October 30, 2011

Power outage--be back soon!


Hi there, friends!

If you haven't heard, we had a bit of a snowstorm last night here in New England.  Unfortunately, my neighborhood is without power, our city has cancelled school tomorrow in order to use one of the schools as a shelter, and Halloween trick-or-treating has been postponed until Wednesday.  Seriously?!  I had to ask my husband once again why we moved to MA.  LOL!

I'm at work right now catching up on a few projects, then heading up to my MIL's in Maine until we get power back.  I hope to have internet access so I can at least catch up with what's been happening in blog land over the weekend.

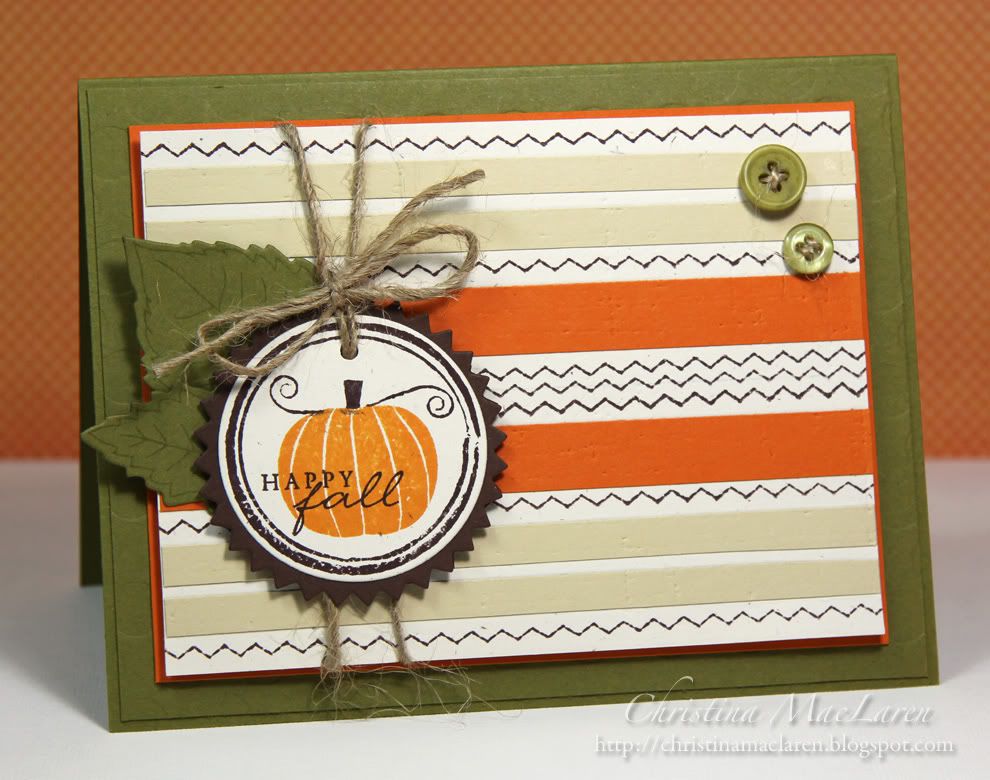
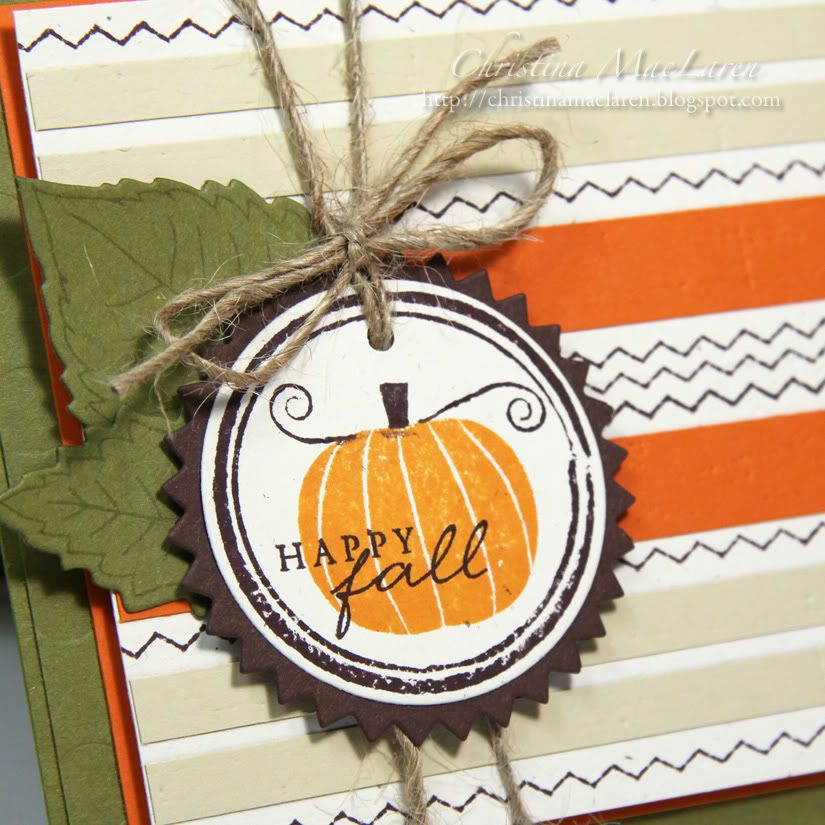
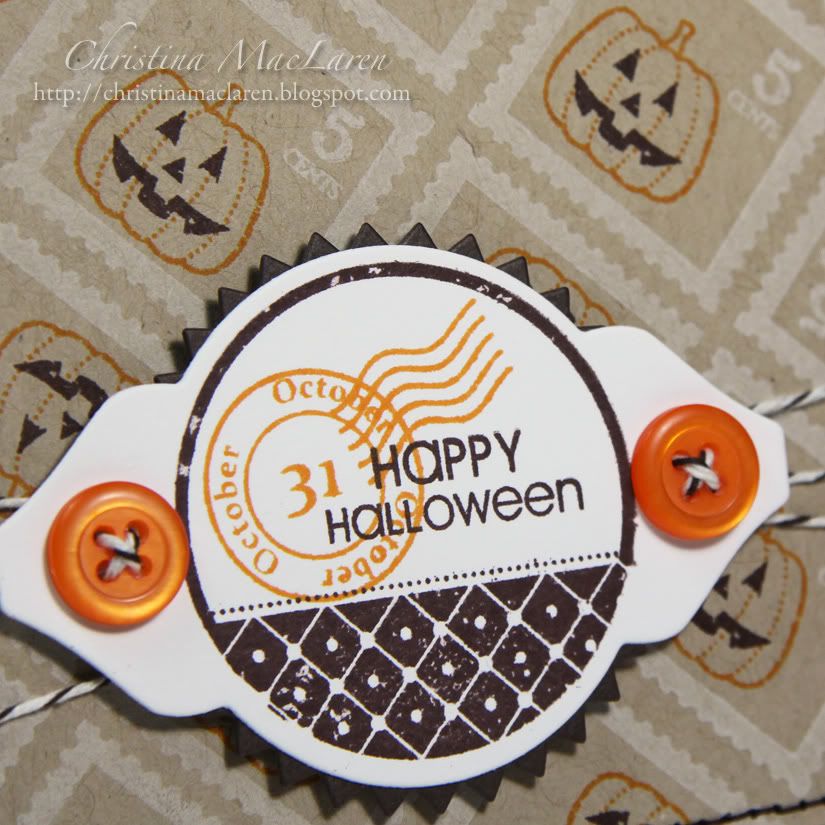
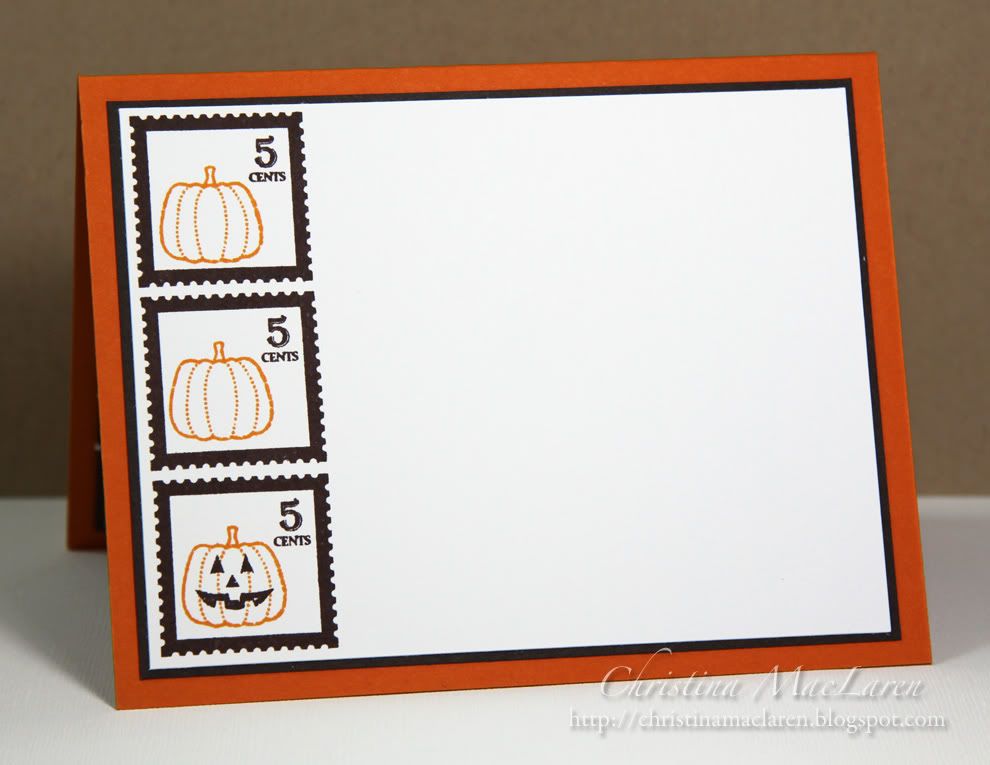
I'd hate for you to leave empty-handed, so I thought I'd share this masculine card I made for my hubby's cousin, who turned 16 this past August.

All supplies from Papertrey Ink unless noted
Cardstock:  Enchanted Evening, Orange Zest, Kraft, white
Stamps:  Just the Ticket, Star Prints
Ink:  Frost White (Clearsnap), Spiced Marmalade (Ranger), white gel pen
Tools:  ticket border die, Limitless Layers die, Linen & Canvas impression plate, star punch (Fiskars)
Accessories:  button, twine, embossing powder (Stampendous)

Thanks for stopping by tonight!  I hope to be back soon!

October 25, 2011

Papertrey Ink October Blog Hop


Hey folks!  I'm a little late to the party, but I made it!  Today is the monthly Papertrey Ink Blog Hop, and this time Nichole supplied us with another fun inspiration photo.  


Aren't those fabric pumpkins beautiful?  I had a few false starts with this card, but I finally settled on replicating the striped pattern on the front panel of the largest pumpkin, the colors, and the leaves.

On a Rustic White cardstock panel, I adhered strips of Fine Linen and Orange Zest.  Then I stamped some faux zig-zag stitching between the stripes.  The whole panel is debossed with the Linen & Canvas IP.

The tag and sentiment are from 2009 Autumn Tags and the leaves were die cut and stamped using the Delightful Dahlia set.  It's hard to see it, but the Ripe Avocado card base is debossed with the Polka Dot IP, as well.

All supplies from Papertrey Ink unless noted
Cardstock:  Ripe Avocado, Orange Zest, Fine Linen, Dark Chocolate, Rustic White
Stamps:  2009 Autumn Tags, Delightful Dahlia, Patterned Borders (TPC Studio)
Ink:  Ripe Avocado, Chocolate Chip (Stampin' Up! ), Spiced Marmalade (Ranger)
Tools:  Dahlia leaf dies, Limitless Layers, Linen & Canvas IP, Polka Dot Basics IP, hole punch (Fiskars)
Accessories:  buttons, twine (Pebbles, Inc.)

Sorry to post and run, but I have a heap of grading to do!  I'll be back to see the rest of the entries soon. Have a great night, friends!

ColourQ #108


Hello, friends!  It's Tuesday morning, and you know what that means--a new color palette to get your mojo going over at the ColourQ challenge blog!  I hope you can tolerate one more Halloween project from me, because I got just the inspiration I needed yesterday in the form of happy mail from WPlus9.  I was the lucky winner of A Pocketful:  Halloween during a recent contest on Lea Lawson's blog, and I was excited to sit right down and ink it up for this week's ColourQ.  Thanks, Lea!


I started with PTI's spiral notebook die on white cardstock, which was then stamped with lines in So Saffron using Mini Scrapbook Series:  Library Ledger.  I stamped the bats directly on top of that, and the little spiderwebs were stamped in opposite corners.  Since I don't have the pocket stamp or die that coordinate with this set, I used a label cut from Peach Parfait and stamped with a cute Halloween sentiment from the Pocketful set.

The Daffodil panel is textured with the Linen & Canvas impression plate and stitched to a Peach mat, then adhered to the Black card base.  I popped the notebook page up on foam dots, added some peach gems, and tucked a strip of Saffron ribbon under the label to finish things off.

Cardstock:  Stampin' Up! (Daffodil Delight, Peach Parfait), Papertrey Ink (True Black, white)
Stamps:  WPlus9 Design Studio (A Pocketful:  Halloween), Papertrey Ink (Mini Scrapbook Series:  Library Ledger)
Ink:  Inkadinkadoo (Black), Stampin' Up! (So Saffron)
Tools:  Spellbinders (Labels 18), Papertrey Ink (spiral notebook die, Linen & Canvas impression plate)
Accessories:  Stampin' Up! (ribbon), Queen & Co. (gems), thread

I'm thinking these colors could work well for a Thanksgiving or fall-themed card, too, so I'm looking forward to seeing what you come up with. 

Be sure to stop by the ColourQ blog for all of the challenge details and to see the rest of the DT samples!

Thanks for visiting today!

October 23, 2011

Halloween goodie bags

Warning:  Photo-heavy post


Cardstock:  Papertrey Ink (True Black, Orange Zest, Royal Velvet, white), Stampin' Up! (Lucky Limeade)
Patterned paper:  DCWV (Ghosts & Goblins Stack)
Stamps:  Papertrey Ink (Tiny Treats:  Halloween, Tag-its #7, Tiny Tags)
Ink:  Ranger (Spiced Marmalade), Stampin' Up! (Lucky Limeade), Versamark, Inkadinkadoo (Black), Copic markers
Tools:  Papertrey Ink (Mat Stack 2, Limitless Layers, Tiny Tags dies), Fiskars (slot punch)
Accessories:  ribbon, baker's twine, paper bags

Hi there!  As promised, I'm back to share the goodie bags I've been working on for our annual Halloween party.  It was supposed to be last night, but my little ones were not feeling 100% so we postponed it until next weekend.  I like to put together a few things for the kids that come to the party, and this year's loot includes some mini boxes of stickers, two mini tubs of Play-Doh, and a notebook that I altered with Halloween papers and stamps.  Wanna see?


Cardstock:  Papertrey Ink (white)
Patterned paper:  DCWV (Ghosts & Goblins Stack)
Stamps:  Papertrey Ink (Tiny Treats:  Halloween)
Ink:  Inkadinkadoo (Black), Copic markers
Tools:  Fiskars (hole punch)
Accessories:  notepads, Mod Podge

These notepads were so easy to put together, I made 18 of them in one afternoon.  I got the 3 X 5 inch memo pads in a pack of 3 at Target for $1.99.  I used Mod Podge to cover them with patterned paper from the DCWV Ghosts & Goblins stack.  Then I cut a strip of white cardstock and stamped an image and "happy halloween" sentiment from PTI's Tiny Treats:  Halloween and colored the images with Copics.

For the bags, I used small white paper bags that I covered with more of the same patterned paper.  I punched slots at the top and tied them up with ribbon and a coordinating tag.  The tags were made with PTI's Mat Stack 2 die.  After stamping the circle frame and sentiment from Tag-its #7 in the middle of the Mat Stack, I trimmed off one side of the die cut so that I would have a round tag.  I added a pinked circle mat, a Tiny Tag, and some baker's twine to finish it off.

I'm so happy with the way these turned out, especially the notepads.  You can click on any of the photos to enlarge, and feel free to send me a message if you have any questions!

Thanks for stopping by, friends!  Have a great night!

October 22, 2011

Make it Monday #37 & PDCC#104


Hi friends!  I've participated in very few challenges of late, so I jumped at the opportunity to make something for The Play Date Cafe's second anniversary.  Congratulations on two wonderful years, ladies!

This week I'm also joining the Make it Monday challenge to use layered mats and frames.  Easy peasy!


For my color palette, I used PTI's Ripe Avocado and Lemon Tart and Stampin' Up!'s Rose Red.  I would have used PTI's new Autumn Rose, but I am still (very anxiously) waiting for my September Release winnings.  They said it would be 4-6 weeks, but I had no idea what torture it would be waiting for it to arrive!  My heart skips a beat every time I hear the mail or UPS truck rumble down our street.  

Okay, on to the card!  I started with a Rose Red base and die cut a window with Mat Stack 1.  I layered a piece of white cardstock behind the window and stamped it with one of the frames from the Mat Stack 1 Collection.

I die cut Fillable Frames #11 from Lemon Tart cardstock and clear embossed the frame from the set.  The sentiment is from the Mat Stack 1 Collection.  I centered the label over the Mat Stack window and popped it up on foam dots.

The leaves are die cut and stamped with Harvest Berries and embellished with Ripe Avocado buttons and a bit of SU's Old Olive striped ribbon.

To add some interest to the bottom of the card, I used a faux embossing technique.  I die cut three strips of Rose Red cardstock with the Victorian Lace border die and adhered them directly to the card base.  I think it adds a fun textural detail.

Cardstock:  Papertrey Ink (Ripe Avocado, Lemon Tart, white), Stampin' Up! (Rose Red)
Stamps:  Papertrey Ink (Mat Stack 1 Collection, Fillable Frames #11)
Ink:  Stampin' Up! (Rose Red), Papertrey Ink (Ripe Avocado), Versamark
Tools:  Papertrey Ink (Mat Stack 1, Fillable Frames #11, Victorian Lace, Harvest Berries dies)
Accessories:  Papertrey Ink (buttons), Stampin' Up! (ribbon), Stampendous (embossing powder), DMC floss

Be sure to come back tomorrow to see my Halloween goodie bags!  They turned out SO cute this year, if I do say so myself.  *smile*

Thanks for visiting!

October 21, 2011

Rainbow Hearts Birthday

Cardstock:  Papertrey Ink (Pure Poppy, Orange Zest, Harvest Gold, New Leaf, Blueberry Sky, white)
Stamp:  Papertrey Ink (Signature Series:  Dress Form)
Ink:  Inkadinkadoo (Black), Copic markers
Tools:  Papertrey Ink (heart die, Linen & Canvas impression plate), corner rounder
Accessories:  Papertrey Ink (buttons), twill ribbon, DMC floss

Hi there!  I have several projects lined up to share with you in the next few days, if I can just get them all photographed!  In the meantime, I remembered that I hadn't shared this card that was made for a recent PC call.

I used the medium-sized die from PTI's Heart Prints die set to cut heart "windows" along one side of a piece of white cardstock.  It took a few tries to get them lined up just right.  It would have been much easier to cut the hearts from colored cardstock and layer them on top of the panel, but I just love using negative space on a card, so I was determined to make it work.

I stamped a sentiment from Signature Series:  Dress Form, rounded two corners, and added some texture to the main panel with the Linen & Canvas impression plate.  Colored squares are adhered behind the heart windows, and I embellished them with a few color coordinated buttons.

I added rainbow stripes to a piece of white twill using Copics, then tucked it under the main panel, which is popped up on foam dots.

Thanks for stopping by today!  Enjoy the start of your weekend!

October 18, 2011

ColourQ #107

This is my second post for today--please scroll down for Karen's virtual birthday party & blog hop!


Hi there, friends!  Are you getting in the Halloween spirit yet?  In our house, we love Halloween and throw a costume party every year that just seems to keep growing.  It's coming up this weekend, so I've got to get busy planning a menu, finding a costume, and making goodie bags for the kids.  It's always fun, but a bit stressful until it's all done.

This week's ColourQ challenge is another bright and festive combo that called out for another card using my cute Halloween stamps from Michaels.


I've seen a few designers use a "filmstrip" recently, and I thought it would be a fun idea to CASE on this card. 

I would have liked to use a larger sentiment, but I was shocked to realize that I don't have any Halloween greetings besides those in PTI's Tiny Treats:  Halloween and Tag-its #7.  So I stamped the bats and a star (also from TT:  Halloween) framing the sentiment to keep it from getting lost in all of the white space.

The card front and colored squares are debossed with the Linen impression plate for a little bit of texture on an otherwise flat and easy-to-mail card.

Cardstock:  Stampin' Up! (Rich Razzleberry, Lucky Limeade, Pumpkin Pie, Early Espresso), Papertrey Ink (white)
Stamps:  Michaels (vampire, witch, mummy, bats), Papertrey Ink (Tiny Treats:  Halloween)
Ink:  Stampin' Up! (Early Espresso, Rich Razzleberry), Copic marker
Tools:  Papertrey Ink (Linen & Canvas impression plate)
Accessories:  Queen & Co. (rhinestone)

Be sure to stop by the ColourQ blog for the rest of the DT samples and to link up your creation!

Thanks for visiting!

Happy Birthday Karen!


Welcome, friends!  You've come on a very special day.  Today some blogging buddies and I are throwing a virtual birthday party for our sweet and talented friend, Karen Baker!  Each of us is bringing something to the party to share with Karen, so be sure to see the bottom of my post for the full list of participants.
I was delighted to be asked to be a part of this blog hop, as I have long admired Karen's creations as well as the stories, quotes, and memories she shares on her blog, The Bald Dragonfly.  More importantly, Karen has become one of those treasured blog friends who never fails to leave encouraging comments wherever she goes.  Karen, you are a constant source of inspiration and a wonderful friend, and I wish you a birthday full of fun and surprises!

Because of Karen's gift for writing and sharing bits and pieces of her life through her blog, I made an altered notebook that she can use for recording memories, ideas, poems, or whatever comes to mind.  

There are a few details of my design that make me think of Karen, too.  First, I went with a nature theme because Karen always uses earth tones so beautifully, and her cards often have a rustic look or natural elements.  Next, I went with a stamp set that she and I recently used in her Carbon Copied feature, WPlus9's Woodgrain Silhouettes Additions.  Finally, I stamped a quote that goes well with the nature theme but also speaks to Karen's amazing creativity and ability to do things in new and unexpected ways.

Cardstock:  Stampin' Up! (Garden Green), Papertrey Ink (Rustic Cream)
Patterned paper:  Stampin' Up! (Neutrals collection)
Stamps:  WPlus9 (Woodgrain Silhouettes & Additions, Spring Post), Unity (quote), Papertrey Ink (Postmarks, Background Basics:  Text Style)
Ink:  Stampin' Up! (Garden Green, Chocolate Chip), Papertrey Ink (Dark Chocolate)
Tools:  Papertrey Ink (Woodgrain impression plate, postage die), EK Success (border punch), Fiskars (hole punch)
Accessories:  Papertrey Ink (buttons), muslin fabric, DMC floss, Mod Podge

As promised, there are lots of talented ladies attending this virtual party, so hop along and see what they've created for the occasion.  And a very special thanks to Erin Thiem for organizing this event!

Karen, the birthday girl, http://thebalddragonfly.blogspot.com/
 
Thanks for stopping by!

October 17, 2011

Bridal silhouette

Cardstock:  Papertrey Ink (Vintage Cream)
Stamps:  Papertrey Ink (Iconic Images, Tiny Tags), Waltzingmouse (Vintage Labels 18)
Ink:  Stampin' Up! (Chocolate Chip), Clearsnap (Dune), Papertrey Ink (Tea Dye duo)
Tools:  Papertrey Ink (Music Score, Linen & Canvas impression plates, tag die), Spellbinders (Labels 18 die), EK Success (circle punch)
Accessories:  Martha Stewart (ribbon), Ranger (Perfect Pearls), Michaels (pearls), thread

Hi there!  Just popping in to share a card I made for a recent Paper Crafts call that wasn't picked up.  The category was silhouettes for brides and babies, which led me to create this little number perfect for an engagement.

To make this card, I stitched a piece of Vintage Cream cardstock debossed with PTI's music score impression plate onto a Cream card base. 

For the focal point, I die cut and stamped the large frame from Waltzingmouse's Vintage Labels 18 and punched out the center circle.  The silhouette from PTI's Iconic images was stamped onto another piece of Vintage Cream cardstock, debossed with the Linen & Canvas impression plate, and adhered behind the frame, which is popped up on foam dots.

You can't see it in the photo, but the frame was sprayed with Perfect Pearls mist to give it a nice shimmer.  For the finishing touches, I added a crown of pearls to the silhouette and a tiny tag tied with wrinkled ribbon.

I hope you'll come by tomorrow, as I have two posts lined up, including the newest ColourQ challenge.  Thanks for visiting!

October 12, 2011

Carbon Copied & CR84FN40


Hello out there!  You're in for a special treat this morning.  I am absolutely thrilled to be posting alongside my friend Karen Baker from The Bald Dragonfly as her guest for Carbon Copied.  This is a fun little feature on Karen's blog where she and another designer use the same stamp set and same challenge, then post their creations at the same time.  You can read more about it HERE.  

Karen and I decided to use a favorite pair of stamp sets, WPlus9's Woodgrain Silhouettes and Additions, along with the color challenge at CR84FN.


I used just Woodgrain Silhouettes to create my CAS card, as well as a couple of other WPlus9 goodies.  First I used the Label Layers 3 die to mask and stamp a woodgrain frame onto kraft cardstock.  A gorgeous sentiment from Very Vintage Greetings was stamped directly on top of that, then the panel was debossed with PTI's Linen & Canvas impression plate.

I stamped the flowers (from Woodgrain Silhouettes) onto cream cardstock and cut them out by hand, then adhered them with foam dots.  A few red pearls and a red satin bow add a punch of color.

Cardstock:  Papertrey Ink (Kraft, Vintage Cream, Dark Chocolate)
Stamps:  WPlus9 Design Studio (Woodgrain Silhouettes, Very Vintage Greetings)
Ink:  Stampin' Up! (Chocolate Chip), Papertrey Ink (Dark Chocolate)
Tools:  Papertrey Ink (Linen & Canvas impression plate)
Accessories:  Papertrey Ink (ribbon), Queen & Co. (pearls)

I can't wait to see what Karen has created with the same stamps and color combo--it is sure to be inspiring!  Make sure you hop over and leave her some love.

Thanks for inviting me to play along this week, Karen!  And thanks to everyone else for stopping by today!

October 11, 2011

ColourQ #106


Good morning!  I hope my Canadian friends had a wonderful Thanksgiving weekend.  We had a gorgeous long weekend for the Columbus Day holiday here in the U.S., which fell on my son's birthday this year.  But it's back to work today, and I'll be confused about what day it is for the rest of the week!

I did manage to remember that today is Tuesday, which means a new ColourQ challenge!  I think I would carry a backpack every day if I could get one this cute:


This seemed like a perfect combo for a Halloween card, which gave me a chance to use more of the $1 stamps I found at Michaels a few weeks ago.  I don't do cute cards very often, but I just can't resist images like this at Halloween!

This card was fairly quick and easy to make.  I used my Stamp-a-ma-jig to line up the images on a white cardstock panel, colored them with Prisma pencils, and blended with OMS.  The open circle border is from PTI's Faux Ribbon, and I originally planned to fill the circles with bling, but decided against it in the end.  The sentiment is from Tiny Treats:  Halloween.

The panel is matted and stitched to a piece of Summer Sunrise cardstock, tied with Mandarin twine from The Twinery, and adhered to a Basic Gray card base.

Cardstock:  Papertrey Ink (Summer Sunrise, white), Stampin' Up! (Basic Gray)
Stamps:  Studio G (vampire, witch, mummy), Papertrey Ink (Faux Ribbon, Tiny Treats:  Halloween)
Ink:  Inkadinkadoo (Black)
Coloring medium:  Prismacolor Premier pencils, odorless mineral spirits
Accessories:  The Twinery (Mandarin twine), thread

I hope you'll find time to play along with the challenge this week and check out the rest of the inspiration from the always-amazing Royal Court DT.

I have a special post lined up for tomorrow, so be sure to stop by!  Thanks for your visit today!

October 7, 2011

Operation Julie's Smile, CR84FN39, & Textured to Perfection


Happy Friday, friends!  I'm thrilled today to be participating in a special blog hop for the sweet and talented Julie Ranae.  If you are following along on the hop, you should have arrived here from 
the blog of Vera Yates.  If not, make sure you stop by the Sweet Stamp Shop blog to start at the beginning and learn how you can win some fabulous prizes while helping a fellow stamper.  

There are over 120 blogs participating in this hop, so if you encounter a broken link at any time, just head back to the Sweet Stamp Shop blog for the full list of participants.  You have all weekend to visit and comment, so take your time and have fun!

Please keep reading to learn more about Julie's story and how you can help give her back her smile!

“The creative blogging community is coming together this weekend to help one of our friends, Julie Ranae.  You may know her as the Design Team Coordinator for many wonderful companies from bakers twine, die cuts, rubber stamps and more.  What many people don’t know about Julie Ranae is that she has had some pretty major dental surgeries in her lifetime due to medication she had to take as a child.  It was in her plans to think about having all of her teeth  replaced at some point in the next 5 years, a decision that was pretty easy to plan out.  But then it happened…she chipped her front teeth on a weekend a month ago. The dentist told her there was no way to save them & that it was his recommendation that she give in and have them all her teeth removed soon, but for that day, they needed to get her front teeth done so her gums could begin to heal. He said he would 'work out payments with her to have ALL this work done...but when she called to make her appt for the first step of impressions, they told her the amount of money that was needed and that the 'payments' applied only to the two teeth that were extracted that day. Her husband Paul was with her & that too, was his understanding as well. So this is how she has found herself in this situation…Needing at least $4000 to get started and another $3000 to finish the process…a total of $7000.

Nicole Rixon, owner of Sweet Stamp Shop put together this benefit after finding out about this situation and before Julie Ranae knew it, it took flight!
Because she is an event organizer by trade, she has taken on the job of organizing all of the blogs in this hop as her way of ‘working overtime’ for what she needs, the same as if she were able to work overtime at an outside job to pay for the work to be done.
It is the goal of all of these generous friends & sponsors to help make this situation more do-able for our friend so that she can share a brand new smile with all of us soon.


If there is anything you can do to help with a financial donation, there is a donation button ready for you to click.  Any amount is appreciated and ALL DONATIONS will be eligible for prizes from our sponsor pool of over $2500.”

You can find the donation button on my blog's sidebar, and on all of the other blogs along the hop.

Now to share the card I've made for today, with Julie in mind. 


I combined the colors of the current CR84FN challenge with the Textured to Perfection challenge in the Moxie Fab World to create a fall-inspired card of encouragement.


I cut a piece of cream felt with pinking shears and embroidered vines in two shades of orange (although one looks red in the photos) and yellow.  This was adhered to an Early Espresso card base and embellished with buttons.

I stamped a sentiment from PTI's Think Big Favorites onto a strip of Vintage Cream cardstock, notched one end, and adhered it with foam dots.

Cardstock:  Stampin' Up! (Early Espresso), Papertrey Ink (Vintage Cream)
Stamps:  Papertrey Ink (Think Big Favorites #4)
Ink:  Stampin' Up! (Early Espresso)
Accessories:  Papertrey Ink (felt, buttons), DMC floss

I'm so glad you stopped by today for this special post!  Your next stop on the hop is Carisa Zglobicki.  Don't forget to leave a comment here before you go for a chance to win prizes, and please click on the donation button to help our friend, Julie.

Have a great weekend!

October 5, 2011

WPlus9 WCMD Halloween Challenge


Hello!  I'm popping in with an entry for a challenge over on the talented Lea Lawson's blog.  She has a WPlus9 stamp set up for grabs, so you know I have to play for a chance to win!  The challenge is to make a stamped Halloween project.  Easy peasy!

I don't have any fall or Halloween stamps from WPlus9, but I wanted to use some of Dawn's stamps that I do have, so I pulled out two favorites:  Spring Post and Postmarks.  On a kraft panel, I repeatedly stamped the postage in white ink.  I love this image because you can customize it with any small stamps in your collection.  I chose the pumpkin from PTI's Tag-its #7.

I stamped the tag and sentiment from Tag-its #7 onto a Mat Stack 2 label, then added an orange postmark with "October" and "31", from WPlus9's Postmarks.  Orange buttons and some brown and white twine finish the card front.

Cardstock:  Papertrey Ink (Orange Zest, Kraft, white), Stampin' Up! (Early Espresso)
Stamps:  WPlus9 Design Studio (Spring Post, Postmarks), Papertrey Ink (Tag-its #7)
Ink:  Stampin' Up! (Early Espresso), Clearsnap (Frost White), Ranger (Spiced Marmalade)
Tools:  Papertrey Ink (Mat Stack 2, Limitless Layers dies)
Accessories:  Papertrey Ink (buttons), baker's twine, thread

I haven't given you a peek at the inside of a card for a while, so here you go:


Thanks to Lea for hosting this challenge!  And thanks to you for stopping by, friend!

October 4, 2011

ColourQ #105


Hello again, friends!  It's ColourQ day!  

I'm sorry I haven't been around for the last week, but I just got back from a long weekend in Indiana for my brother's wedding.  We had a wonderful visit with family, but I missed being able to participate in the World Card Making Day festivities, and coming around to see what all of you have been up to.  I hope things are great in your corner of the world!

For this week's ColourQ challenge, Arielle has chosen another combo that I never would have come up with on my own, but I love it!  Combining black and brown can be a challenge, but they look striking together on the chair in this inspiration photo:


I really like the look of the multi-colored leaves on the chair, so I used that as inspiration for my leaf-stamped background.  First, I stamped two outline leaf images repeatedly onto a white cardstock panel.  Then I cut the panel into four strips and stamped them with the coordinating solid leaf images in Chocolate Chip, Pear Pizzazz, and Wisteria Wonder.  

To assemble the background, I adhered the stamped strips onto a black card base, leaving a thin margin between them.  For the sentiment, I die cut and stamped a frame from WPlus9's Very Vintage Greetings, then stamped a sentiment from PTI's Healing Touch Sentiments and another solid leaf image as an accent.

The label is popped up on foam dots over a loop of black satin ribbon, and I added two black buttons to the top corner for balance.

Cardstock:  Papertrey Ink (True Black, white)
Stamps:  WPlus9 Design Studio (Woodgrain Silhouettes, Woodgrain Silhouettes Additions, Very Vintage Greetings), Papertrey Ink (Healing Touch Sentiments)
Ink:  Stampin' Up! (Chocolate Chip, Wisteria Wonder, Pear Pizzazz), Inkadinkadoo (Black)
Tools:  WPlus9 Design Studio (label die)
Accessories:  ribbon, buttons, DMC floss

I hope you'll find some time this week to play along with the challenge!  I'm off to peruse the hundreds of unread posts in my Reader before I head off to work.  Thanks so much for your visit today!
Related Posts Plugin for WordPress, Blogger...