April 30, 2012

The 12 Kits of Christmas--April


Hi there!  It's that wonderful time of the month again where I get to share my creations for The 12 Kits of Christmas.  If you've missed out on the first three months, this is a challenge between 12 designers where one of us hosts each month and sends a kit of supplies to everyone else for making holiday cards.  We all post our creations at the end of the month and pat ourselves on the back for having a few more Christmas cards stocked up for the end of the year.  *smile*

This month's host is Marybeth from Marybeth's Time for Paper, and here's a peek at the goodies she sent us for April (thanks to Kara for the photo once again!):


This kit had lots of beautiful die cuts, so I set out to work with those first.  I've been smitten with the Memory Box landscape dies since I started seeing them, so I was thrilled to work with this one.  And check out the fun eyelash yarn Marybeth included in our kit!

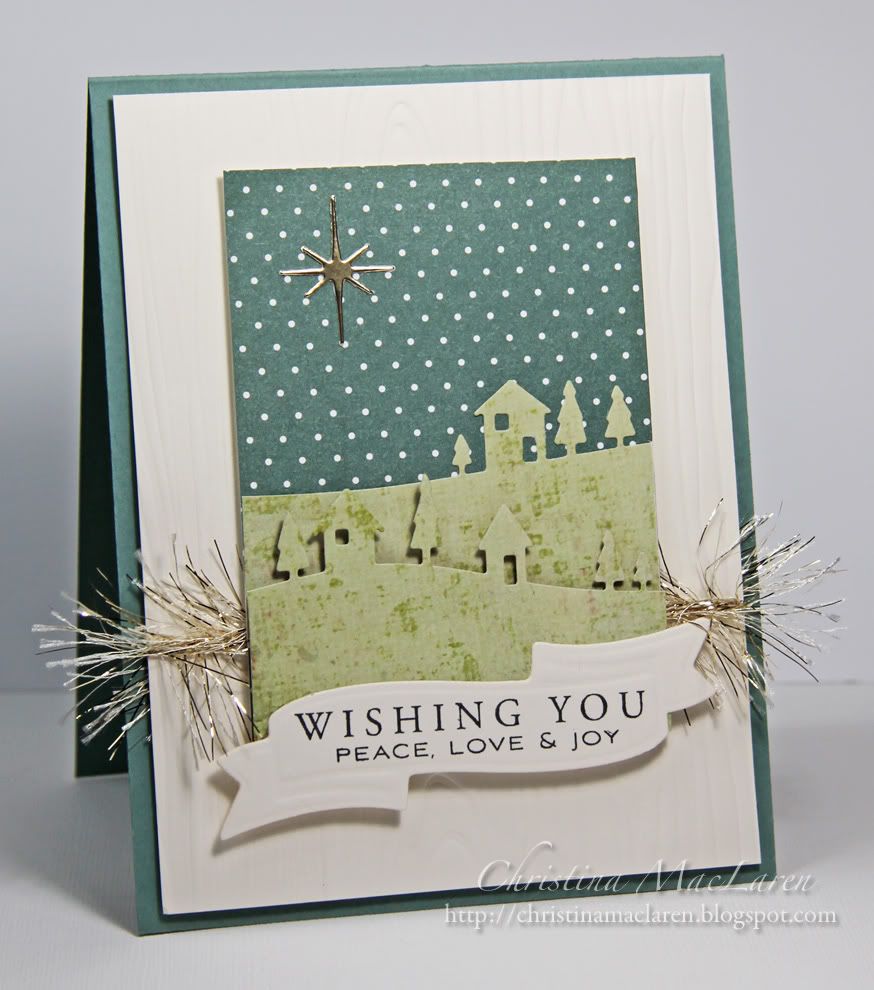
Cardstock:  Papertrey Ink (Ocean Tides, Vintage Cream)
Patterned paper:  My Mind's Eye (The Merry Days of Christmas), Papertrey Ink (2008 Bitty Dots)
Stamp:  Papertrey Ink (Tree Trimming Trio)
Tools:  Memory Box (Country Landscape die, Star of Wonder die), Spellbinders (Banner Ribbons die), Papertrey Ink (woodgrain impression plate)
Accessories:  Martha Stewart (yarn)

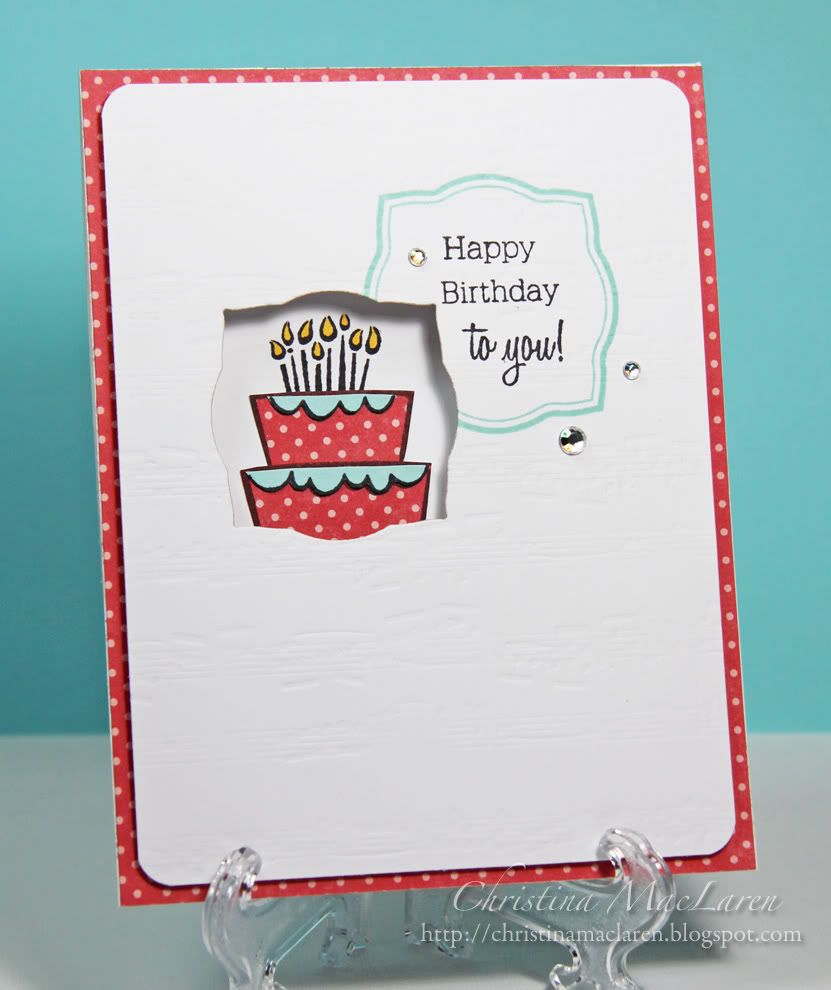
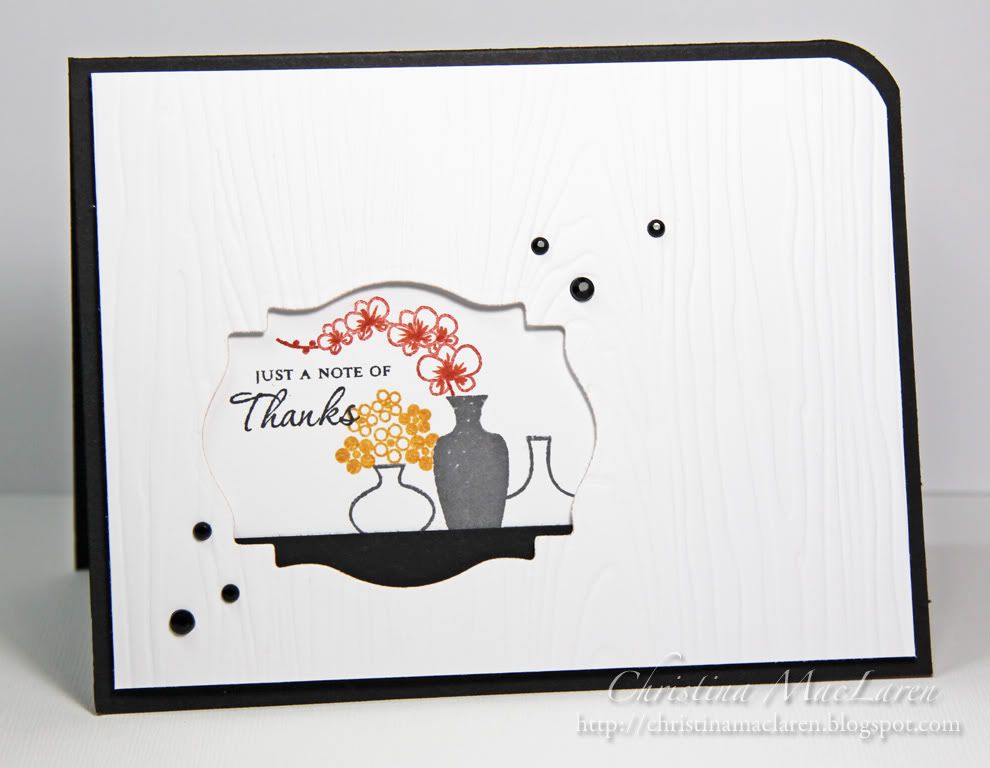
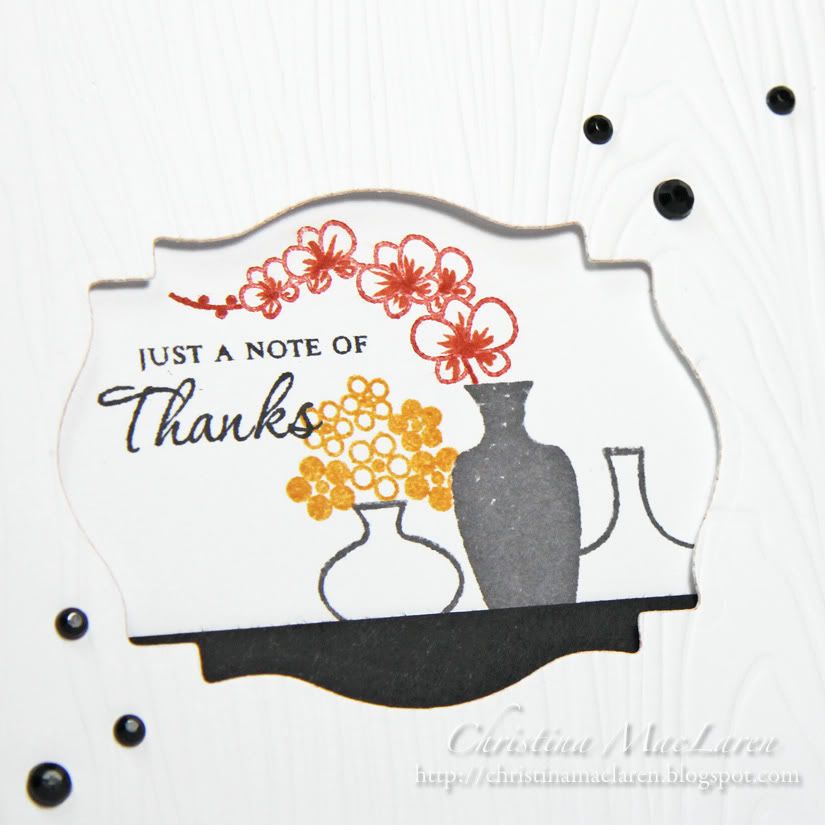
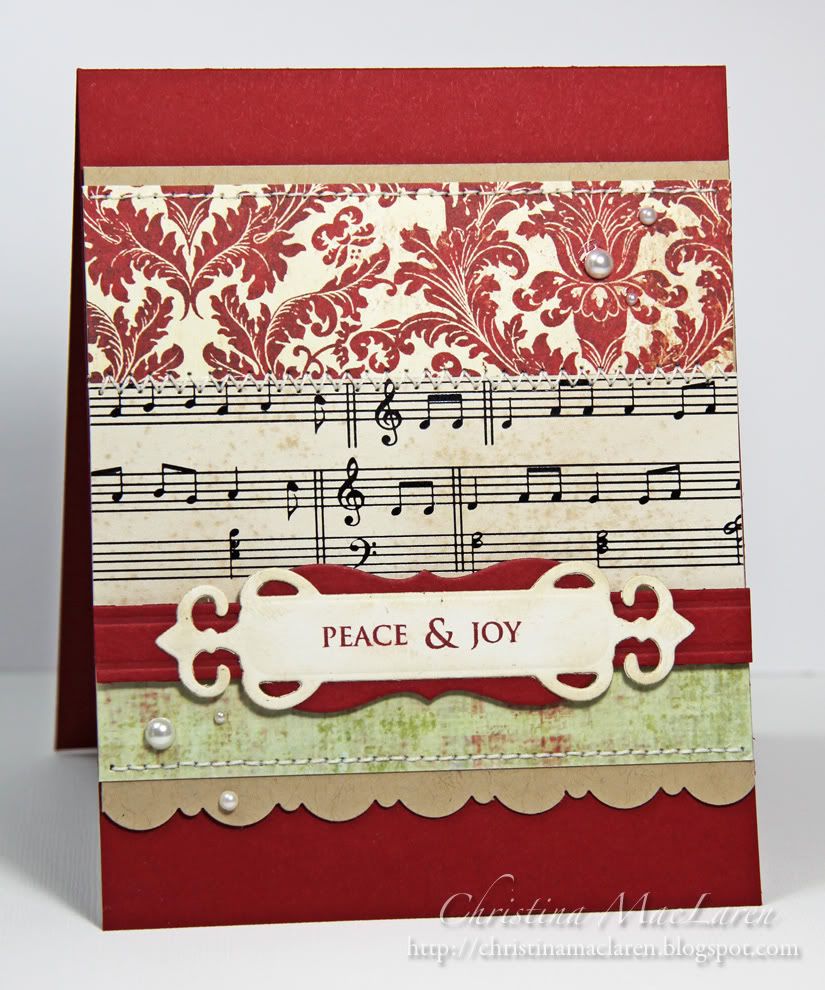
See these darling red bells?  They're flocked!  How sweet is that?  I added the silver jingle bells in the corner to go with the pretty sheet music patterned paper.

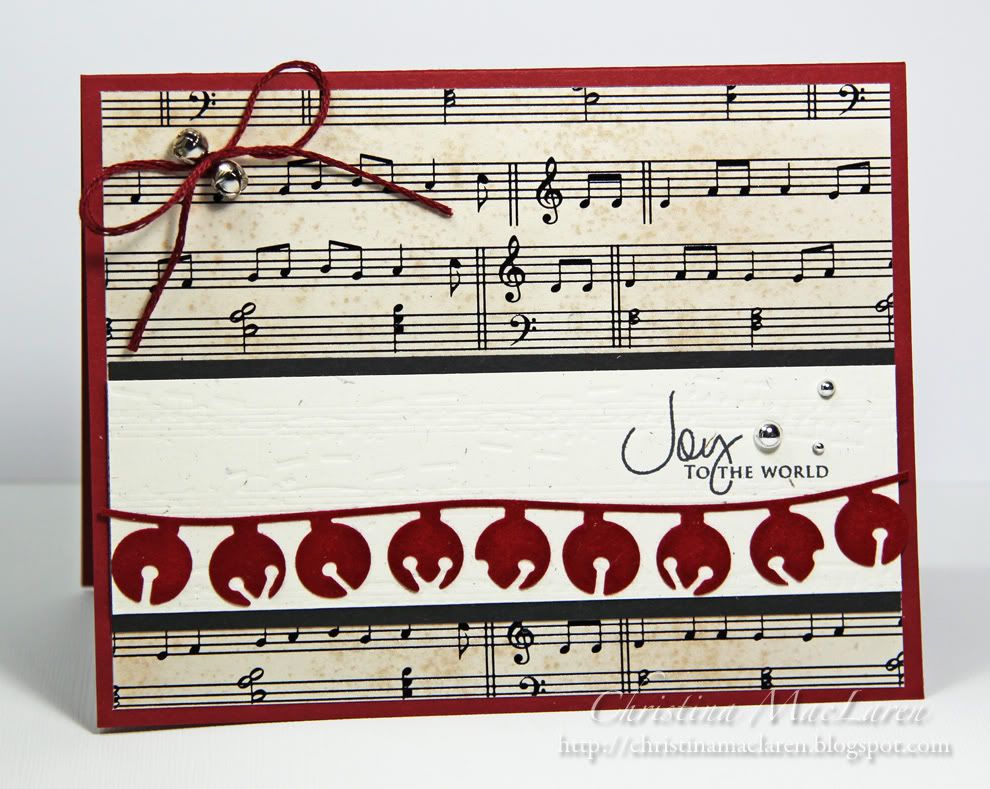
Cardstock:  Stampin' Up! (Cherry Cobbler), Papertrey Ink (Rustic White, True Black)
Patterned paper:  The Paper Studio
Stamp:  Papertrey Ink (Signature Christmas)
Tools:  Memory Box (Jingle bell border die), Papertrey Ink (music score impression plate)
Accessories:  silver pearls, bells, DMC floss

I had a hard time covering up the gorgeous snowflake border on this next card, but I decided to nestle the tree silhouette into the corner.    It's hard to see, but there are a few stamped white snowflakes in the upper right corner, and the edges are inked white for a soft, snowy look.

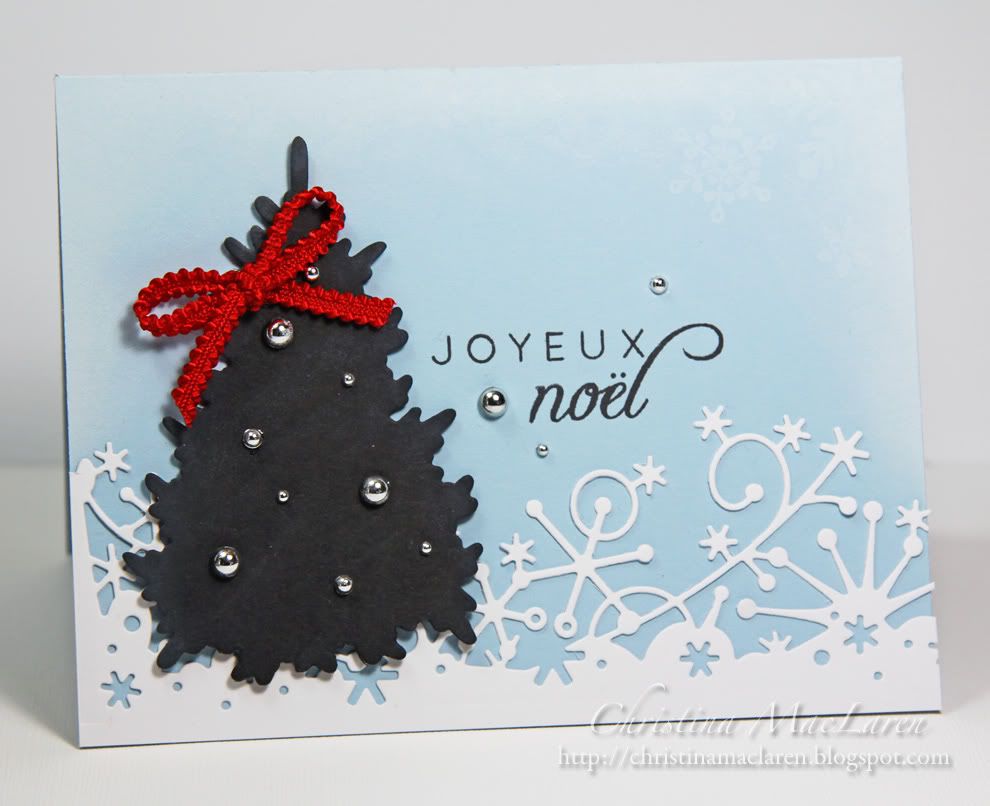
Cardstock:  Papertrey Ink (Spring Rain, True Black, White)
Stamp:  Papertrey Ink (Peace Be Still)
Tools:  Memory Box (Frostyville border die), Papertrey Ink (tree die)
Accessories:  silver pearls, ribbon

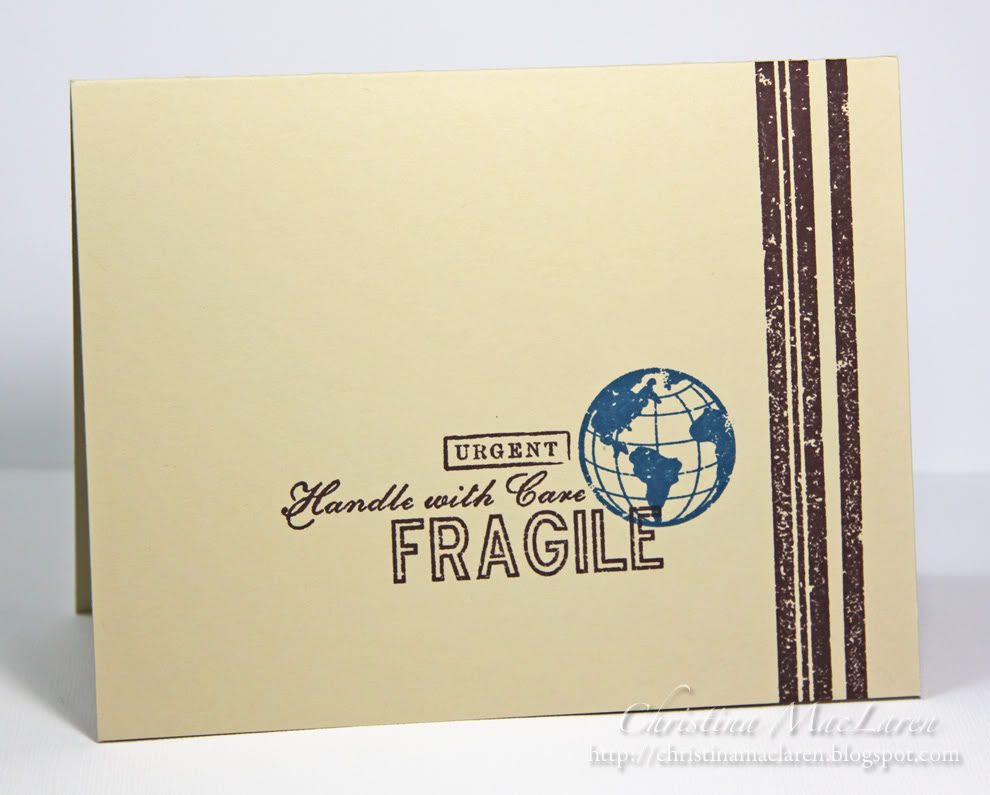
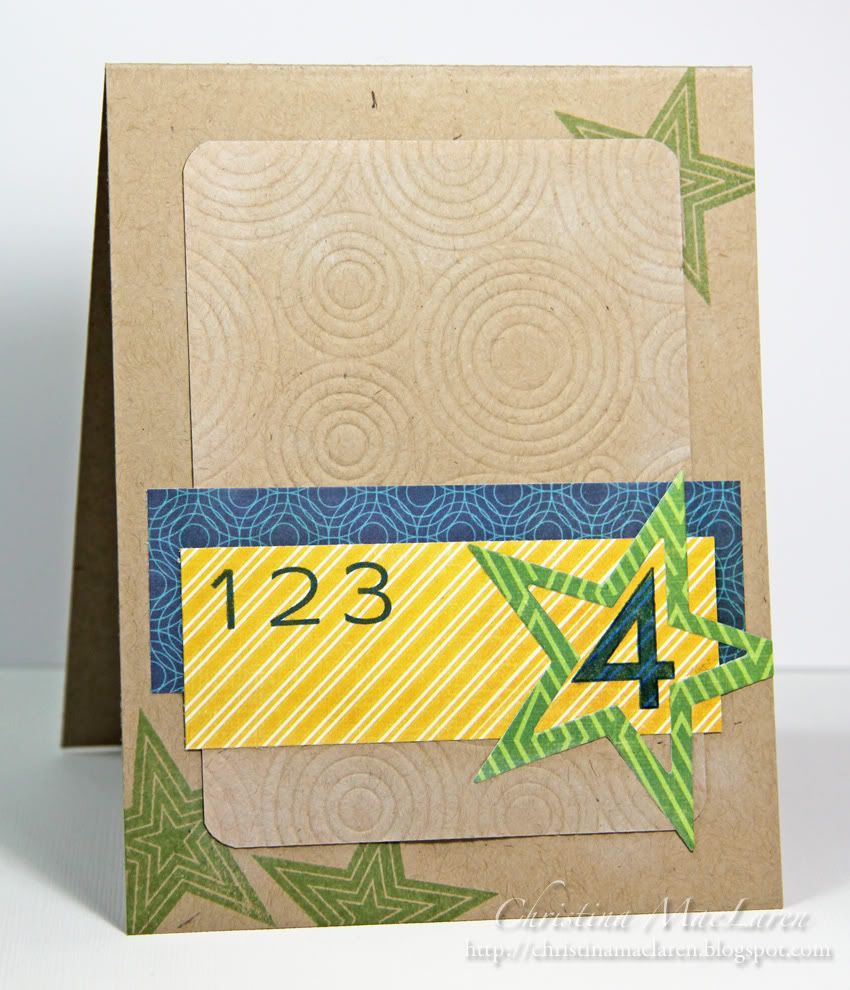
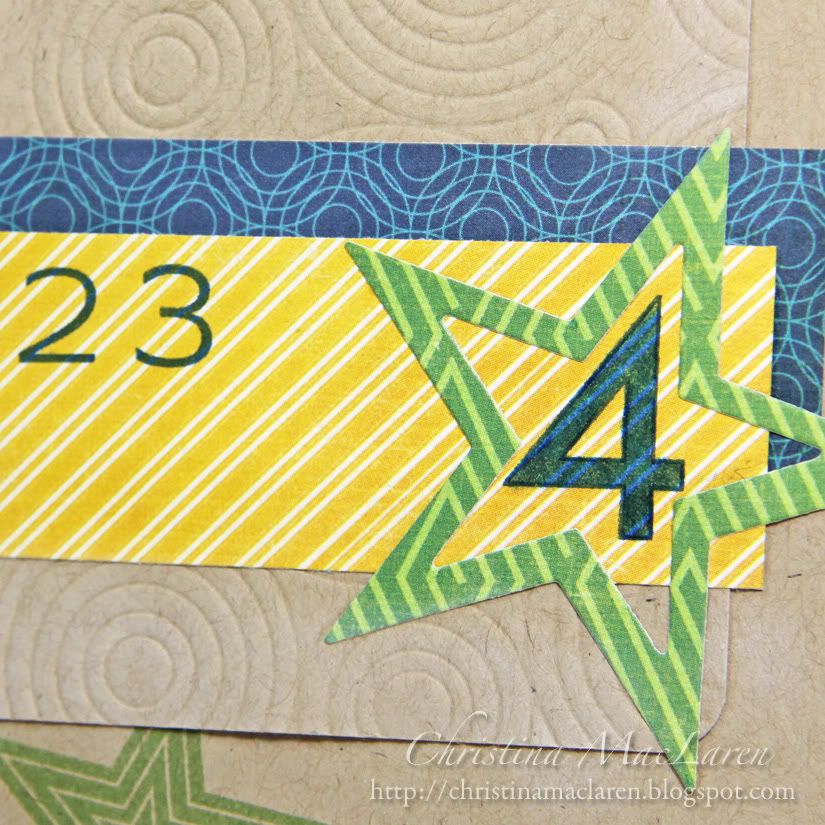
Yes, I've used this next layout every month so far, but I love it so much for patterned paper strips!  It's a CASE of a card by Veronica Zalis in the 2011 issue of Holiday Cards & More.  I added my own layered die cuts and a sentiment from WPlus9 to the papers included in this month's kit.

Cardstock:  Stampin' Up! (Cherry Cobbler), Papertrey Ink (Vintage Cream, Kraft)
Patterned paper:  My Mind's Eye (The Merry Days of Christmas), The Paper Studio
Stamp:  WPlus9 Design Studio (Poinsettia Patterns)
Tools:  Spellbinders (Fancy Tags die), Papertrey Ink (Photo Finishers die), EK Success (border punch)
Accessories:  pearls, thread

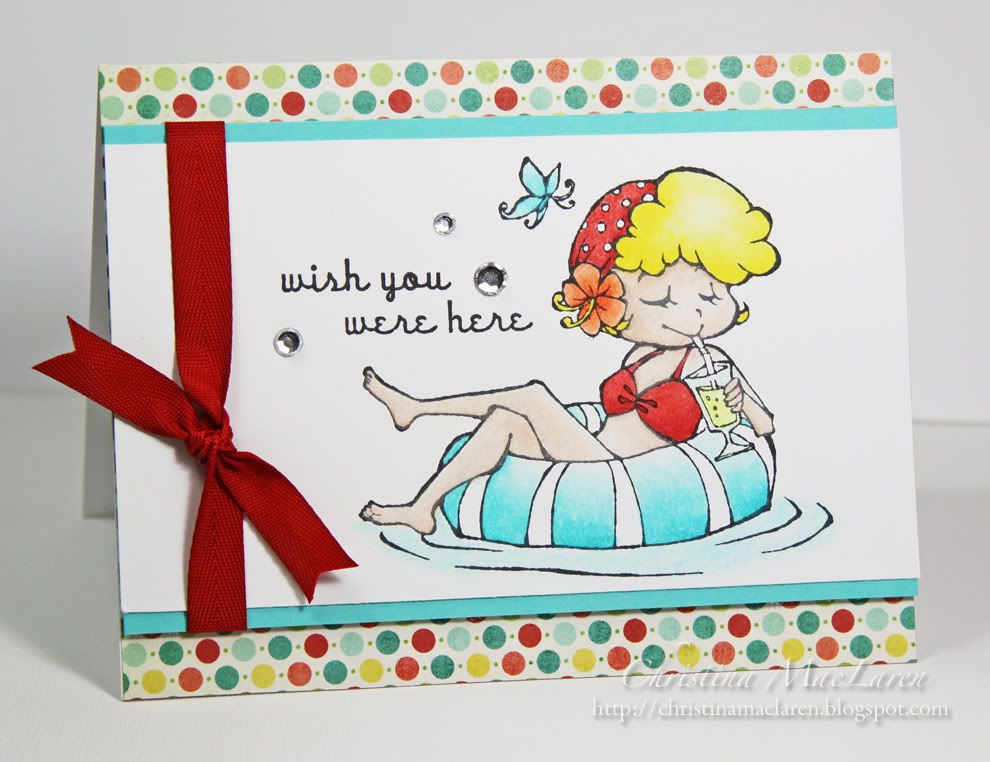
My last card has a cute little image that I colored with my Prismas and blinged out with glitter.  It goes perfectly with the fun trim!

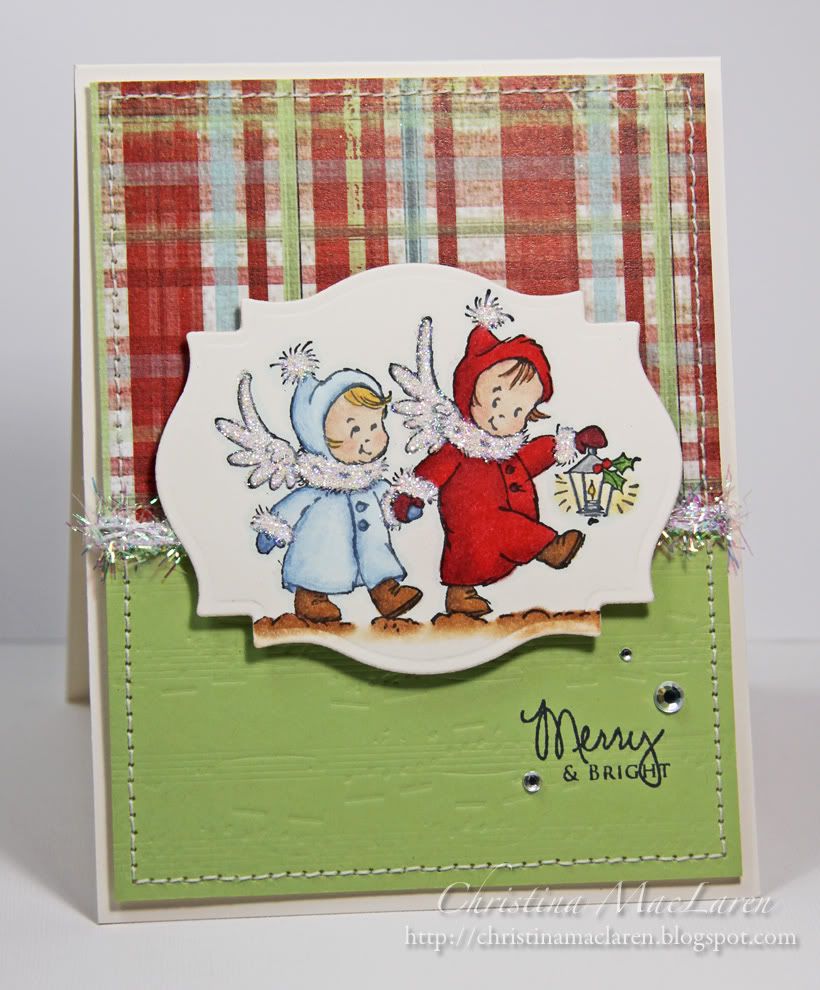
Cardstock:  Stampin' Up! (Certainly Celery), Papertrey Ink (Vintage Cream)
Patterned paper:  My Mind's Eye (The Merry Days of Christmas)
Stamps:  Stampendous (girls), Papertrey Ink (Signature Christmas)
Tools:  Spellbinders (Labels 18), Papertrey Ink (music score impression plate)
Accessories:  Hobby Lobby (decorative trim), rhinestones, glitter, thread
Coloring medium:  Prismacolor Premier pencils

I can hardly wait to see everyone else's cards and CASE them with the supplies I have left!  Be sure to visit them for some holiday inspiration:


Suzanne:  The Card Yard
Kara: KandRDesigns
Sharron: OnPapillionWings
Jeanne: AKeptLife

Thanks for stopping by, friends!  I hope your week gets off to a great start!

April 28, 2012

Card Patterns sketch #163


Hello!  How's your weekend going so far?  It's a beautiful but chilly day here in the Northeast, but that's okay since I have quite a few indoor projects to work on, including some crafting!

It's time for a new challenge at Card Patterns, and this week we have a fun sketch from Nina Brackett:


You could also win an assortment of stickers from SRM if you play along with us--stop by the Card Patterns blog to see the loot and link up your design!

This week I decided to ink up a stamp that had yet to see any love, this big silhouette of the U.S. from A Muse.  I love that it fills up a lot of space on a card to make a big impact, plus I can see myself using it for travel-themed layouts.

I stamped the heart over my home state, Indiana, as I'm thinking I'll leave this card for my hubby when the kids and I travel west this summer to visit my family.  The sentiment is from the same A Muse set.

Cardstock:  Papertrey Ink (Pure Poppy, White)
Patterned paper:  Papertrey Ink (Distressed Dots)
Stamps:  A Muse Studio (Wish You Were Here)
Ink:  Stampin' Up! (Baja Breeze, Real Red)
Tools:  Papertrey Ink (double ended banner die)
Accessories:  Ribbon Carousel (natural jute twine), Papertrey Ink (button)

I hope you have time to get crafty this weekend!  Thanks so much for your visits and comments!

April 24, 2012

ColourQ #134 and a goodbye


Hello ColourQ fans!  Today's post is a bittersweet one for me, as this will be my last challenge as a member of the Royal Court Design Team.  I joined the ColourQ as a Guest Designer in October 2010 and became a permanent member at the end of that year.

I have thoroughly enjoyed every minute of my time with the ColourQ and am so thankful to Arielle for giving me the opportunity to be a part of the best color challenge in blog-land!

I've also had the pleasure of working with some incredible designers on the Royal Court, and they inspire me every week just as much as they inspire you.  I appreciate all of the support and encouragement they have given me for the last 18 months.  

I have no doubt that I will continue to look to the ColourQ challenge every week for inspiration, but now I'll just be playing for fun.  *smile*  

Speaking of fun, how about I show you this week's colors?


This was incredibly challenging for me--I kept getting stumped by the Pumpkin Pie!  But the design on the pillow made me think of a colorful botanical print, so that was the starting point for my card.

I first stamped the large dogwood image from WPlus9's Flora & Fauna I in Bravo Burgundy onto cream cardstock.  Then I masked the image and stamped the small dogwood blossom in Calypso Coral and some branches from Woodgrain Silhouettes Additions in orange.

One of the Coral blooms was cut out and adhered with foam tape for some dimension, and I added a sentiment from Very Vintage Greetings in Coral, as well.  Finally, I stamped the text across the bottom of the panel in Pool Party.

Cardstock:  Stampin' Up! (Bravo Burgundy), Papertrey Ink (Vintage Cream)
Stamps:  WPlus9 Design Studio (Flora & Fauna I, Woodgrain Silhouettes Additions, Very Vintage Greetings), Papertrey Ink (Background Basics:  Text Style)
Ink:  Stampin' Up! (Bravo Burgundy, Calypso Coral, Pool Party), Ranger (Spiced Marmalade)
Tools:  We R Memory Keepers (Corner Chomper)

It's kind of funky and different for me, but I think I like it!

Please stop by the ColourQ blog and say thank you to Arielle for her hard work every week with this challenge!  And leave some love for the wonderful ladies on the Royal Court--they deserve it!

Thank you so much for stopping by today, my friends!

April 23, 2012

Happy Birthday Michele!


Hi everyone!  I'm part of a special blog hop today to celebrate a very special lady:  the one and only Michele Gross!  Not only is she our fearless leader at CAS-ual Fridays, but she is a wonderfully talented designer and all-around sweet gal.  I hope you'll join us in wishing her a happy birthday!


What better sketch to use for my card than this week's CAS-ual Fridays challenge sketch?


I used Lawn Fawn's Bake Me a Cake to paper piece a birthday cake for Michele on the inside of the card, then cut a window in the card front with Spellbinders Labels 3.  I used the coordinating Vintage Labels 3 stamp from Waltzingmouse to add an aqua frame, then stamped a sentiment from PTI's Flower Fusion #9.

Hopefully you can see the detail of the debossed music score on the card front.  It seemed appropriate since the sentiment had me humming the birthday song.  *grin*

Cardstock:  Papertrey Ink (White), Stampin' Up! (Pool Party)
Patterned paper:  Echo Park (Dots and Stripes)
Stamps:  Lawn Fawn (Bake Me a Cake), Waltzingmouse (Vintage Labels 3), Papertrey Ink (Flower Fusion #9)
Ink:  Memento (Tuxedo Black), Stampin' Up! (Pool Party), Copic markers
Tools:  Spellbinders (Labels 3 die), Papertrey Ink (Music score impression plate), We R Memory Keepers (Corner Chomper)
Accessories:  Michaels (rhinestones)

When you open the card, you get to see the whole cake!


Many thanks to Karen Baker for putting together this hop for Michele!  You'll want to visit the rest of the hop participants to see what they've created:

Karen
Dana
Stephanie
Karolyn
Angie
Laura
Debby
Lorena
Suzanne
Kimberly
Jenny
Virginia
Julie Ranae
Laurie
Lisa
Deb


Thanks so much for stopping by today.  I hope your week gets off to a great start!

April 22, 2012

Happy Earth Day!


Hi, friends!  Happy Earth Day!

I'm just popping in to share a card I made quite a while ago and never posted, which I thought was perfect for today.

Cardstock:  Papertrey Ink (Fine Linen)
Stamps:  Papertrey Ink (Postmarks, Masculine Motifs, Distressed Stripes)
Ink:  Stampin' Up! (Chocolate Chip, Not Quite Navy)

I also thought I'd share some photos of my hubby and kids that I took at a beach clean-up yesterday.  My husband works as a naturalist with the Blue Ocean Society for Marine Conservation.  They host beach clean-ups throughout the year, and this was their 2nd annual Earth Day Cleanup at Salisbury Beach in MA.


Over 80 volunteers showed up and removed more than 250 pounds of trash from this stretch of beach, including 112 cigarette butts that my kids found (among many other interesting items).  It was a gorgeous day, and my kids can't wait to do it again.  Nothing makes me more proud than to hear them talk about "taking care of the earth".


If you're interested in beach clean-ups in your area, you can visit the Ocean Conservancy for more information, and if you're in New England you can find the schedule for Blue Ocean sponsored clean-ups HERE.

Do you have any special plans for Earth Day?  I'd love to hear about them!

Thanks for stopping by today!

April 21, 2012

Card Patterns Sketch #162


Hey there, friends!  I hope your weekend is off to a great start.  We're headed out to do a beach clean-up this morning, so I'll make this short and sweet.

This week's sketch at Card Patterns is one of my favorites to date--you can keep it CAS or dress it up with layers.


This week we're sponsored by Sparkle Creations once again, who provided the designers with some of their high quality rubber stamps to use on our designs.  I used this cute Swimming Lucy again.  I colored her with Prismas to match a fun polka dot paper from My Mind's Eye.  The sentiment is from an A Muse set, Wish You Were Here.

I left off the two buttons in the sketch as I just couldn't make them work, and added a few gems around the sentiment instead.

Cardstock:  Papertrey Ink (Hawaiian Shores, White)
Patterned paper:  My Mind's Eye (Quite Contrary-Jack & Jill)
Stamps:  Sparkle Creations (Swimming Lucy), A Muse Studio (Wish You Were Here)
Ink:  Memento (Tuxedo Black)
Accessories:  Papertrey Ink (twill ribbon), Queen & Co. (rhinestones)
Coloring medium:  Prismacolor Premier pencils

You'd think with all of her sunbathing Lucy would have a bit more of a tan, or at least some freckles like me.  *grin*  Every time I upload a photo of a person I've colored, it looks washed out.  I think I need to work on adding more pink tones as well.

I hope you'll play along with us this week at Card Patterns!  Thanks for visiting!

April 17, 2012

ColourQ #133


Hello!  It's been quiet around here for a few days, quite literally since I seem to have lost my voice!  I've been under the weather, but I think I'm starting to rally, so hopefully I'll have more energy for stamping and blogging in the coming days.

You all rocked the groovy retro colors in last week's ColourQ challenge!  This week we have the modern, graphic pattern on these pillows as inspiration.


I made a little die cut window with Spellbinders Labels 18, then debossed the panel with woodgrain.  I placed a strip of Basic Black cardstock behind the window to make a shelf and stamped a trio of vases in Basic Gray.

After stamping the flowers, I added a few highlights with a Copic marker and stamped the sentiment in black.

It seemed like it needed something else, so I sprinkled a few black gems around the corners of the "window".  I'm not 100% happy with the way it turned out, but sometimes that's just how it goes!

Cardstock:  Papertrey Ink (White, True Black)
Stamps:  Papertrey Ink (Gracious Vases)
Ink:  Stampin' Up! (Basic Gray, More Mustard), Clearsnap (Terracotta), Memento (Tuxedo Black), Copic marker
Tools:  Spellbinders (Labels 18), Papertrey Ink (Woodgrain impression plate), corner rounder
Accessories:  Bazzill (rhinestones)

I can't wait to see your design in the gallery this week!  Thanks so much for playing along with us at the ColourQ, and thanks for stopping by today!

April 14, 2012

Card Patterns Sketch #161--Sponsored by Clear & Simple Stamps


Hi friends!  It's time for a new sketch at Card Patterns!  This week we're sponsored by Clear & Simple Stamps, and they were sweet enough to send the DT some stamps from their latest release to use with this sketch.


The set I was given to work with was Special Bundle, a cute set with stork and basket images plus lots of sentiments.  I used papers from My Mind's Eye Fine and Dandy Girl collection to paper piece one of the stork images and a sweet little basket.

The sentiment is stamped on a die cut banner wrapped with white floss.  I used pinking shears to trim one end and popped the banner up with foam tape.

Cardstock:  Papertrey Ink (White, Aqua Mist)
Patterned paper:  My Mind's Eye (Fine and Dandy Girl collection)
Stamps:  Clear & Simple Stamps (Special Bundle)
Ink:  Stampin' Up! (Chocolate Chip)
Tools:  Papertrey Ink (Book Print impression plate, banner die), Spellbinders (circle, scalloped circle dies)
Accessories:  embroidery floss, thread

Stop by the Card Patterns blog to see details on this week's challenge and link up your card for a chance to win a fantastic prize from Clear & Simple Stamps!

I'm off to the park with the kids today to enjoy the beautiful weather.  What are your plans for the weekend?  I hope it's a great one!

Thanks for visiting!

April 13, 2012

Paper Smooches SPARKS April challenge, & a huge thank you

First of all friends, you are amazing.  And you know how to make a girl feel amazing.

I was overwhelmed today by your response to my announcement that I will be joining the CAS-ual Fridays Design Team.  Overwhelmed.

Oh how I would love to reply to each one of you personally to say thank you for your kind words of support and enthusiasm, but there just aren't enough minutes in the day for that many emails.  So I hope you will accept my sincere thanks here and know how much you are appreciated.  My heart is very full today.  *smile*

How about a card?  This is my first time participating in the Paper Smooches SPARKS challenge, now that I have some fun Paper Smooches stamps to call my very own.


And here's the inspiration:
Obviously I was inspired by the two shades of blue with a pop of orange, and it's hard to tell in the photo but I used a Soft Stone card base rather than white.

Using Paper Smooches' Metropolis, I stamped the two different cityscapes onto cardstock and cut them out by hand, then layered them with foam adhesive for extra dimension.

There is a solid road image in the PS set, but since I wanted to stamp the greeting directly on the road I used a stamp from PTI's Scrapbook Basics:  Library Ledger.  The car was cut out by hand from orange cardstock and popped up with foam tape.

A moon and a few stars from Metropolis are the finishing touches, along with one rounded corner.

Cardstock:  Papertrey Ink (Soft Stone, Enchanted Evening, Blueberry Sky, Orange Zest)
Stamps:  Paper Smooches (Metropolis), Papertrey Ink (Scrapbook Series:  Library Ledger)
Ink:  Stampin' Up! (Not Quite Navy), Ranger (Spiced Marmalade), Copic marker
Tools:  We R Memory Keepers (Corner Chomper)

This little card really makes me smile, especially since I know it will be going in a box of goodies that we're sending to some dear friends back in Ohio next week.

Thanks so much for stopping by again, and for all your wonderful comments!  I hope to get caught up on my return visits this weekend.

Have a great night!

I have a secret....

....and I can't wait any longer to share the news!


Yep, I'm one lucky gal.  *grin*

But it gets even better.  Just wait until you see the amazingly talented designers Michele has chosen for the new DT!  I won't spoil the surprise--you'll have to head over to the CAS-ual Fridays blog to find out!

I'm so excited to be working with these gals starting in May.  Be sure to stop by their blogs to see their creations and congratulate them!

Many thanks to Michele for all of her hard work in putting together the new team.  I feel so very fortunate to have the opportunity to be a Girl Friday!

I'll be back later in the day with a card!  Thanks so much for stopping in to share in my good news.

'Night!

April 10, 2012

ColourQ #132 & Retro Sketches #6


Happy Tuesday, friends!  I hope you had a restful weekend.  I'm back today with a card for a new ColourQ challenge!  I also managed to use this week's sketch at Retro Sketches, inspired by a sweet card by my blogging buddy Lynn Mangan.


I used a similar design for a baby boy card a couple of weeks ago, so I hope you don't mind seeing these star dies again!  When I saw the pattern on the lampshade in the inspiration photo, the lines and dots made me think of PTI's Background Basics:  Retro.  

I stamped the lines in chartreuse, orange and red on the bottom half of my cardstock, then die cut the star just off of one edge.  I die cut a smaller star from Poppy Parade cardstock and added a Pumpkin Pie banner with a sentiment from Paper Smooches.

Cardstock:  Stampin' Up! (Poppy Parade, Pumpkin Pie), Papertrey Ink (True Black, White)
Stamps:  Papertrey Ink (Background Basics:  Retro), Paper Smooches (Sentiment Sampler)
Ink:  Stampin' Up! (Lucky Limeade), Ranger (Spiced Marmalade), Clearsnap (Scarlet), Memento (Tuxedo Black)
Tools:  Papertrey Ink (star dies, banner die), corner rounder)
Accessories:  button, DMC floss

Sorry to keep it short, but I have to get back to work!  Be sure to visit the rest of the ColourQ Royal Court DT to be inspired, then link up your creation at the ColourQ blog!

Have a good one!

April 7, 2012

Card Patterns Sketch #160--Sponsored by Prickley Pear


Hello, friends!  I hope you're having a great start to your weekend.  There's a new sketch up at Card Patterns today, and we hope you'll play along!  


This week we're sponsored by Prickley Pear, and they provided the designers with a care package of cute rubber stamps.  I chose to work with this sweet little Duck in Tub image.  I colored it with my Prisma pencils and cut it out with a Spellbinders oval die.

The polka dot paper is from Echo Park's Dots & Stripes Homefront collection, and I debossed polka dots on the white cardstock behind it too.

The "Happy" part of the sentiment is from PTI's Birthday Basics, and the word "Easter" is from WPlus9's Spring Post.  I added a So Saffron bow in the top corner and a tiny scalloped border under the sentiment.

Cardstock:  Papertrey Ink (White), Stampin' Up! (So Saffron)
Patterned paper:  Echo Park (Dots & Stripes Homefront)
Stamps:  Prickley Pear (Duck in Tub), Papertrey Ink (Birthday Basics), WPlus9 (Spring Post)
Ink:  Stampin' Up! (Chocolate Chip)
Tools:  Spellbinders (oval die), Papertrey Ink (banner die, polka dot impression plate), Fiskars (border punch), corner rounder
Accessories: Stampin' Up! (ribbon)
Coloring medium:  Prismacolor Premier pencils

Happy Easter and Passover to all of you who will be celebrating this weekend!  Thanks for your visit!

April 6, 2012

Pin-spired--Nautical stripes


Hi friends!  It's been a while since I made a card that wasn't for a DT assignment or challenge of some kind, so I decided to sit down for a few minutes this afternoon and make something just for me.  I recently Pinned this photo for inspiration and immediately sketched an idea for a card.  

                                                                                    Source: laviepetite.blogspot.com via Christina on Pinterest

It's pretty obvious how I was inspired!  I wanted to replicate the broad red stripes, so I stamped them onto white cardstock using PTI's Faux Ribbon.  I tucked strips of navy cardstock under the panel at the top and bottom and pinked the edges, then added a stitched "seam".

The sentiment is from Paper Smooches Sentiment Sampler, and I balanced it by adding three navy buttons threaded with red and white baker's twine in the top corner.

The subtle texture on the striped panel comes from PTI's Linen & Canvas impression plate.

Cardstock:  Papertrey Ink (Enchanted Evening, White)
Stamps:  Papertrey Ink (Faux Ribbon), Paper Smooches (Sentiment Sampler)
Ink:  Stampin' Up! (Real Red, Not Quite Navy)
Tools:  Papertrey Ink (Linen & Canvas impression plate), Fiskars (pinking shears)
Accessories:  Papertrey Ink (buttons), The Twinery (Maraschino baker's twine), thread

I've noticed a lot of designers posting cards that were inspired by photos on Pinterest.  I have a ton of pictures saved that I'd like to use as inspiration for cards, so maybe I'll make this a semi-regular feature.  What do you think?

I hope your weekend gets off to a great start!  I'll be back in the morning with a new Card Patterns sketch!

April 4, 2012

CAS-ual Fridays #46 & Retro Sketches #5


Good evening, friends!  It's been a crazy week so far, but I'm thrilled to say that my 5-day weekend starts tomorrow.  I have so much catching up to do!

I found a few minutes tonight to combine a couple of challenges:  CAS-ual Fridays and RetroSketches.  


The challenge at CAS-ual Fridays is to be inspired by the lyrics of a song.  How fun!  I thought of a few but needed a card for a friend whose son recently turned four, so I thought of a song by Feist, 1,2,3,4.  The original version of the song is HERE, but I'm a little partial to her version on Sesame Street:

Feist on Sesame Street--1,2,3,4

Everything's better with Muppets, right?  

I started with a kraft card base, then debossed a kraft panel with PTI's Sunshine impression plate and sponged the edges with white ink.  

The patterned paper is from Echo Park's A Boy's Life collection.  I stamped the yellow strip with numbers from PTI's Fresh Alphabet (1,2,3) and Outlines Alphabet (4).  The star stamps and dies are also from PTI.

Cardstock:  Papertrey Ink (Kraft)
Patterned paper:  Echo Park (A Boy's Life)
Stamps:  Papertrey Ink (Star Prints, Fresh Alphabet, Outlines Alphabet)
Ink:  Stampin' Up! (Not Quite Navy), ColorBox (Frost White)
Tools:  Papertrey Ink (star dies, Sunshine impression plate), corner rounder
Coloring medium:  Prismacolor Premier pencil

Off to watch the Celtics with my hubby before bed.  Thanks for stopping by, and be sure to come back in a few hours for a new Muse at CASE Study!

April 3, 2012

ColourQ #131


Hi there, friends!  I have a sweet and simple project to share with you today using the latest ColourQ palette.  Aren't these spring colors so pretty together?


I recently ordered some Pure Innocence images from My Favorite Things, and the first thing I wanted to do was make a bookmark for my 6 year old daughter, who is an avid reader.  She's in the middle of several chapter books and is always looking for colorful scraps to use as bookmarks.

I just love the pigtails on this little girl!  I paper pieced her outfit with designer papers from Stampin' Up!'s In Color collection and colored her skin and hair with Prisma pencils.  I added a fringed strip of Pear Pizzazz cardstock for the "grass" and some paper strips at the top, then punched a hole to add a loop of So Saffron ribbon.  I added my own sentiment with a Chocolate Chip Stampin' Write marker.

The back of the bookmark needed some love, too, so I covered it with patterned paper and stamped my daughter's name with alphabet stamps. 

Cardstock:  Stampin' Up! (Pear Pizzazz, So Saffron), Papertrey Ink (White)
Patterned paper:  Stampin' Up! (2010 In Color Designer Series Paper)
Stamp:  My Favorite Things (Pure Innocence Being Cute is What I Do)
Ink:  Stampin' Up! (Chocolate Chip)
Tools:  Papertrey Ink (polka dot impression plate), corner rounder, hole punch
Accessories:  Stampin' Up! (So Saffron ribbon)
Coloring medium:  Prismacolor Premier pencils

Don't be afraid to think outside the box with your ColourQ project!  It doesn't have to be a card to be in the running for Colour Queen, just as long as you use the challenge colors.

I have a busy week, so I haven't been around making as many comments, but I'm looking forward to a long Easter weekend.  Hope your week is going well so far!

Thanks for stopping by today!
Related Posts Plugin for WordPress, Blogger...