May 31, 2012

The 12 Kits of Christmas--May

Hi there, friends!  Welcome back for the May edition of The 12 Kits of Christmas!  If you're fairly new to the blog, you can read more about The 12 Kits group challenge in the January installment HERE.


This month's challenge has a fun twist--hostess Joyce sent us packages full of Hanukkah-themed supplies!  Here's a peek at some of the wonderful goodies she included (thanks to Kara for the photo!):


I've never made a card for Hanukkah, so it was especially fun getting to play with these colors and images.  I only had time to make 2 cards this month as we've been busy with end-of-school activities, but I have tons of supplies left to work with and plan to revisit them in the near future!

For my first card I wanted to use these gorgeous doilies from Memory Box that Joyce included in the kit.  I layered two of them behind a die-cut oval and a dreidel from PTI's Mazel Tov, which I cut out and popped up with foam tape.

This is one of the great patterned papers Joyce included from a digital kit she found on Etsy.

Cardstock:  Papertrey Ink (Enchanted Evening, Spring Rain, White)
Patterned paper:  Etsy
Stamps:  Papertrey Ink (Mazel Tov)
Tools:  Memory Box (Whimsy Circle die), Papertrey Ink (double ended banner die), Spellbinders (oval die)
Accessories:  Queen & Co. (rhinestones), thread

My second card uses these cute postage stamps with menorah images from Mazel Tov and Impression Obsession's Jewish Greetings.  

Cardstock:  Papertrey Ink (Blueberry Sky, White)
Patterned paper:  Etsy
Stamps:  Papertrey Ink (Mazel Tov), Impression Obsession (Jewish Greetings)
Tools:  Papertrey Ink (pinked square die, banner die), Spellbinders (postage die)
Accessories:  Papertrey Ink (button), The Twinery (baker's twine), thread

I'll keep this short so you can hop along to see what the rest of the girls made!


Suzanne:  The Card Yard
Kara: KandRDesigns
Sharron: OnPapillionWings
Jeanne: AKeptLife

Thanks for stopping by to see my creations!  Come back soon for my CASE Study card!

May 28, 2012

Card sets for teachers 2012


Hey there, friends!  Happy Memorial Day to those of you in the U.S.--I hope you enjoyed a relaxing day and found some time to remember those who have served or are serving in the military, especially those who have made the ultimate sacrifice to keep us safe.

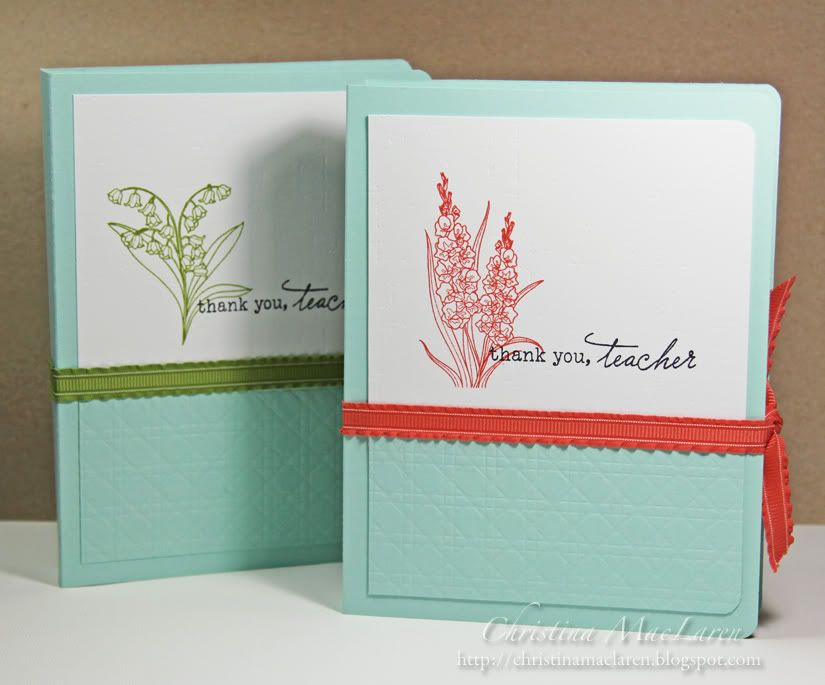
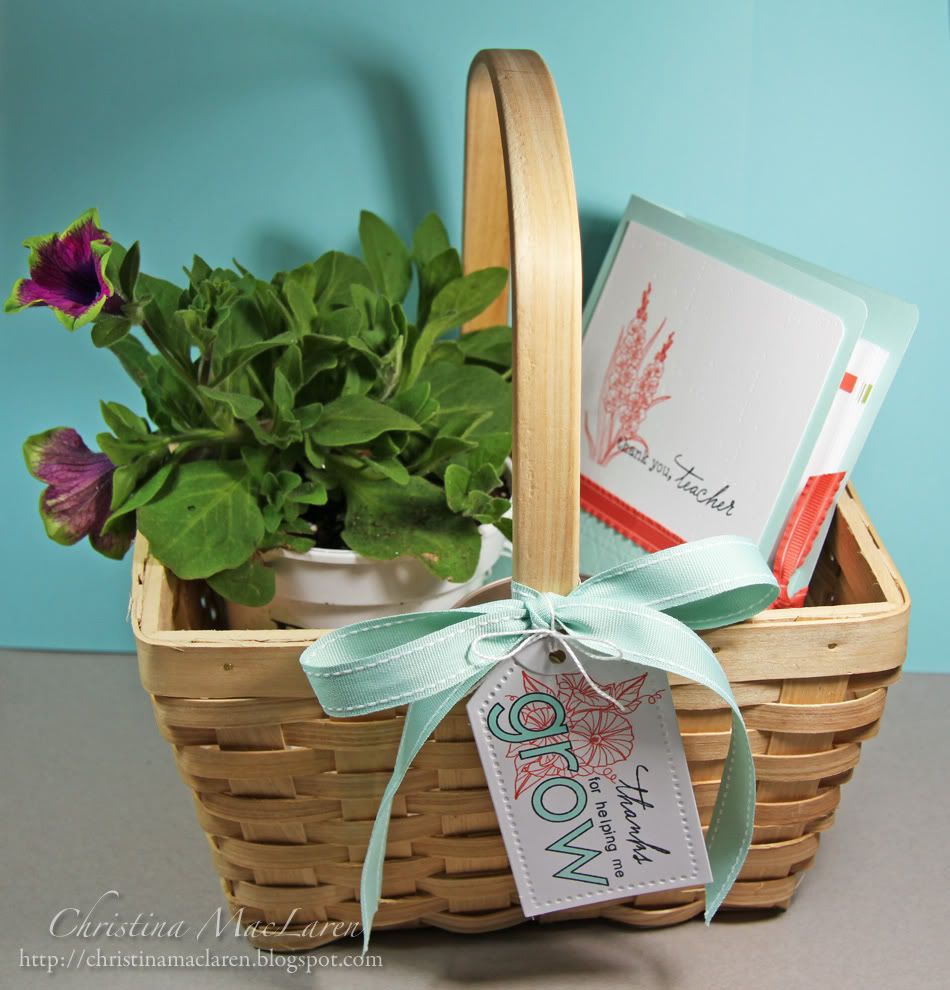
I promised to share the card sets I made for my son's teachers this year, and chances are I'll be making a third set for my daughter's teacher in a few weeks.  They're super easy and came together in no time, though the folders I put them in took a little longer.  The folders are a slightly larger version of the one in my tutorial HERE, larger because I included 8 cards in each.


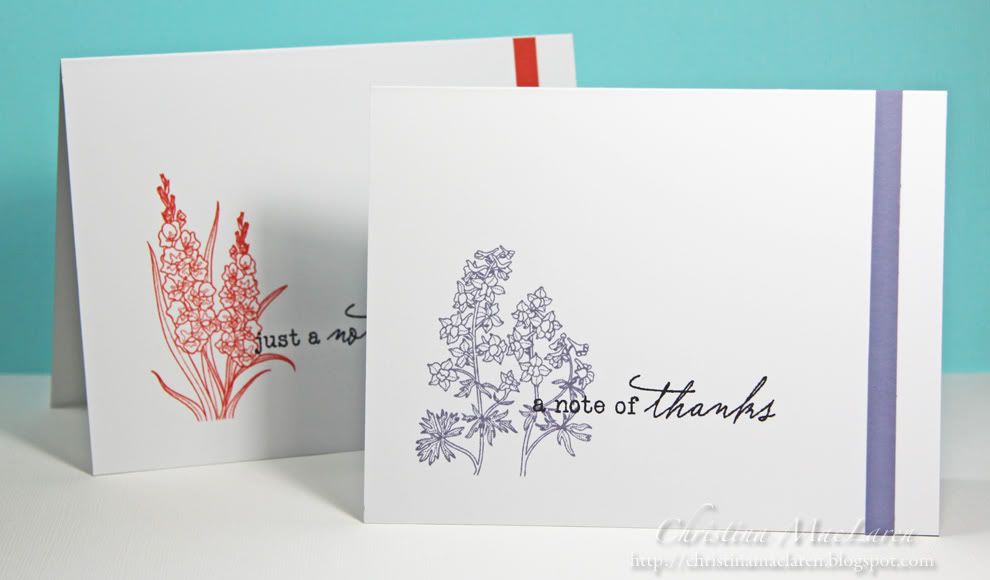
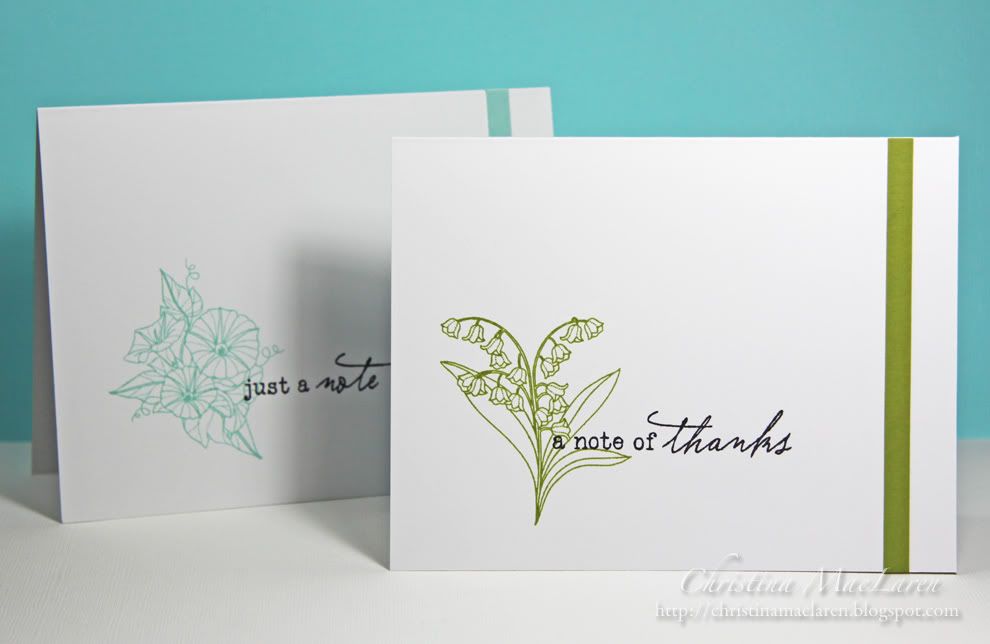
I chose 4 images from PTI's Year of Flowers Collection and stamped them in 4 of Stampin' Up!'s 2011 In Colors:  Calypso Coral, Wisteria Wonder, Lucky Limeade, and Pool Party.  I added a strip of coordinating cardstock to each card front for balance and stamped one of 2 sentiments from PTI's Happy Trails in black.

Card supplies
Cardstock:  Papertrey Ink (White), Stampin' Up! (Calypso Coral, Wisteria Wonder, Pool Party, Lucky Limeade)
Stamps:  Papertrey Ink (Year of Flowers Collection, Happy Trails)
Ink:  Memento (Tuxedo Black), Stampin' Up! (Calypso Coral, Wisteria Wonder, Pool Party, Lucky Limeade)

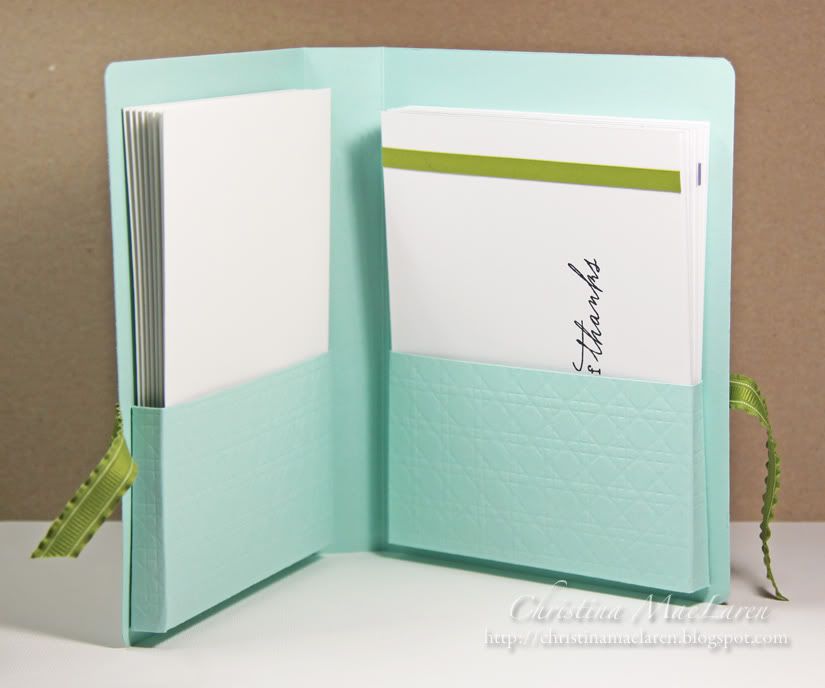
Here's the inside of the folder, with pockets that have been debossed with PTI's diamond impression plate.  I wrapped each one with some of this pretty ruffled ribbon from SU!

Folder supplies
Cardstock:  Papertrey Ink (Aqua Mist, White)
Stamps:  Papertrey Ink (Year of Flowers Collection, Happy Trails)
Ink:  Memento (Tuxedo Black), Stampin' Up! (Calypso Coral, Lucky Limeade)
Tools:  Papertrey Ink (Linen & Canvas, Diamond impression plates), Martha Stewart (Scoring Board), We R Memory Keepers (Corner Chomper)
Accessories:  Stampin' Up! (ruffled ribbon)

My little guy and I went to pick out some flowers and a candle, then nestled everything into a basket.  I made tags that read "Thanks for helping me grow" using PTI's Simple Alphabet and Outline Alphabet.  I masked the letters before stamping the morning glory image, then colored the letters with a Copic marker.

Tag supplies (All Papertrey Ink unless noted)
Cardstock:  White
Stamps:  Year of Flowers Collection, Simple Alphabet, Outline Alphabet, Happy Trails
Ink:  Tuxedo Black (Memento), Calypso Coral (Stampin' Up!)
Tool:  Tag die
Accessories:  Aqua Mist ribbon, DMC floss

If you're looking for a last-minute teacher gift, this is a really versatile card design that would work with lots of images, not just florals.  If you're pressed for time, just bundle them up with some pretty ribbon or baker's twine rather than packaging them in a folder.

May 26, 2012

Card Patterns sketch #167


Hello, friends!  I hope you're enjoying your weekend so far!  I'm just popping in to share my card for this week's Card Patterns sketch, which is another "keeper".


Our sponsor this week is a wonderful shop I recently discovered called Freckled Fawn, and they carry a fabulous assortment of washi tapes and accessories.  They've generously offered up a gift certificate to a random participant this week, so be sure to enter your creation for a chance to win!

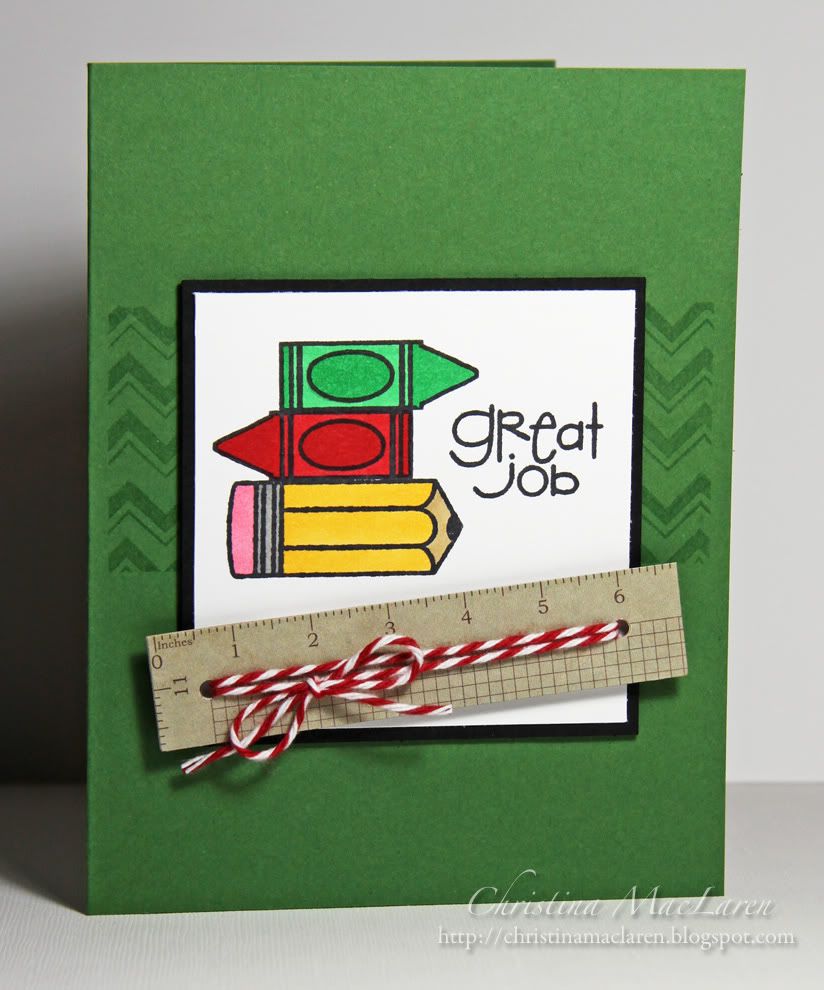
For the Design Team, this was a "stash" week, meaning we were free to use any supplies we wanted on our design.  I decided to make a card for my little guy, who had his last day of preschool on Friday (sniff, sniff).  His favorite color is green, so I used SU's Garden Green as my card base, masking and stamping a panel of chevrons in Versamark.

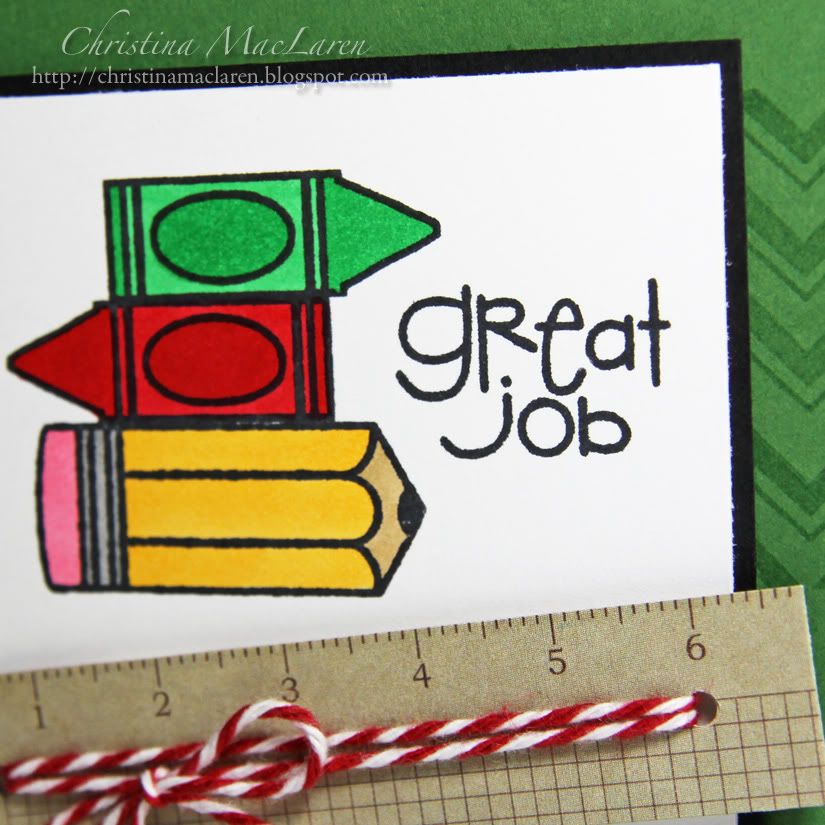
The focal image is an assortment of stamps from Paper Smooches' Smarty Pants set, which I stamped and colored with Copics.  

I was stumped for a while about what to use for the banner element of the sketch, and I would have loved to use a ruler, but I settled for a strip of grid patterned paper from Fancy Pants' Off to School collection.  I punched a hole in each end and wrapped it with baker's twine.

Cardstock:  Papertrey Ink (True Black, White), Stampin' Up! (Garden Green)
Patterned paper:  Fancy Pants Design (Off to School)
Stamps:  Paper Smooches (Smarty Pants), Lawn Fawn (Chevron Backdrops)
Ink:  Memento (Tuxedo Black), Versamark, Copic markers
Tools:  Fiskars (hole punch)
Accessories:  The Twinery (Maraschino baker's twine)

Stop by the Card Patterns blog for more inspiration, then be sure to link up your design for a chance to win this week's prize!

Thanks for stopping by!  I'll be back soon to share the card sets I made for my son's teachers.

Have a good one!

May 25, 2012

CAS-ual Fridays #54--Sponsored by Gina K. Designs


Woohoo!  It's Friday!  Here in the U.S. many of us are looking forward to a long weekend for Memorial Day, so hubby and I have plans to stain our deck.  We sure know how to party, right?  *wink*

If you have some stamping time this weekend, we'd love to have you join us for a new CAS-ual Fridays challenge!  This week we're asking you to whip up something masculine, which would be the perfect chance to work on some Father's Day cards.


This week we're being sponsored by Gina K. Designs, and the Design Team got to work with the fun masculine papers from their Casual Friday paper pack!  How cool is that?


I was immediately drawn to the paper that looks like denim and had the idea to make a patched "knee" for a masculine get well card.

I first took a piece of the denim patterned paper and folded the left edge under, stitching it to another strip of denim paper to make a seam.

I cut a square patch from the navy blue gingham, also from the Casual Friday paper pack, and stitched it in place, leaving the ends of the thread trailing across the card front.  

The sentiment is from Paper Smooches Sentiment Sampler, stamped in Real Red onto kraft cardstock and popped up with foam tape.

Cardstock:  Papertrey Ink (Kraft)
Patterned paper:  Gina K Designs (Casual Friday)
Stamp:  Paper Smooches (Sentiment Sampler)
Ink:  Stampin' Up! (Real Red)
Accessories:  thread

I hope you'll join us with a masculine card this week!  Be sure to visit the rest of the Girl Fridays for more ideas.

Thanks for visiting today!  See you back here soon!

May 20, 2012

Card Patterns sketch #166--Sponsored by Designed2Delight


Hi everyone!  I hope you've had a great weekend.  We had lots of fun in Boston yesterday, but I'm battling a sore throat and feeling run-down today, so I'll keep this short.

This week's Card Patterns sketch was quite the challenge for me, but I can't wait to see what you do with it!


We're sponsored again this week by Designed2Delight Digital Stamps, and they provided the DT with some of their cute digis to work with.  I chose the set Orca Love.

I stretched the image horizontally a little to better fit the Spellbinders label.  I added one of the sentiments from the set, tucking it in between the mom and baby whale.  The image was colored with Copics, then cut out with a Labels 4 Nestie.

I used papers from PTI's Men of Life pack on a Pure Poppy card base.  The blue scallops at the top are die cut circles that I cut in half.

Cardstock:  Papertrey Ink (Pure Poppy, Spring Rain, White)
Patterned paper:  Papertrey Ink (Men of Life)
Digital Stamp:  Designed2Delight (Orca Love)
Ink:  Copic markers
Tools:  Spellbinders (Labels 4, circle die), We R Memory Keepers (Corner Chomper)
Accessories:  Papertrey Ink (ribbon, button), thread

I hope to see your creation with this week's sketch in the gallery this week!  Three randomly chosen participants will each receive a $5 gift certificate to the Designed2Delight store.

Thanks for stopping by tonight, friends!  Have a great start to your week!

May 18, 2012

CAS-ual Fridays #53: Punchy


Welcome back, friends!  How are your weekend plans coming?  Any chance you'll be making time for this week's CAS-ual Fridays challenge?  I thought so!  

Our challenge this week is all about getting punchy--with your punches and dies, that is!


Our fabulous sponsor this week is Lawn Fawn, and they generously provided the DT with some of their darling stamps and new Bright Side papers.  Thanks, Lawn Fawn!


I chose to work with the cute florals in Blissful Botanicals.  They were so much fun to stamp and color!  For the punchy part of the challenge, I dusted off my old circle punches and created three windows in a yellow cardstock panel, then stamped the flower and leaf images in the open spaces onto a white card base.

The images were colored with Copics, and the flowers were adorned with yellow rhinestone centers.  I added faux white stitching around the "windows" and stamped a sentiment from Blissful Botanicals.  (Confession:  the sentiment doesn't have a dotted "i", but I just couldn't bear to leave it that way, so I added a dot with a black pen!)

Cardstock:  Papertrey Ink (Harvest Gold, White)
Stamps:  Lawn Fawn (Blissful Botanicals)
Ink:  Memento (Tuxedo Black), Copic markers, white gel pen
Tools:  Papertrey Ink (Linen & Canvas impression plate), circle punches, corner rounder
Accessories:  Queen & Co. (rhinestones)

This card turned out just the way I had it in my head.  I love it when that happens.  *grin*

Now it's your turn to put on your thinking cap and get to work with your punches and dies!  But first, make sure you pay a visit to the other Girl Fridays to see their CAS creations.  

Thanks for stopping by today!  

May 14, 2012

Clear & Simple Stamps App Sneak Peek


Hi friends!  Just popping in quickly to share a sneak peek of my card that is featured on the Clear & Simple Stamps Daily App today!

Enjoy!

Related Posts Plugin for WordPress, Blogger...