Showing posts with label kids. Show all posts

February 17, 2013

Kids' Craft--Magnetic Bookmarks

Cardstock:  Stampin' Up! (Pretty in Pink, Lucky Limeade), WPlus9 Design Studio (White)
Stamps:  Papertrey Ink (Tiny Treats: Valentine, Boxes, Bags, & Tags), Lawn Fawn (Chevron Backdrops)
Ink:  WPlus9 Design Studio (White), Memento (Tuxedo Black), Stampin' Up! (Real Red, Lucky Limeade, Pretty in Pink)
Tools:  Spellbinders (circle die), corner rounder

Hi friends!  How about a just-for-fun post tonight?  I've been looking forward to sharing the Valentines my daughter and I made for her class.  We're not big on giving out candy as party favors, so I'm always trying to think of alternatives.

This past Christmas, my daughter got some magnetic bookmark clips in her stocking, and that was the inspiration for these little magnetic clips.  Aren't they cute?  

We made simple cards out of cardstock, Lucky Limeade for the boys and Pretty in Pink for the girls, and clipped the bookmarks to the top.  For reference, the cards are 2 1/2 X 3 1/4 inches and the clips are 1 3/8 X 4 1/2 inches.

Here's a view of the clips once they're taken off of the cards:


This design could be adapted to whatever stamps and dies you have in your stash.  I used a Spellbinders circle die to round the ends of a strip of white cardstock, then my daughter did some basic stamping with images from PTI's Tiny Treats: Valentine and Boxes, Bags, & Tags.  She colored the images with pencils.

I stamped the fronts and backs of the bookmarks using Lawn Fawn's Chevron Backdrops, masking the image and sentiment on the front.


After scoring and folding the strips in the middle, I cut self-adhesive magnetic squares from a large roll, stacked the magnets together, and removed the backing from one square to attach it to the inside of the strip.

One tip if you make these yourself:  Make sure you orient the magnetic squares so that they are strongly attracted to each other.  In some orientations they have a weaker attraction, and once you adhere the magnets you won't be able to move them.

I removed the paper backing from the other magnet, folded the top of the strip down and pressed it onto the adhesive.


These were so much fun for my daughter and I to make together, and hopefully her classmates will enjoy using them.

If you decide to make any of these, I'd love to hear how they turn out!  I already have plans of making some Halloween themed clips for our annual party's goodie bags.

Hope you've had a great weekend!  Thanks for visiting today!

February 9, 2013

Cloud9 February Blog Hop


It's time for another Cloud9 Blog Hop!


This month's inspiration photo comes from the Black Eiffel blog, featuring an assortment of kids' Valentine treat bags:

via Black Eiffel
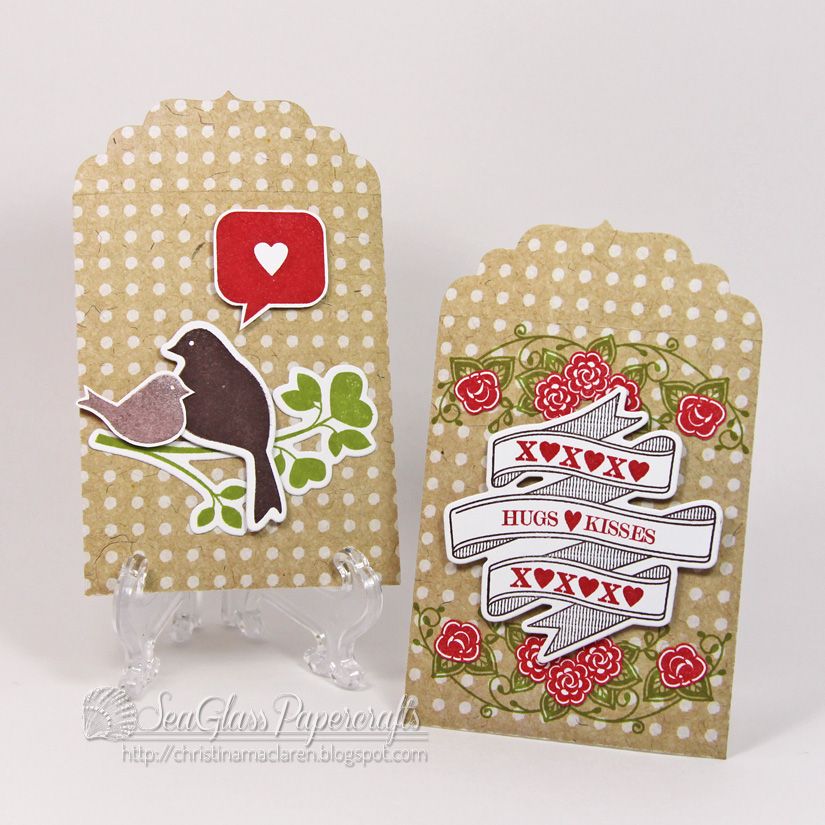
I took the inspiration pretty literally and whipped up some little envelopes to put in my kids' lunch boxes on Valentine's Day.

Using WPlus9's seed packet die, I cut the envelopes from this kraft, polka-dotted paper from a collection that I must have bought three or four years ago.  I just keep whittling away at it year by year.  :)

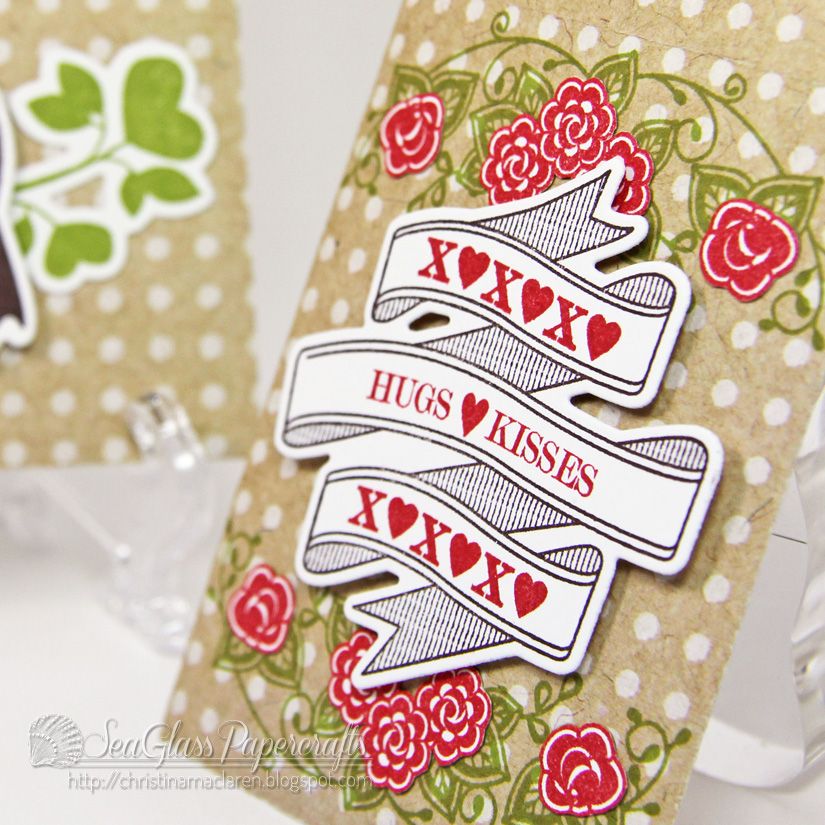
For my daughter's envelope, I used the just-released sets Chantilly Trim (for the floral image) and Written on Ribbon (for the banner), as well as the companion die.  The sentiments are from Love You More.

My son's envelope is decorated using images from Love Birds, along with the coordinating dies.  Since my little guy doesn't do much reading yet, I opted for the heart speech bubble from Love You More in lieu of a sentiment.

Cardstock:  WPlus9 Design Studio (White)
Patterned paper:  (K & Company)
Stamps:  WPlus9 Design Studio (Chantilly Trim, Written on Ribbon, Love Birds, Love You More)
Ink:  Stampin' Up! (Lucky Limeade, Real Red, Chocolate Chip)
Tools:  WPlus9 Design Studio (Written on Ribbon die, Love Birds dies)

I'll probably fill these with stickers and a love note, which should put a smile on their faces, especially since this mom is rarely organized enough ahead of time to put notes in lunch boxes.  :)

Please join us for this month's hop!  We'd love to see what you come up with using your WPlus9 goodies.

I'm off to tackle the shoveling!  Thanks for spending a bit of your day with me.

May 20, 2012

Card Patterns sketch #166--Sponsored by Designed2Delight


Hi everyone!  I hope you've had a great weekend.  We had lots of fun in Boston yesterday, but I'm battling a sore throat and feeling run-down today, so I'll keep this short.

This week's Card Patterns sketch was quite the challenge for me, but I can't wait to see what you do with it!


We're sponsored again this week by Designed2Delight Digital Stamps, and they provided the DT with some of their cute digis to work with.  I chose the set Orca Love.

I stretched the image horizontally a little to better fit the Spellbinders label.  I added one of the sentiments from the set, tucking it in between the mom and baby whale.  The image was colored with Copics, then cut out with a Labels 4 Nestie.

I used papers from PTI's Men of Life pack on a Pure Poppy card base.  The blue scallops at the top are die cut circles that I cut in half.

Cardstock:  Papertrey Ink (Pure Poppy, Spring Rain, White)
Patterned paper:  Papertrey Ink (Men of Life)
Digital Stamp:  Designed2Delight (Orca Love)
Ink:  Copic markers
Tools:  Spellbinders (Labels 4, circle die), We R Memory Keepers (Corner Chomper)
Accessories:  Papertrey Ink (ribbon, button), thread

I hope to see your creation with this week's sketch in the gallery this week!  Three randomly chosen participants will each receive a $5 gift certificate to the Designed2Delight store.

Thanks for stopping by tonight, friends!  Have a great start to your week!

February 14, 2012

ColourQ #124, CAS-ual Fridays 39, & WMSC 84


Happy Valentine's Day!  I hope you're able to spend some time with the ones you love most today!

I've got a new ColourQ palette to share with you, and it was perfect for making a couple of cards for my kids.


I loved the challenge of using vanilla and white together, as I don't usually think of it but love the way it looks on other people's cards.

On my daughter's card, I stamped the frame and bunny image from PTI's Tiny Treats:  Valentine onto a spiral notebook die cut.  I wrapped the panel with cream ribbon, stitched a pink button in place, and popped the panel up on foam dots.

The white card base has a panel of Pool Party cardstock stitched with a strip of patterned paper from PTI's Library Ledger pack, which has those sweet cream dots to match the ribbon.

Two more pink buttons add the final touch.

Cardstock:  Stampin' Up! (Pool Party), Papertrey Ink (White)
Patterned paper:  Papertrey Ink (Library Ledger)
Stamps:  Papertrey Ink (Tiny Treats:  Valentine)
Ink:  Stampin' Up! (Real Red), Inkadinkadoo (Black), Copic marker
Tools:  Papertrey Ink (spiral notebook die, Linen & Canvas impression plate)
Accessories:  Michaels (ribbon), buttons, DMC floss, thread

My daughter's card was inspired by the Waltzingmouse Sketch challenge this week, but since a Waltzingmouse Stamps image is required for the challenge, I made my son's card with the same sketch and the Half Pint Heroes set.  I also used paper piecing, so this qualifies for the current challenge at CAS-ual Fridays.


I just adore how this polka dot car turned out!  I paper pieced the entire car body with PTI's Distressed Dots paper, then pieced the bumpers with Pure Poppy cardstock.  I added a "road" using journaling lines from PTI's Scrapbook Series:  Library Ledger.  The hearts are from Tag-its #4 and the sentiment is from Half Pint Heroes.


Isn't this little guy so cute?  My son loves this stamp set!

Cardstock:  Stampin' Up! (Pool Party), Papertrey Ink (Pure Poppy, White)
Patterned paper:  Papertrey Ink (Library Ledger, Distressed Dots)
Stamps:  Waltzingmouse (Half Pint Heroes), Papertrey Ink (Tag its #4, Scrapbook Series:  Library Ledger)
Ink:  Inkadinkadoo (Black), Stampin' Up! (Pretty in Pink), Copic markers
Tools:  Papertrey Ink (spiral notebook die)
Accessories:  The Twinery (Maraschino baker's twine), thread

Thanks so much for stopping by today!  I hope you'll check out the rest of the samples at the ColourQ blog and share your creation with us this week.

Have a great day!
Related Posts Plugin for WordPress, Blogger...