January 31, 2012

ColourQ #122

This is my third post of the day.  Please scroll down to see my 12 Kits of Christmas post and my card for Cath!


Happy Tuesday, ColourQ fans!  Are you ready for a "love"ly color combo?  I couldn't resist inking up some sweet little hearts with this palette:


I stamped a grid of polka dotted hearts using a darling little stamp from DeNami Designs in Regal Rose on a white cardstock panel.

Next I cut a strip of black cardstock and heat embossed white hearts across it.  I stamped the heart one more time in Versarmark onto red cardstock and added a "love" sentiment, also from DeNami, then cut it out by hand and attached it with foam tape.

I finished off the card with some Maraschino baker's twine and one of PTI's Tiny Tags.

FYI:  This cutie measures just 4 1/4 inches square, if you're curious about the scale of the stamps.

Cardstock:  Papertrey Ink (Kraft, True Black, Pure Poppy, White)
Stamps:  DeNami Designs (Hearts Petit Fours stamp set, Heartfelt Greetings Petit Fours stamp set), Papertrey Ink (Tiny Tags)
Ink:  Stampin' Up! (Regal Rose), Inkadinkadoo (Black), Tsukineko (Versamark)
Tools:  Papertrey Ink (tag die)
Accessories:  The Twinery (baker's twine), Filigree (embossing powder)

Won't you join us this week?  I can't wait to see your designs in the ColourQ gallery!

Thanks for stopping by again today!  Have a good one!

The 12 Kits of Christmas--Month One

This is my second post of the day.  Please scroll down to see my card for the Blog Hop for Cath!

Edited to add:  Renee is generously offering up some blog candy to one lucky commenter!  Be sure to see her post for more details, and leave comments on all of the designers' blogs to increase your chances of winning!


Hello friends!  I'm back with my second post of the day, and it's another special one!  I'm so excited to introduce you to a new group that I'm delighted to be a part of, The 12 Kits of Christmas.

The idea behind this monthly challenge came from fellow stampers Renee Lynch and Suzanne Dahlberg, who were looking for a way to get their holiday cards done in a more timely fashion.  They invited 10 more crafters to join them in a monthly challenge to do just that.

Each month one of us sends a kit of holiday card-making supplies to the rest of the participants.  At the end of the month, we will all post our creations on our blogs.  Hopefully you'll be inspired to get some of your Christmas cards done throughout the year, or even adapt the designs to use for other occasions.

This month's kit was provided by Renee Lynch, and let me just say that she was incredibly generous with the supplies!  Our kits were jam-packed with die cuts, stamped sentiments, patterned papers, gorgeous ribbons, buttons, bells, and pearls.  Here's a peek at the contents:


I had so much fun working with these goodies!  I have 5 cards to share with you today.

I was first drawn to the amazing die cut windows and wanted to make a couple of cards using those.  The first one has a view from outside looking in at a Christmas tree.  I used lots of foam tape to pop up the layers and added some scored lines on the card base to resemble the siding on a house.

Cardstock:  Papertrey Ink (Pure Poppy, Simply Chartreuse, Smokey Shadow, White)
Stamp:  Waltzingmouse (2011 Holiday Ornaments)
Tools:  Poppystamps (Grand Madison Window die), Cheery Lynn (O Tannenbaum Christmas Tree die), Papertrey Ink (Double Ended Banner die, Diamonds impression plate), scoring board
Accessories:  Ranger (silver Stickles), Michaels (silver pearls)

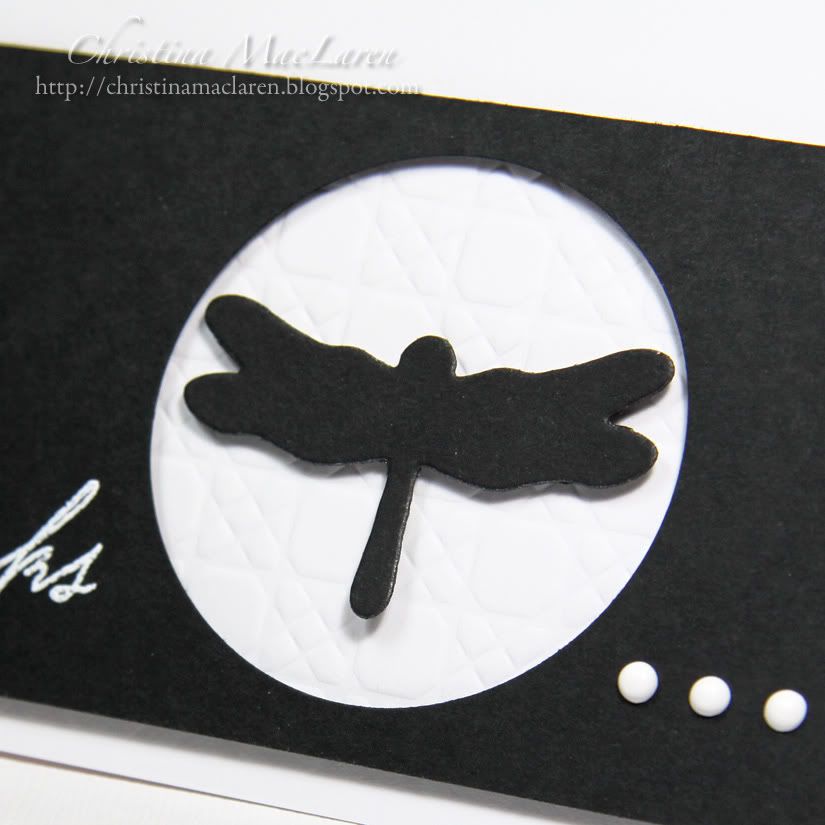
For the next card, I wanted to show a scene looking out of a window.  It uses die cuts from PTI's In the Meadow, embossed cardstock to resemble snow, and some gorgeous baker's twine.

Cardstock:  Papertrey Ink (Spring Moss, Pure Poppy, True Black, White)
Stamp: Waltzingmouse (Compliments of the Season)
Tools:  Poppystamps (Grand Madison Window die), Papertrey Ink (In the Meadow dies, Woodgrain impression plate), McGill (tag punch), polka dot embossing folder
Accessories:  baker's twine

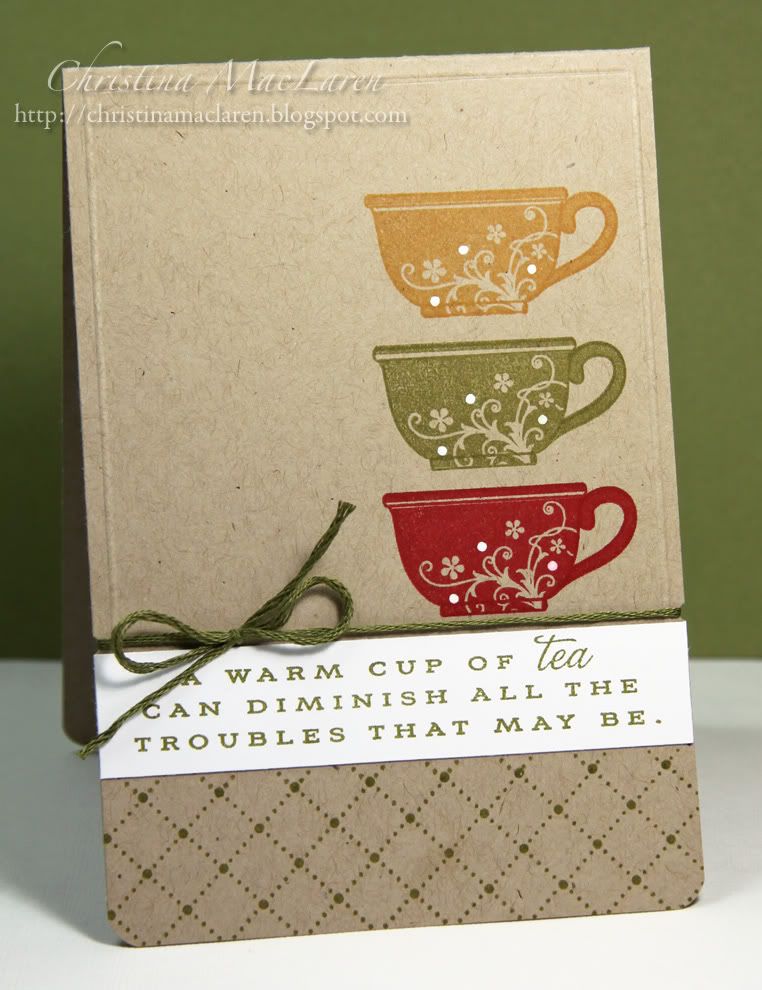
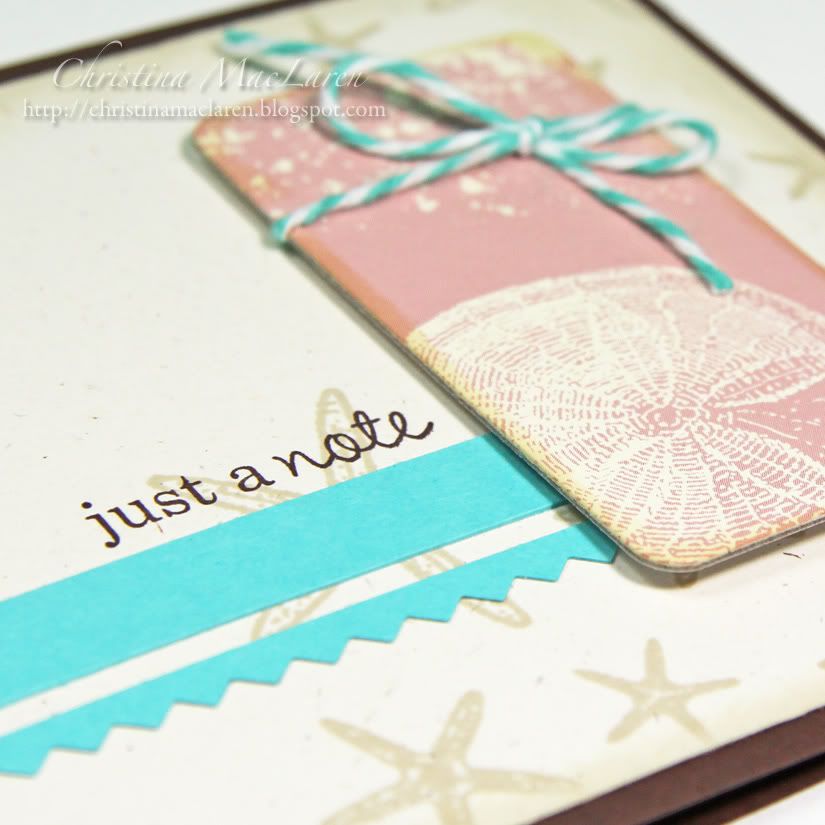
My next card uses some of the patterned paper Renee provided, from October Afternoon's Holiday Style.  I couldn't resist using the sentiment from Waltzingmouse's Compliments of the Season with some silver jingle bells.

Cardstock:  Papertrey Ink (True Black, Pure Poppy, White)
Patterned paper:  October Afternoon (Holiday Style)
Stamp:  Waltzingmouse (Compliments of the Season)
Ink:  Papertrey Ink (Chamomile Tea Dye), black
Tools:  Papertrey Ink (Mat Stack 4 die, Sheet Music impression plate, Holiday Photo Finishers die), Spellbinders (oval die), corner rounder
Accessories:  ivory seam binding, silver bells

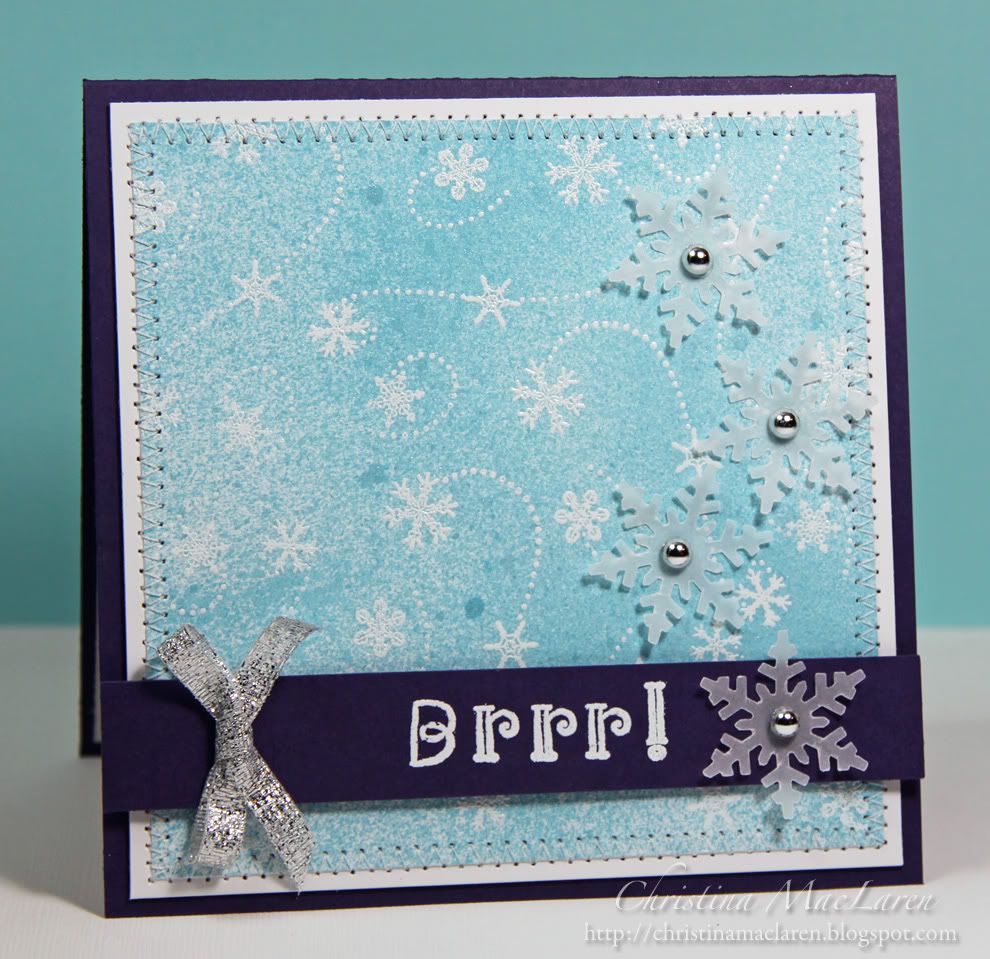
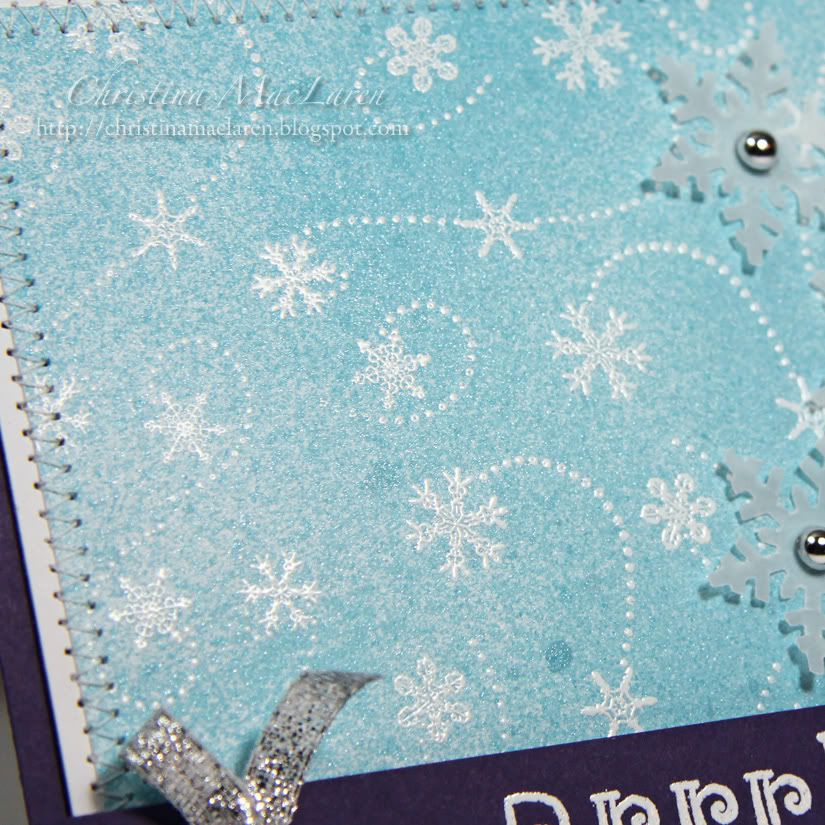
I wanted to make a really simple card to highlight the horse-drawn sleigh from PTI's In the Meadow, so I layered the snow banks with foam tape on an Aqua Mist card base, added a sentiment banner, and adhered two die cut stars from Memory Box's Star of Wonder.

Cardstock:  Papertrey Ink (Aqua Mist, True Black, White)
Stamp:  Waltzingmouse (2011 Holiday Ornaments)
Tools:  Papertrey Ink (In the Meadow dies, Double Ended Banner die), Memory Box (Star of Wonder die)
Accessories:  red pearls

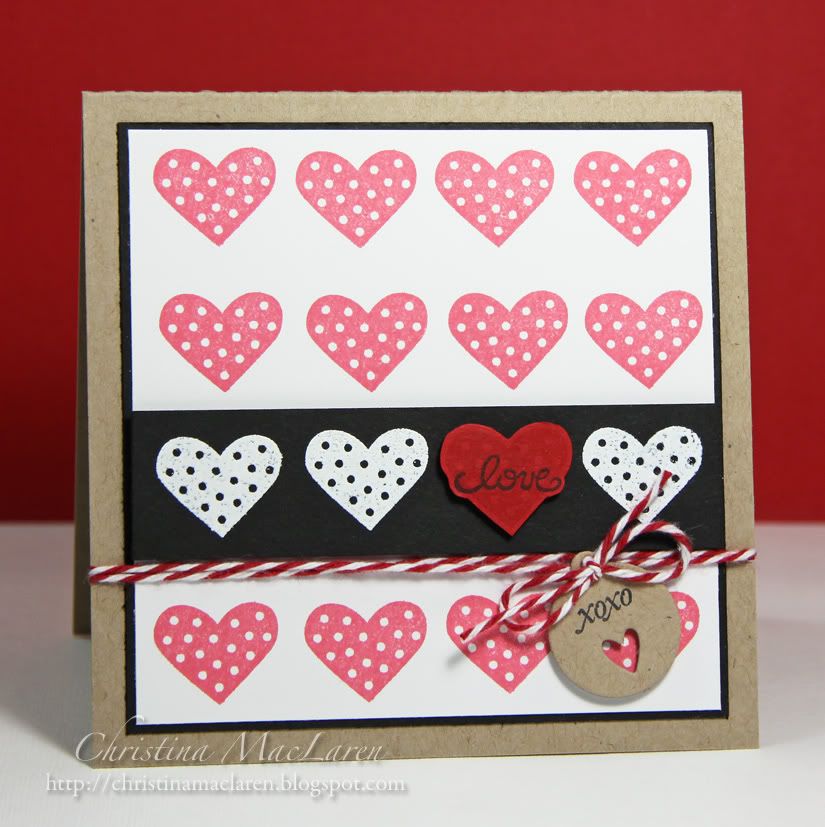
For the last card, I decided to CASE a design from Paper Crafts' Holiday Cards & More Vol. 6.  Right next to my card in this issue (on page 41), Veronica Zalis had a beautiful card made from patterned paper strips on a kraft base, and I just loved the mix and match look.  I added some red seam binding and a wooden button to my version.

Cardstock:  Papertrey Ink (Kraft, White0
Patterned paper:  October Afternoon (Holiday Style)
Stamp:  Waltzingmouse (Say it with Style)
Ink:  Papertrey Ink (Chamomile Tea Dye), red
Tools:  EK Success (border punch)
Accessories:  wood button, red seam binding, DMC floss, thread

Ready for more?  Here are links to the rest of the 12 Kits of Christmas team:


Suzanne:  The Card Yard
Jeanne: AKeptLife

I can't wait to hop around and see what they've made!

Thanks for visiting!  I'll be back later today with a new ColourQ palette!

For Cath (sans CHA) with Love Blog Hop, CAS-ual Fridays #37, & CR84FN47


Hello, crafty peeps!  Are you ready for a mega-fun blog hop in honor of Miss Moxie Fab herself, Cath Edvalson?

The idea for this hop came from talented crafters Lorena Canto and Virginia Lu, and there are dozens of amazing designers participating!  Cath recently shared the news on the Moxie Fab World blog that she would be unable to attend CHA this year due to severe pain in her shoulder.  To wish her a speedy recovery and thank her for keeping us up-to-date on all things trendy, we're sending her well wishes with some creations just for her!


I was also inspired by the sketch this week at CAS-ual Fridays and the sweet colors at CR84FN.

One of my go-to sets lately has been PTI's Faux Ribbon.  I used it on this card to stamp rows of circles in Real Red, Regal Rose, and Pool Party.  I added a Pure Poppy felt flower with a button center and a Tiny Tag stamped with the sentiment "feel better".

The eyelet border is CASEd from my friend Karen Baker's design for CAS-ual Fridays this week--I knew it would be perfect with these circles.

The Aqua Mist panel is debossed with PTI's argyle impression plate, which I thought was a fun contrast to the circular elements.


All supplies from Papertrey Ink unless noted
Cardstock:  Aqua Mist, White
Stamps:  Faux Ribbon, Tiny Tags
Ink:  Real Red, Regal Rose, Pool Party (Stampin' Up!), Versamark (Tsukineko)
Tools:  Argyle impression plate, Tiny Tags die, Beautiful Blooms dies, Eyelet border die
Accessories:  Pure Poppy felt, Aqua Mist button, DMC floss, thread

To see the rest of the cards on the hop, all you need to do is stop by Lorena Canto's or Virginia Lu's blog for links to the participants.

We hope you're back in tip-top shape very soon, Cath!  Best wishes to you for a speedy recovery!

January 28, 2012

Card Patterns sketch #150


Ah, the weekend!  I've been enjoying a lazy morning with some quality time in my crafty space.  I hope your weekend is off to a great start, too!

If you need some inspiration to jump-start your next crafting session, look no further than this week's sketch at Card Patterns!  It features a fun diamond shaped panel, but you'll have to check out the samples on the Card Patterns blog to see just some of the ways this element can be interpreted.  I hope you'll share your creative ideas with us this week as well!


As an added bonus this week, one lucky participant will receive a $25 shopping spree from our generous sponsor, My Favorite Things.  Who wouldn't love that?

Now I must admit, I struggled with this sketch.  I was thrilled to have the opportunity to choose a stamp set from My Favorite Things to work with this week, but I had a hard time deciding how I would make it work with the sketch.  The set I chose was the Die-Namics Polka Dot Greetings Die and Stamp Set Duo, which has the cutest sentiments and fonts and a fun label shape.

I finally decided to use the sentiment "I just can't thank you enough".  I wanted to stamp the "thank you" part of the sentiment repeatedly on the background, so I actually cut the stamp apart, which is something I do occasionally if selective inking isn't an option.  I stamped a piece of Early Espresso cardstock with the words in Versamark, then heat embossed them with clear powder.

The diamond shape is one of Spellbinders Labels Three Nesties, cut from Vintage Cream cardstock and stamped with the full sentiment.  

I punched a border strip from Very Vanilla DSP and added a wide strip of Rose Red grosgrain ribbon tied at the side.  

Cardstock:  Stampin' Up! (Rose Red, Early Espresso), Papertrey Ink (Vintage Cream)
Patterned paper:  Stampin' Up! (Neutrals DSP)
Stamps:  My Favorite Things (Die-Namics Polka Dot Greetings Die & Stamp Set Duo)
Ink:  Stampin' Up! (Early Espresso), Tsukineko (Versamark)
Tools:  Spellbinders (Labels Three), Fiskars (border punch)
Accessories:  Stampin' Up! (ribbon), Michaels (pearls), Stampendous (clear embossing powder), DMC floss

You will definitely be seeing more of this stamp set and its coordinating die soon!  Thanks, MFT!

I hope you'll play along with the sketch this week.  Thanks for stopping by today!

January 25, 2012

CAS-ual Fridays #36


Hello there!  Just a quick post tonight before the challenge ends at CAS-ual Fridays.  What a fun theme this week--use only black and white in celebration of Penguin Awareness Day!


Have you checked out the gallery for this week's challenge?  Holy cow!  There were over 230 entries when I last visited, and there are so many amazing creations.  But hey, I finished this card so I might as well throw my hat in the ring!

I wanted to do some sort of silhouette in a negative space, so I pulled out PTI's Happy Trails and die cut the dragonfly from black cardstock.  I punched a 2 inch circle in a wide strip of black cardstock to make a window, then stamped and heat embossed the sentiment with white embossing powder.  I balanced it out with three dots of white Enamel Accents on the other side of the frame.

The space behind the silhouette was looking a little plain, so I added a piece of white cardstock debossed with the Cane Print impression plate.

All supplies from Papertrey Ink unless noted
Cardstock:  True Black, White
Stamp:  Happy Trails
Ink:  Versamark (Tsukineko)
Tools:  Cane Print impression plate, Happy Trails die, circle punch (Marvy Uchida)
Accessories:  Enamel Accents (Ranger), white embossing powder (Filigree)

Thanks for joining me tonight!  I'll be back soon with a new CASE Study challenge!

January 24, 2012

ColourQ #121


Hello, friends!  Glad you could join me today for a new challenge at the ColourQ!    I can't wait to see your creations with this color combo:


I had a few too many things on my mind when making my card, so I'm not totally happy with the way it turned out, but sometimes that's just how it goes.  The teacups seem to be floating in space and need something to ground them, but my brain was not working well enough to find a solution, so this is how it will stay for now!

I stamped the teacups in Real Red, Old Olive, and More Mustard on a kraft card base that is only 3 3/4 inches wide.  I stamped the bottom using PTI's Background Basics:  Tin Types, then stamped a sentiment from Tea for Two on a white strip of cardstock.

To finish the card, I added some white dots to the cups with a gel pen, scored a frame around the edge, and tied some olive floss around the card front.  I suggest cutting a small notch in the edge of the card to keep your floss in place, as you can see in the photo below.

Cardstock:  Papertrey Ink (Kraft, White)
Stamps:  Papertrey Ink (Tea for Two and Additions, Background Basics:  Tin Types)
Ink:  Stampin' Up! (Old Olive, Real Red, More Mustard), white gel pen
Tools:  scoring board, hole punch, corner rounder
Accessories:  DMC floss

Please visit the ColourQ blog to see the rest of the team's samples!

Thanks for visiting today!

January 23, 2012

Moxie Fab World Map to Your Heart Challenge


Hi there, crafty people!  I'm so happy I had a chance to squeeze in a challenge last night.  This one is ending tonight over in the Moxie Fab World, so you'll have to run if you still want to enter!

The Map to Your Heart challenge asks us to incorporate a map on our project.  I didn't have any real maps laying around, but I did have some journal cards from October Afternoon's Road Map collection that fit the bill.

I took one of those journal cards and used a frame die to cut out a space at the bottom.  In the negative space, I stamped a globe and a sentiment from PTI's Masculine Motifs.  The globe was stamped with Versamark and heat embossed with clear powder.

I die cut a tiny heart from another journal card with a plaid print and added some hand stitching around the edge of the map before adhering those elements with pop dots.  

Cardstock:  Papertrey Ink (Aqua Mist)
Patterned paper:  October Afternoon (Road Map collection)
Stamps:  Papertrey Ink (Masculine Motifs)
Ink:  Stampin' Up! (Real Red), Tsukineko (Versamark)
Tools:  Papertrey Ink (Fillable Frames #11 die, Heart Prints die, Linen & Canvas impression plate), corner rounder
Accessories:  Stampendous (clear embossing powder), DMC floss

Pretty simple, but I like how it turned out.

Thanks for visiting today!  I hope your week is off to a great start!

January 21, 2012

Card Patterns sketch #149


Hello!  I'm so glad it's the weekend, how about you?  Even more reason to celebrate:  it's time for a new sketch at Card Patterns!


I rarely make a circular card, but it's always a fun change of pace when I do.  I had WPlus9's pocket dies on my desk when I went to work on this card, so I knew immediately that I wanted to use them.

I first cut a circle card base from Rustic White cardstock with my largest circle Nestie.  I punched a scalloped border from Wisteria Wonder cardstock and layered a strip of Rustic White on top.  The strip is stamped with stitches from PTI's Faux Ribbon and a sentiment from Tag-its #3.

I stamped the sun image from WPlus9's A Pocketful, then the stitched border on the kraft pocket.  After attaching the pocket with foam adhesive, I wrapped yellow baker's twine around the card front and pocket.

The last step was cutting a Wisteria frame with my Spellbinders Nesties and attaching it to the card base.

Cardstock:  Stampin' Up! (Wisteria Wonder), Papertrey Ink (Rustic White, Kraft)
Stamps:  WPlus9 Design Studio (A Pocketful), Papertrey Ink (Tag-its #3, Faux Ribbon)
Ink:  Stampin' Up! (Chocolate Chip, Daffodil Delight)
Tools:  Spellbinders (circle, scalloped circle dies), WPlus9 Design Studio (pocket die), Fiskars (border punch), Papertrey Ink (Linen & Canvas impression plate)
Accessories:  The Twinery (Lemondrop baker's twine)

I love the pop of bright yellow on this card!  It reminds me of spring, even on a snowy day like today.

Be sure to hop over to the Card Patterns blog to see the rest of the Design Team samples and link up your creation!

Thanks for visiting today, friends!  Hope your weekend is off to a great start!

January 17, 2012

ColourQ #120 & CAS-ual Fridays #35


Hi there!  So glad you stopped by today.  It's time for a new color palette at the ColourQ blog, and this one was definitely a challenge for me!  I turned to the current challenge at CAS-ual Fridays to use scallops, and things finally started coming together.


I first stamped a scalloped border using PTI's Boy Basics:  Simple Circles in Island Indigo, Rich Razzleberry, and Wisteria Wonder.  I added one more circle with a star center near the top before debossing the top half of the panel with the Linen & Canvas impression plate.

You've seen me use a star frame a few times recently, but I love it and thought it added a nice balance to the top of the card.

For the sentiment, I heat embossed the word "congrats" in white using PTI's Outline Alphabet on Bravo Burgundy cardstock, then popped the strip up with foam dots.

Cardstock:  Stampin' Up! (Bravo Burgundy, Island Indigo), Papertrey Ink (white)
Stamps:  Papertrey Ink (Boy Basics:  Simple Circles, Outline Alphabet)
Ink:  Stampin' Up! (Island Indigo, Rich Razzleberry, Wisteria Wonder), Tsukineko (Versamark)
Tools:  Papertrey Ink (Linen & Canvas impression plate, star dies)
Accessories:  Filigree (white embossing powder)

 So, will you play along this week?  I can't wait to see the gallery--it gets better every week!

Thanks again for your visit!  Have a good one!

January 14, 2012

Card Patterns sketch #148--Sponsored by Clear Dollar Stamps


Hello friends!  I hope you're having a great weekend so far.  I'm back to share a new Card Patterns sketch with you, and I really love this one!


We were provided with some wonderful digital images from Clear Dollar Stamps to use on our cards this week.  I chose a pretty stained glass lamp and sentiment from the set called Let Your Light Shine.

I printed the lamp onto white cardstock, colored it with Copics, then cut it out with a circle Nestie.  I added a yellow scalloped circle mat to add a "glow" around the lamp and some blue gems to reflect the natural light.

For the background panels, I debossed strips of Pool Party cardstock using both sides of PTI's Diamonds impression plate, then alternated the patterns on the card base and stitched them in place.  

The sentiment is one of several included in this digital stamp set.  I printed it onto white cardstock, trimmed it and notched one end, and attached it to the card base.  

In place of the scalloped border on the left side of the sketch, I let the scalloped circle extend off the side.

Cardstock:  Stampin' Up! (Pool Party, Daffodil Delight), Papertrey Ink (Hawaiian Shores, white)
Digital Stamps:  (Clear Dollar Stamps)
Ink:  Copic markers
Tools:  Spellbinders (circle, scalloped circle dies), Papertrey Ink (Diamonds impression plate)
Accessories:  Me & My Big Ideas (gems), thread

You can find all of the DT samples and details about this week's challenge and sponsor on the Card Patterns blog!

Thanks for visiting today!

January 13, 2012

For a star teacher


Hooray for Friday!  I can't wait to get my weekend started, how about you?

I have a card to share with you today that I submitted to the latest Paper Crafts call, but it wasn't picked up.  No worries, though, because I really love how this turned out and can't wait to give it to my daughter's teacher for all of her hard work!

I started with a Harvest Gold card base which I stamped repeatedly with the pencil from PTI's Happy Trails.  I colored each of the erasers with a Copic marker, then stamped the sentiment above the border.

I used PTI's star dies to make a star frame from Berry Sorbet cardstock, added a bit of turquoise baker's twine, and popped it up with foam tape, trimming the right edge flush with the card base.

For inside of the frame, I die cut another star from Harvest Gold cardstock, stamped it with ledger lines from Scrapbook Series:  Library Ledger in Versamark, and heat embossed the lines with clear powder.  The tiny sentiment was stamped by selectively inking two different sentiments from Tiny Tags.


All supplies from Papertrey Ink unless noted
Cardstock:  Harvest Gold, Berry Sorbet
Stamps:  Happy Trails, Scrapbook Series:  Library Ledger, Tiny Tags
Ink:  Black (Inkadinkadoo), Versamark (Tsukineko), Copic marker
Tools:  star dies
Accessories:  clear embossing powder (Stampendous), Caribbean baker's twine (The Twinery)

I hope you're having a fantastic Friday, even if it is the 13th!  Thanks for stopping by!

January 11, 2012

CAS-ual Fridays #34


Hello, friends!  Thanks for stopping by.  My crafty space was calling me this afternoon, as the last few days have been emotionally exhausting.  I won't bore you with the details, but this year has not gotten off to the best start for me, and I'm feeling like I need another vacation!

Now that I think about it, maybe that's what led to the soft-hued, beach-inspired creation I made for this week's CAS-ual Fridays challenge.  The challenge this week was to use chipboard, and this rosy piece with a sand dollar was calling to me from my stash.


I started by stamping the starfish from WPlus9's Guiding Light using tea dye ink on a Rustic Cream panel.  I inked the edges, rounded the corners, and adhered it to a Dark Chocolate card base.

I cut two strips of Hawaiian Shores cardstock, trimming one with my pinking shears, and attached them 1/3 of the way up from the bottom.  These help to ground the sentiment, from PTI's Ribbon Tails, and the chipboard piece.

I inked the edges of the chipboard and wrapped a bit of baker's twine around the top before attaching it with foam adhesive.

Cardstock:  Papertrey Ink (Rustic Cream, Hawaiian Shores, Dark Chocolate)
Stamps:  WPlus9 Design Studio (Guiding Light), Papertrey Ink (Ribbon Tails)
Ink:  Papertrey Ink (Tea Dye duo), Stampin' Up! (Chocolate Chip)
Tools:  Fiskars (pinking shears), corner rounder
Accessories:  Me & My Big Ideas (chipboard), The Twinery (Caribbean baker's twine)

I actually started this card yesterday, with the sketch already in my head, and had to walk away from it because it just wasn't working.  I decided to try to salvage it this afternoon, and I'm glad I did.  I've found that the only way for me to break out of a creative slump is to just keep creating, even if things don't turn out quite as I'd hoped.

Thanks again for visiting me today!  Don't forget to stop by tomorrow for a new CASE Study challenge!

January 10, 2012

ColourQ #119


Hello!  Is your week off to a good start?  I have to admit, I'm having a hard time getting back in the swing of things after the Christmas break.  Every couple of months or so I just get so overwhelmed by everything that needs to be done, with no time to do any of it.  

Luckily for me, this week's new color combo at the ColourQ challenge gave me a chance to forget about all of my responsibilities for a while and just play with paper.  I'm loving the color palette this week!


And, we have an extra special treat for you this week as we are introducing a new member of the Royal Court Design Team, the immensely talented and super sweet Silke Ledlow!  I've had the pleasure of designing with Silke before, and I just know she's going to knock our socks off every week.  Be sure to stop by her blog, My Life, and give her a warm welcome!

For my card this week, I had to sub Basic Gray for Going Gray, and the baker's twine is closer to Tangerine than Pumpkin, but it works.

I managed to CASE my own ColourQ card from 2 weeks ago without even realizing it!  I stamped a sentiment from PTI's Faux Ribbon onto the white panel, then debossed it with the Polka Dot impression plate and rounded the top corners.

I added some striped Basic Gray paper at the bottom and layered an eyelet border along the top edge.  For just a pop of orange, I tied Mandarin baker's twine across the border.  Finally, I added a trio of pink hearts cut with PTI's heart dies and mounted the whole panel onto a Raspberry Fizz card base.

Cardstock:  Papertrey Ink (Raspberry Fizz, white), Stampin' Up! (Basic Gray, Pretty in Pink)
Patterned paper:  Stampin' Up! (Neutrals paper pack)
Stamp:  Papertrey Ink (Faux Ribbon)
Ink:  Stampin' Up! (Melon Mambo)
Tools:  Papertrey Ink (heart dies, eyelet border die, Polka Dot impression plate), corner rounder
Accessories:  The Twinery (Mandarin baker's twine)

I can't wait to see all of the creations with these colors!  I hope you'll play along, too.

Thanks for your visit today, friends!  Have a great Tuesday!

January 7, 2012

Card Patterns sketch #147--Sponsored by DRS Designs


Hello, friends!  Thanks so much for all of our wonderful comments and congratulations over the last few days.  You really make a girl feel special.  *grin*

I'm here to share my debut creation as a Design Team member for Card Patterns, and I tried to go outside my comfort zone with this one.  Our sponsor this week is DRS Designs, and they generously provided rubber stamps for the DT to use on their cards.

Here is this week's sketch:


I chose to use a beautiful little stamp called Swirling Snowflakes.  Those tiny flakes are wonderfully detailed.  I decided to create a background by spraying white cardstock with turquoise glimmer mist.  I then stamped and heat embossed the snowflakes repeatedly across the panel.  It's really pretty and shimmery in person.

The panel was stitched to a white cardstock mat and adhered to a Royal Velvet card base.  For the sentiment, I used Doodlebug Alphabet stamps to heat emboss "Brrr!" on a strip of purple cardstock, then tied some silver ribbon around the end.  

Finally, I punched four snowflakes from vellum, added silver pearls to the centers, and adhered them to the card.

Cardstock:  Papertrey Ink (Royal Velvet, white), vellum
Stamps:  DRS Designs (Swirling Snowflakes), Hampton Art (Doodlebug Alphabet)
Ink:  Versamark, Tattered Angels (Peacock)
Tools:  Martha Stewart Crafts (snowflake punch)
Accessories:  Filigree (embossing powder), Michaels (silver pearls), silver ribbon, thread

I forgot to take a picture of it, but the inside of the card reads "Let's snuggle!"  If it ever snows here, I might give it to my hubby.

I'd love to see your take on the sketch this week!  Be sure to drop by the Card Patterns blog to be inspired by the rest of the Design Team and get all the details on this week's challenge.

Thanks for stopping by today!

January 6, 2012

Did you see?

I'm joining the Design Team at Card Patterns !  Check out the post over on the Card Patterns challenge blog to see the rest of my new teamies, and check back tomorrow for the new sketch.

It's going to be a fun start to the new year!

January 3, 2012

ColourQ #118


Hey, strangers!  As you read this I will be making my way to Ohio to visit friends, then flying home to Boston on Wednesday.  Our visit with my family has been much too short, but we've enjoyed every minute.  I hope you're all having a great start to the New Year!

Are you ready for a new ColourQ challenge?  Check out the cute purse that inspired this week's color palette:


I welcomed the chance to make a card with some fresh, spring-like colors.  This was the first time I'd inked up WPlus9's A Pocketful stamp set, and it is so darn cute!  I cut the pocket from Pool Party cardstock and added texture with PTI's Linen & Canvas impression plate.

The bunch of flowers was stamped twice to fill the entire pocket.  I added some scattered red blooms and filled the flower centers with a clear Spica glitter pen.

To add a "stitched" border, I simply inked up the top edge of the pocket stamp with Pool Party ink and added it along the top of the scalloped border.

Cardstock:  Stampin' Up! (Pool Party, Cherry Cobbler), Papertrey Ink (white)
Stamps:  WPlus9 Design Studio (A Pocketful)
Ink:  Stampin' Up! (Pool Party, Pear Pizzazz), Clearsnap (Chianti, Papaya Cream)
Tools:  WPlus9 Design Studio (pocket die), Papertrey Ink (Linen & Canvas impression plate), Fiskars (border punch), corner rounder
Accessories:  Spica glitter pen

I hope you'll play along with the ColourQ palette this week!  Thanks so much for stopping by!
Related Posts Plugin for WordPress, Blogger...