December 31, 2010

Happy New Year!


Hello friends!  I just wanted to pop in and wish you all a very Happy New Year!  I also promised to share a set of thank you cards that I made for my daughter's Kindergarten teacher.  I kept them very clean and simple, but I love the way they turned out.  There are two different styles in three colors, Pure Poppy, Simply Chartreuse, and Hawaiian Shores.  Both use the Mat Stack 1 Collection stamps and the Background Basics:  Diamonds impression plate.

Cardstock:  Papertrey Ink (white)
Stamps:  Papertrey Ink (Mat Stack 1 Collection)
Ink:  Clearsnap (Cranberry, Moss Green), Papertrey Ink (Hawaiian Shores), Inkadinkadoo (Black)
Tools:  Papertrey Ink (Background Basics:  Diamonds impression plate), Martha Stewart (scoring board), We R Memory Keepers (Corner Chomper)
Accessories:  Stampendous (clear embossing powder)

To make these, I dry embossed the diamonds at the bottom of each card front, then added two scored lines.  I stamped the label and heat embossed with clear powder, then added the sentiment in black.

To package the cards, I repurposed a clear plastic box from one of my PTI stamp sets.  I simply tied some Hawaiian Shores dotty ribbon around it and added a tag.


It's a little hard to see, but the tag is stamped with various holiday sentiments, as well as Versamark stamped snowflakes that are heat embossed with clear glitter embossing powder.

Cardstock:  Papertrey Ink (Hawaiian Shores, white)
Stamps:  Papertrey Ink (Signature Christmas, Peace Be Still, Mega Mixed Messages), Waltzingmouse Stamps (Teeny Trees), WPlus9 (Poinsettia Patterns)
Ink:  Papertrey Ink (Hawaiian Shores), Versamark
Tools:  Spellbinders (Create a Flake One and Two dies), Papertrey Ink (Tag Sale 1 die)
Accessories:  Papertrey Ink (button, ribbon), Jo-Ann (glitter embossing powder), The Twinery (baker's twine), DMC floss

That's all for tonight, but I hope you all have a safe and happy New Year's celebration!  Thanks for stopping by, and I'll see you in 2011!

December 30, 2010

Marshmallow treats


Hi there!  I'm back, as promised, with a sweet treat to share!  We are currently visiting my family in Indiana, but I have a few projects to share while I'm away from home.  Today I thought I'd show you a cute and easy treat I made with my kids to take to a Christmas Eve party.  

I don't remember where I saw the idea for the marshmallows, but they are incredibly easy and fun to make.  First you stick a jumbo marshmallow onto the end of a paper lollipop stick.  I got my sticks at Michaels.  Dip the top of the marshmallow into melted chocolate, then into a small bowl of crushed mints (candy canes would work well, too).  Place the marshmallow onto a cookie sheet covered with wax paper to cool.  Once all of the marshmallows are coated, you can pop the whole cookie sheet into the fridge to harden the chocolate faster.


Patterned paper:  American Crafts (Jolly collection)
Cardstock:  Bazzill (Sea Salt)
Tools:  EK Success (border punch)
Accessories:  Papertrey Ink (Aqua Mist satin ribbon), Michaels (clear paint can), Wilton (lollipop sticks, treat bags with ties)
Other:  Wilton (Dark Cocoa Candy Melts), marshmallows, peppermint candies

I bought clear plastic treat bags with silver twist ties to individually wrap each marshmallow.  Then I popped them into a medium-sized plastic paint can that I had decorated with some patterned paper, a punched border, and ribbon.

Thanks so much for stopping by today!  I'll have a simple set of cards to share tomorrow!  Until then, have a great day!

December 28, 2010

ColourQ #65


Hello there, friends!  It has been quiet here on the blog lately, but I hope to be a little more active again in the New Year.  Today we spent the better part of the afternoon shoveling after the East coast blizzard, then the kids had fun sledding down the hill in our yard.  It was good to not have to go anywhere!  I hope those of you on this coast endured the storm (and the shoveling!) without any major problems.

Tonight I will be flying out to the Midwest to visit family for the holidays, but I will have some posts to share while I'm out of town.  For today, I have the latest ColourQ challenge to share with you!  Check out this sophisticated palette:


I'm loving those gorgeous felt flowers in the inspiration photo!  But this was a challenging week for me, to be sure, especially the combination of vanilla and white, plus black, gray, and kraft.  Okay, so pretty much the whole thing!  But I did come up with something that makes me happy, and it looks even better IRL than what the pictures show.

I used the faux letterpress technique, tapping my Old Olive ink pad directly onto PTI's Diamond impression plate before running it through my Big Shot with Vintage Cream cardstock.  Every time I use this technique I am reminded of the fact that I need to get a brayer, so that the ink will go on more smoothly.  But I kind of like the textured, uneven look it gives to the background.

The label die and stamp are PTI's Mat Stack 1, and the sentiment is from Tea for Two Additions (a Christmas gift from my dear hubby, my favorite tea-drinking partner!).

Cardstock:  Papertrey Ink (Vintage Cream, True Black), Stampin' Up! (Old Olive), Bazzill (kraft)
Stamps:  Papertrey Ink (Mat Stack 1 Collection, Tea for Two Additions)
Ink:  Stampin' Up! (Old Olive), Inkadinkadoo (Black)
Tools:  Papertrey Ink (Mat Stack 1 die, Background Basics:  Diamonds impression plate)
Accessories:  Michaels (lace trim), Stampin' Up! (Basic Gray ribbon), thread

I can't wait to see what everyone comes up with this week!  This is one of those color combos that can go in so many directions, as you'll see from the rest of the Royal Court Design Team.  Be sure to hop over to the ColourQ blog to check out the samples and post a link to your creation!

Thanks for stopping by today!  I'll be back with a "sweet" project in a day or two!  Have a great day!

December 26, 2010

Curtain Call Act 62


Good morning, friends!  For those of you who celebrated Christmas yesterday, I hope it was wonderful!  I've had a fabulous last few days at home baking, wrapping, and celebrating the holiday with family.  And I can't forget to mention my amazing hubby, who enabled my crafting this year with some new stamps and a Corner Chomper!  I can't wait to play with my new toys.  Were there any surprises for you under the tree this year?

The last week has flown by so quickly, it's hard to believe it's time for another Curtain Call Color Challenge!  I am so ready to make some non-holiday cards, how about you?  Stacey has chosen one of my absolute favorite combos this week.  These colors are just so serene, perfect for the calm after the storm of the holiday craziness, don't you think?


Okay, I'm just now realizing that I had written down Vanilla instead of White for this challenge, so just increase the brightness on your computer screen and it will almost look like I used white, 'kay?  

I just love layering PTI's two butterfly dies, plus a punched Martha Stewart one.  The larger green one is debossed with PTI's Diamond impression plate for a little more depth.  The label stamp is from the Mat Stack 1 Collection.  Oh my, do I love the new Mat Stack stamps!  I embellished this one with some pearls, and I used a sentiment from the same set.

Cardstock:  Papertrey Ink (Dark Chocolate, Vintage Cream), Stampin' Up! (Pear Pizzazz, Baja Breeze)
Stamps:  Papertrey Ink (Mat Stack 1 Collection, Background Basics:  Text Style)
Ink:  Papertrey Ink (Dark Chocolate)
Tools:  Papertrey Ink (butterfly dies, Mat Stack 1 die, Woodgrain impression plate, Diamonds, impression plate), Martha Stewart (butterfly punch)
Accessories:  Michaels (pearls)


And Sunday just wouldn't be the same if you didn't stop by and see what the rest of the girls have been up to!

Jean Martin at Stampin' Scrapper
Julie Lacey at Stamps & Taxes
Laurel Seabrook at Seabrook Designs
Makiko Jones at MakInk Studio
Monika Davis at M.A.D. Stamper
Piali Biswas at Touch of Creation
Silke Ledlow at My Life


and December Guest Designer, Maureen Plut at Buttons & Bling.

Be sure to leave them some love!

Don't forget to post your Curtain Call Color Challenge creation using Mr. Linky back at Stacey's Stamping Stage.


Thanks so much for stopping by today!  Have a great Sunday!

December 21, 2010

ColourQ #64


Good morning!  I've been a busy bee trying to finish up some projects (both crafty and otherwise) before Christmas.  How are your preparations coming?  I hope you can find a little bit of time in your week to play with the latest ColourQ challenge!  Just take a look at this sweet color combo:


Mmmmm, makes me want to curl up with a steaming hot mug!  I decided to give you one last holiday card, if you're not sick of them yet!  I've seen these fabulous punched wreaths around blog-land, so I thought I'd give one a try.  I first cut a ring using two circle Nesties, then punched the leaves and glued them to the ring.  Super easy!

The gem colors are a bit hard to see in the photos, but they are a very close match to Real Red, Regal Rose, and Pink Pirouette.  I added a woodgrain debossed panel behind the wreath and a label cut and stamped with PTI's Fillable Frames #10, with a sentiment from Signature Christmas.

Cardstock:  Papertrey Ink (Pure Poppy, white), Stampin' Up! (Pear Pizazz)
Stamps:  Papertrey Ink (Fillable Frames #10, Signature Christmas)
Ink:  Clearsnap (Cranberry)
Tools:  Martha Stewart (leaf punch), Papertrey Ink (woodgrain impression plate, Fillable Frames #10 die), Spellbinders (circle dies)
Accessories:  Papertrey Ink (ribbon), Me & My Big Ideas (rhinestones)

Make sure you stop by the ColourQ blog to see what the rest of the DT has created!  They never disappoint!

Thanks for stopping by today, during a time when I know many of you are overcommitted and rushing to get everything done before the end of another year.  I appreciate each and every one of your visits and comments so very much!!

Have a great Tuesday!

December 19, 2010

Curtain Call Act 61


Hello, folks!  Are you ready for a new color challenge?  I thought so!  This week's Curtain Call Color Challenge is up, and it's a rich combo that would be perfect for a last minute holiday card but would also work beautifully for many other occasions.  I don't need any more Christmas cards myself, so I decided to look forward to Valentine's Day and make a sophisticated, love-themed card.  Here are the colors we're working with this week:


I used WPlus9's Poinsettia Patterns to stamp the background in Bravo Burgundy.  I just received PTI's Mat Stack #1 Collection, so I had to break it in!  I stamped one of the labels onto kraft cardstock and added an Early Espresso mat.  I die cut a Vintage Cream circle and stamped another image and a sentiment from Poinsettia Patterns.

At first I wasn't happy with the symmetry of this design, and I experimented with a few different embellishments in the bottom corner, but nothing worked with the stamped background so I opted to leave it as is.


The Curtain Call Crew has samples to show you today, too, so make sure you stop by to see:

Jean Martin at Stampin' Scrapper
Julie Lacey at Stamps & Taxes
Laurel Seabrook at Seabrook Designs
Makiko Jones at MakInk Studio
Monika Davis at M.A.D. Stamper
Piali Biswas at Touch of Creation
Silke Ledlow at My Life


and December Guest Designer, Maureen Plut at Buttons & Bling.

...then play along with us and post your Curtain Call Color Challenge creation using Mr. Linky back at Stacey's Stamping Stage.

Thanks for visiting, friends!  Have a great one!

December 16, 2010

2010 Christmas Tag


Hello, friends!  Today I thought I'd share with you the tags I will be using on my holiday gifts for extended family and friends.  We travel from Massachusetts to Ohio and Indiana after Christmas, so I pack up all of the presents in an extra suitcase with my gift-wrapping materials.  To make things easier, I decided to use patterned kraft gift bags this year.  This serves two purposes:  first, they fold up flat and take up very little room in the suitcase, and second, they are not glossy and so are recyclable, unlike most wrapping paper and other bags.  Plus, I *heart* kraft!

Here is one of the bags I picked up at Jo-Ann for 60% off a few days ago.  Score!  I got several in different sizes with the same pattern.


I took most of my design elements directly from the bag, including the colors, the tree image, and the swirl in the corner.  I decided to put a place for the recipient's name on the back, and I stamped the year:

Cardstock:  Bazzill (kraft), Papertrey Ink (Pinefeather, Pure Poppy)
Patterned paper:  Papertrey Ink (Distressed Dots)
Stamps:  Papertrey Ink (Background Basic:  Text Style, Fancy Flourishes, Boxes, Bags, & Tags, Mini Scrapbook Series:  Library Ledger), WPlus9 (Poinsettia Patterns), Martha Stewart (Serif Font)
Ink:  Ranger Distress (Tea Dye), Clearsnap (Evergreen)
Tools:  Papertrey Ink (Tag Sale #1 die, Tree die, Woodgrain impression plate), EK Success (circle punch)
Accessories:  Papertrey Ink (buttons, ribbon, twine), DMC floss, thread

Here's what the tag looks like attached to the bag.  I'm wishing I had picked up plain red tissue to stuff inside, but this coordinating tissue was 60% off too!


To make this tag:
1.  Die cut tag from kraft cardstock.  Stamp bottom with text using tea dye ink.  Stamp flourish and numbers in top corner.  Flip tag over to the back and stamp year at the bottom.
2.  Cut a strip of patterned paper, mat with red cardstock, and stitch edges.  Adhere to tag.
3.  Die cut tree from green cardstock and trim edges.  Deboss with woodgrain impression plate.  Embellish with stitched buttons and attach to tag with foam adhesive.
4.  Cut a small strip of kraft cardstock and stamp with sentiment.  Adhere to tag.
5.  Flip tag over to the back.  Cut a strip of patterned paper and adhere at bottom.  Stamp scalloped circle frame on kraft cardstock.  Stamp with the word "To:".  Punch out circle and adhere to tag.
6.  Add ribbon to top of tag and tie with jute twine.

The only thing I might do differently on the rest is to use red twill ribbon, but satin is what I happened to have handy today.

If you're inspired to make a tag or other type of gift packaging, I'd love to see, so leave me a comment with a link and I'll be sure to stop by!  Thanks for visiting today!

December 14, 2010

ColourQ #63 & FTL #120


Hello friends!  I know this is super late, but I just discovered that my ColourQ post for this week was never published!  I know some of you have had this issue with scheduled posts in the past, but this is the first time it has happened to me, so I'll have to keep an eye on it in the future!

Arielle chose a fun and festive color combo this week, and you still have 12 hours or so left to enter if you're up for it!  

I chose to make a New Year's card using the latest sketch at the clean&simple blog.

I don't have SU's Red, Kiwi, or Bermuda, so I subbed PTI's Pure Poppy and Hawaiian Shores and used Clearsnap Moss Green ink.  I stamped the white cardstock with PTI's Distressed Stripes, one of my favorite sets for pulling together several colors in a design.  The snowflakes were cut with Spellbinders' Create a Flake One dies and layered with a Poppy button and baker's twine from The Twinery (I can't get enough of this stuff!).  I inked up part of a longer sentiment from PTI's Signature Christmas to stamp "Happy New Year".

Cardstock:  Papertrey Ink (Hawaiian Shores, white), Stampin' Up! (Chocolate Chip)
Stamps:  Papertrey Ink (Distressed Stripes, Signature Christmas)
Ink:  Papertrey Ink (Dark Chocolate, Hawaiian Shores), Clearsnap (Cranberry, Moss Green)
Tools:  Spellbinders (Create a Flake One dies), EK Success (corner rounder)
Accessories:  Michaels (ribbon), Papertrey Ink (buttons), The Twinery (baker's twine), thread

I hope you enjoy this colorful take on a winter theme!  Remember to hop over to the ColourQ blog to see the rest of the samples from the Royal Court DT and submit your creation.

Thanks for stopping by!

December 13, 2010

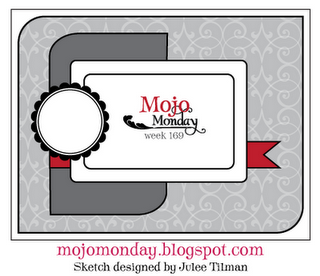
Mojo Monday #169 & The Paper Players #28


Hey there, friends!  I have a card to share for the newest Mojo Monday sketch, and this came at the perfect time for me as I was finishing up a set of cards for a friend and was kind of stuck for ideas.  I paired it up with a fun challenge at The Paper Players to use your favorite color combo.  I have many favorites, but I really love the combo of red, aqua, and rustic white, so that's what I chose to work with.


There are lots of PTI goodies on this one, but I did use a sentiment from Verve!  I love the fonts in the Dream Big set.  The frame is PTI's Fillable Frames #10 and the flower die and stamp are from Beautiful Blooms II.  It's a little hard to see, but the Rustic White background is debossed with the Polka Dots impression plate.

Cardstock:  Papertrey Ink (Pure Poppy, Rustic White)
Patterned paper:  Papertrey Ink (2008 Bitty Dot Basics)
Stamps:  Papertrey Ink (Fillable Frames #10, Beautiful Blooms II)
Ink:  Clearsnap (Cranberry, Seaglass), Papertrey Ink (Chai tea dye), Copic BG13
Tools:  Papertrey Ink (Mat Stack #4 die, Fillable Frames #10 die, Beautiful Blooms die, Polka Dot impression plate), EK Success (corner rounder)
Accessories:  Papertrey Ink (ribbon, button), Queen & Co. (pearls), thread, DMC floss

This is a really great sketch that will be going in my file to use again!  

Thanks for stopping by tonight!  I will be back in a bit with the new ColourQ challenge, so I hope you'll come back soon!  Have a great night!

December 10, 2010

Flourishes Winter White challenge & SSSC #95

 Hi!  Just a super quick post, because I had to be out the door 5 minutes ago!  LOL


Cardstock:  Papertrey Ink (Aqua Mist, white)
Stamps:  Papertrey Ink (Peace Be Still, Signature Christmas)
Ink:  Clearsnap (Frost White, Seaglass)
Tools:  Papertery Ink (Linen & Canvas impression plate, snowflake die), Sizzix (embossing folder), McGill (tag punch)
Accessories:  Papertrey Ink (ribbon), Stampendous (embossing powder), DMC floss

Sorry for the short post!  Have a great evening!

December 9, 2010

Inkspirations sketch #51, Tuesday Trigger, & Caardvarks final challenge


Hello again!  If you missed my earlier post, feel free to scroll down to see my tag for Waltzingmouse and The Color Dare.

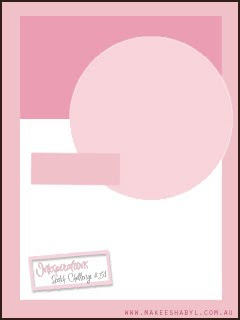
Up next I have a card for a few challenges:  the Inkspirations sketch challenge (my first time to play along with them), the Tuesday Trigger at Moxie Fab World, and the final challenge at Caardvarks to create a monochromatic card.


I was inspired by the Trigger image to use purple (I chose SU's Concord Crush) and add a bit of glitter.  The butterfly was stamped onto PTI's Soft Stone cardstock with Adirondack Eggplant ink then heat embossed with a clear glitter powder.  I used Ranger's Perfect Medium pen in the empty spaces, then brushed on Perfect Pearls powder for even more shimmer.  This is really beautiful in person, if I do say so myself!

Cardstock:  Stampin' Up! (Concord Crush), Papertrey Ink (Soft Stone)
Stamps:  Inkadinkadoo (Garden Delight), Papertrey Ink (A Little Argyle, Mega Mixed Messages)
Ink:  Adirondack (Eggplant), Clearsnap (Antique Pewter)
Tools:  Spellbinders (circle die)
Accessories:  Ranger (Perfect Pearls), Stampendous (glitter embossing powder), ribbon, thread 

I stamped a pattern using A Little Argyle on the bottom half of the Soft Stone cardstock, debossed the top half with the Linen & Canvas impression plate, then stitched around the edges.  I added a couple of loops of white satin ribbon and stamped the sentiment in Antique Pewter ink.

Thanks for taking time to check out both of my posts tonight!  As always, I appreciate each and every one of your comments so much.

Have a great Friday!

WMSC #26 & The Color Dare #88


Hello!  So glad you could stop by, friends!  I had a bit of extra crafty time tonight to squeeze in a tag for the Waltzingmouse Sketch Challenge.  I also tried to stick to the challenge colors at The Color Dare, which are Riding Hood Red, Old Olive, and any neutral.  I realized I am out of Riding Hood Red, so I substituted Pure Poppy.

I started with a scrap of patterned paper from Colorbok that has been in my stash for quite a while.  I went through about 5 different options for embellishments before I remembered these snowflake stickers from the $1 bin at Michaels.  The embossing folder is by Sizzix, and the only stamp I used is the word "to" on the mini tag from Waltzingmouse Stamps' Teeny Trees.

Cardstock:  Papertrey Ink (Pure Poppy, Vintage Cream), Stampin' Up! (Old Olive)
Patterned paper:  Colorbok
Stamps:  Waltzingmouse (Teeny Trees)
Ink:  Stampin' Up! (Old Olive), Clearsnap (Chestnut Roan), Papertrey Ink (Vintage Cream)
Tools:  Spellbinders (circle, scallop circle dies), Sizzix (embossing folder), McGill (tag punch), Fiskars (hole punches)
Accessories:  Papertrey Ink (ribbon, twine), Michaels (sticker)

The embossed pattern on the Olive cardstock is sponged with Vintage Cream ink, but it looks white in the photo for some reason.

I'll be back with a card soon, so I hope you'll check back later!  Thanks for stopping by!

December 8, 2010

CTD #121, Card Patterns #93, & Mojo Monday #168


Hi there!  Thanks for swinging by tonight.  I have two cards to share that are very similar, as I made them for two different card sets that a friend requested.  I used last week's Color Throwdown colors, as I somehow had the date wrong and missed the deadline but just had to play with this fantastic color combo.  My first card is based on the current sketch at Card Patterns.


I used Stampin' Up's Aviary set for the main image, a sentiment from Verve's Accent Notes, and a music score background stamp by Stampendous.  The focal panel needed something else, so I added two hand-cut hearts stamped with a bit of the music score.  I covered them with Glossy Accents to give them a more finished look.

Cardstock:  Stampin' Up! (Marina Mist, Bashful Blue), Papertrey Ink (Dark Chocolate, white)
Stamps:  Stampin' Up! (Aviary), Stampendous (Music Score), Verve (Accent Notes)
Ink:  Papertrey Ink (Dark Chocolate), Stampin' Up! (Marina Mist), Clearsnap (Chestnut Roan)
Tools:  Papertrey Ink (medium scallop border die)
Accessories:  Michaels (ribbon), Ranger (Glossy Accents)

The second card uses the same colors and similar images, this time for the Mojo Monday sketch.


Once again I stamped the music score onto Marina Mist cardstock for the background panel.  The ribbon is also from Stampin' Up!  Just a tip:  I adhered a strip of ribbon, then tied a separate bow and attached it to the card using a fabric adhesive.


Love these cute little birdies!  These birds actually have long legs, but I inked them up without the legs.

Cardstock:  Stampin' Up! (Marina Mist), Papertrey Ink (Dark Chocolate, white)
Stamps:  Stampin' Up! (Aviary), Stampendous (Music Score), Papertrey Ink (Mega Mixed Messages)
Ink:  Papertrey Ink (Dark Chocolate), Stampin' Up! (Marina Mist), Clearsnap (Chestnut Roan)
Tools:  Spellbinders (square die)
Accessories:  Stampin' Up! (ribbon), Queen & Co. (pearls)


Thanks for stopping by tonight!  I've had too many late nights recently, so I must be off to bed.  I hope to have another card or two for you tomorrow.  Have a good one!

December 7, 2010

ColourQ #62 & Paper Players #27


Hey there, friends!  Are you ready for another fun color challenge at ColourQ?  Check out this festive photo for inspiration:


What a collection of cheerful, bright colors!  Because I made a Christmas card, I'll also be sharing it over at The Paper Players, where the challenge is to share a Christmas card or project.

I decided to do something fun and cute using a darling stamp I picked up in the $1 bin at Michaels a while back.  It's this sweet little car carrying a tree on the roof.  I colored it with my Prismas, then added some swirls from PTI's Fancy Flourishes to add a sense of movement.  Then I added a yellow rhinestone to the top of the tree.  Okay, I know you wouldn't put the star on the tree before you strapped it to the top of your car, but it just looks so cute, don't you think?  Some uneven stitching around the edges and a real jingle bell tied with baker's twine finish it off.
(Just a tip:  I added a drop of Ranger's Glossy Accents behind the knot of the baker's twine to hold the bell in place, otherwise the weight would cause it to sag when the card is standing up.)

Cardstock:  Papertrey Ink (Pure Poppy, white), Stampin' Up! (Tempting Turquoise)
Stamps:  Studio G (car), Papertrey Ink (Fancy Flourishes, Signature Christmas)
Ink:  Indadinkadoo (Black), Clearsnap (Cranberry)
Accessories:  The Twinery (baker's twine), Me & My Big Ideas (rhinestone), thread, bell
Coloring medium:  Prismacolor Premier pencils

I just had to stamp the car again on the inside.  


I like how this turned out, especially the lovely twinkling sound from the bell!

What will you create with this week's colors?  You certainly don't have to make a holiday card, and there are so many fun options with this bright palette.  Be sure to check out the rest of the Royal Court DT for more inspiration!

Thanks for spending a few minutes of your day with me!  Have a great day!
Related Posts Plugin for WordPress, Blogger...