Showing posts with label Halloween. Show all posts

October 1, 2013

Curtain Call Inspiration Challenge--Spooky Scene


Believe it or not, folks, it is officially October!  This is my favorite month of the year, so I'm ready to ring it in with a new Curtain Call Inspiration Challenge.  Our theme this time is Spooky Scene:


We have another fabulous sponsor this month.  Danielle Walls, owner of Neat & Tangled, provided all of the designers with one of her darling Halloween themed stamp sets for this challenge.  She is also offering up any stamp set in the Neat & Tangled shop to this week's LEAD!  
I chose to work with the Graveyard Shift stamp set, and I couldn't resist this cute little spider.  I stamped his web repeatedly on white cardstock, then placed it behind a die cut window in black cardstock.

After adding the sentiment banner, strip of purple patterned paper, and popped up spider, the card front felt like it needed something more.  So I stamped and heat embossed the web image several times in the bottom corner and added a sprinkling of purple sequins.

Cardstock:  WPlus9 Design Studio (Black, White), Papertrey Ink (Orange Zest)
Patterned paper:  Pebbles (Trick or Treat)
Stamps:  Neat & Tangled (Graveyard Shift)
Ink:  Memento (Tuxedo Black), Versamark
Tools:  Papertrey Ink (Mat Stack 3, Double Ended Banner dies)
Other:  Filigree (white embossing powder), Factory Direct Crafts (sequins), Zig (Wink of Stella glitter brush)

The Curtain Call Crew has even more spooky inspiration for you this week!  Be sure to see their designs over on the Curtain Call Challenge blog, where you can also link up your take on this week's inspiration.

Many thanks for your visit today!  Happy October!

September 30, 2013

The 12 Kits of Occasions--September 2013


Welcome back for another month of The 12 Kits of Occasions!  This month's theme is Halloween, one of my favorite holidays.  Our hostess, Kim, sent an incredible kit just stuffed with supplies, and the packaging was almost too adorable to unwrap!

My favorite part of this kit was the haunted landscape, so I put it right to work with some striped orange paper, chevron ribbon, and a jack-o-lantern candy bucket.

My next card showcases a few of the papers from the kit along with a spiderweb border.  I love how the yellow and orange pop off of the black card base.


I love this adorable bingo card, so it had to be used with the spiderweb paper, die cut spider, and a Halloween greeting punched into a ticket shape.


For today's last card, I wanted to use this fun paper but found it too busy to use all over the card front, so I die cut a label from the black panel to let the pattern peek through, then stamped a sentiment from an old dollar bin mini set.


I have a couple more cards to share later in the week, and tons of supplies left that I hope to use in the near future.

In addition to the rest of the 12 Kit crew, we have a special guest this month, but you'll have to head over to the 12 Kits blog to see who it is!  While you're there, you can also check out the full list of supplies Kim included in our kit this month.

Thanks so much for stopping by to see my cards!  Have a great day!

October 9, 2012

Cloud9 October Blog Hop


Happy Tuesday, friends!  It's time for the Cloud9 Blog Hop!


Here is the inspiration photo for this month's hop.  You can link up your creation at the Cloud9 Blog anytime before 10 AM EST on October 12 for a chance to win a gift certificate to WPlus9 Design Studio or a spot as a Guest Designer for next month's hop!

{source}
I actually dusted off my Silhouette Cameo to cut a door for my card, inking the edges a bit and adding a bronze brad for a doorknob.

I used four different WPlus9 stamp sets:  the pumpkins and leaf from Season of Thanks, the bird from Woodgrain Silhouettes Additions, the "Halloween" from A Pocketful: Halloween, and the "happy" from A Pocketful.

I wanted to decorate my pumpkins like the ones in the inspiration photo, so I "kissed" the inked stamps with polka dots and chevrons to add a pattern to each.

Cardstock:  Papertrey Ink (Kraft), WPlus9 Design Studio (White)
Stamps:  WPlus9 Design Studio (Season of Thanks, Woodgrain Silhouettes Additions, A Pocketful:  Halloween, A Pocketful), Lawn Fawn (Chevron Backdrops), Papertrey Ink (Background Basics:  Polka Dots)
Ink:  Stampin' Up! (Tangerine Tango, Peach Parfait), Memento (Tuxedo Black), Papertrey Ink (Chamomile Tea Dye)
Tools:  Silhouette Online Store (Card Christmas Door cut file)
Other:  ribbon, brad

I hope you'll join us this month and link up your creation for a chance to win!  Stop by the Cloud9 Blog for more inspiration from the rest of the team and to view the gallery.

July 20, 2012

CAS-ual Fridays #62--Back in Black


Hello from somewhere in Ohio!  I'm still on the road, but I have a few minutes before I collapse from exhaustion to share my card for this week's CAS-ual Fridays challenge.  This week we're going Back in Black!  We want to see your clean and simple designs using a black card base.


Our sponsor this week is Lil' Inker Designs, and who wouldn't want to win a Gift Certificate to the Lil' Inker store?  :)

Sorry to jump ahead to Halloween with my card this week, but I went shopping at Hobby Lobby while I was visiting my parents and was inspired by all of the fall decor already making its way onto the shelves.

I was really wishing I had access to a Big Shot and embossing folders for this card, but I had to settle for a scoring board.  Still, I think it turned out pretty cool.  I drew a spider web on the back of the cardstock, then scored along each of the lines so they would stand out on the front.

Glittered orange and yellow cardstock strips and some glossy, blinged-out letters were all I needed to complete this card.  Pretty simple, but I think it's kind of fun!

All supplies from Hobby Lobby unless noted
Black notecards
Glitter cardstock
Letter stickers
Tool:  Scoring board (Martha Stewart Crafts)

As always, there's amazing inspiration being offered up by the Girl Fridays this week, so stop by the CAS-ual Fridays blog to check it out!

I'll be on the road for two more days, then it's back to work on Monday.  *sigh*  I don't mean to wish away the summer, but I'm already looking forward to the more regular schedule and cooler weather of fall.

Thanks for your visit!  Have a great Friday!

October 25, 2011

ColourQ #108


Hello, friends!  It's Tuesday morning, and you know what that means--a new color palette to get your mojo going over at the ColourQ challenge blog!  I hope you can tolerate one more Halloween project from me, because I got just the inspiration I needed yesterday in the form of happy mail from WPlus9.  I was the lucky winner of A Pocketful:  Halloween during a recent contest on Lea Lawson's blog, and I was excited to sit right down and ink it up for this week's ColourQ.  Thanks, Lea!


I started with PTI's spiral notebook die on white cardstock, which was then stamped with lines in So Saffron using Mini Scrapbook Series:  Library Ledger.  I stamped the bats directly on top of that, and the little spiderwebs were stamped in opposite corners.  Since I don't have the pocket stamp or die that coordinate with this set, I used a label cut from Peach Parfait and stamped with a cute Halloween sentiment from the Pocketful set.

The Daffodil panel is textured with the Linen & Canvas impression plate and stitched to a Peach mat, then adhered to the Black card base.  I popped the notebook page up on foam dots, added some peach gems, and tucked a strip of Saffron ribbon under the label to finish things off.

Cardstock:  Stampin' Up! (Daffodil Delight, Peach Parfait), Papertrey Ink (True Black, white)
Stamps:  WPlus9 Design Studio (A Pocketful:  Halloween), Papertrey Ink (Mini Scrapbook Series:  Library Ledger)
Ink:  Inkadinkadoo (Black), Stampin' Up! (So Saffron)
Tools:  Spellbinders (Labels 18), Papertrey Ink (spiral notebook die, Linen & Canvas impression plate)
Accessories:  Stampin' Up! (ribbon), Queen & Co. (gems), thread

I'm thinking these colors could work well for a Thanksgiving or fall-themed card, too, so I'm looking forward to seeing what you come up with. 

Be sure to stop by the ColourQ blog for all of the challenge details and to see the rest of the DT samples!

Thanks for visiting today!

October 23, 2011

Halloween goodie bags

Warning:  Photo-heavy post


Cardstock:  Papertrey Ink (True Black, Orange Zest, Royal Velvet, white), Stampin' Up! (Lucky Limeade)
Patterned paper:  DCWV (Ghosts & Goblins Stack)
Stamps:  Papertrey Ink (Tiny Treats:  Halloween, Tag-its #7, Tiny Tags)
Ink:  Ranger (Spiced Marmalade), Stampin' Up! (Lucky Limeade), Versamark, Inkadinkadoo (Black), Copic markers
Tools:  Papertrey Ink (Mat Stack 2, Limitless Layers, Tiny Tags dies), Fiskars (slot punch)
Accessories:  ribbon, baker's twine, paper bags

Hi there!  As promised, I'm back to share the goodie bags I've been working on for our annual Halloween party.  It was supposed to be last night, but my little ones were not feeling 100% so we postponed it until next weekend.  I like to put together a few things for the kids that come to the party, and this year's loot includes some mini boxes of stickers, two mini tubs of Play-Doh, and a notebook that I altered with Halloween papers and stamps.  Wanna see?


Cardstock:  Papertrey Ink (white)
Patterned paper:  DCWV (Ghosts & Goblins Stack)
Stamps:  Papertrey Ink (Tiny Treats:  Halloween)
Ink:  Inkadinkadoo (Black), Copic markers
Tools:  Fiskars (hole punch)
Accessories:  notepads, Mod Podge

These notepads were so easy to put together, I made 18 of them in one afternoon.  I got the 3 X 5 inch memo pads in a pack of 3 at Target for $1.99.  I used Mod Podge to cover them with patterned paper from the DCWV Ghosts & Goblins stack.  Then I cut a strip of white cardstock and stamped an image and "happy halloween" sentiment from PTI's Tiny Treats:  Halloween and colored the images with Copics.

For the bags, I used small white paper bags that I covered with more of the same patterned paper.  I punched slots at the top and tied them up with ribbon and a coordinating tag.  The tags were made with PTI's Mat Stack 2 die.  After stamping the circle frame and sentiment from Tag-its #7 in the middle of the Mat Stack, I trimmed off one side of the die cut so that I would have a round tag.  I added a pinked circle mat, a Tiny Tag, and some baker's twine to finish it off.

I'm so happy with the way these turned out, especially the notepads.  You can click on any of the photos to enlarge, and feel free to send me a message if you have any questions!

Thanks for stopping by, friends!  Have a great night!

October 18, 2011

ColourQ #107

This is my second post for today--please scroll down for Karen's virtual birthday party & blog hop!


Hi there, friends!  Are you getting in the Halloween spirit yet?  In our house, we love Halloween and throw a costume party every year that just seems to keep growing.  It's coming up this weekend, so I've got to get busy planning a menu, finding a costume, and making goodie bags for the kids.  It's always fun, but a bit stressful until it's all done.

This week's ColourQ challenge is another bright and festive combo that called out for another card using my cute Halloween stamps from Michaels.


I've seen a few designers use a "filmstrip" recently, and I thought it would be a fun idea to CASE on this card. 

I would have liked to use a larger sentiment, but I was shocked to realize that I don't have any Halloween greetings besides those in PTI's Tiny Treats:  Halloween and Tag-its #7.  So I stamped the bats and a star (also from TT:  Halloween) framing the sentiment to keep it from getting lost in all of the white space.

The card front and colored squares are debossed with the Linen impression plate for a little bit of texture on an otherwise flat and easy-to-mail card.

Cardstock:  Stampin' Up! (Rich Razzleberry, Lucky Limeade, Pumpkin Pie, Early Espresso), Papertrey Ink (white)
Stamps:  Michaels (vampire, witch, mummy, bats), Papertrey Ink (Tiny Treats:  Halloween)
Ink:  Stampin' Up! (Early Espresso, Rich Razzleberry), Copic marker
Tools:  Papertrey Ink (Linen & Canvas impression plate)
Accessories:  Queen & Co. (rhinestone)

Be sure to stop by the ColourQ blog for the rest of the DT samples and to link up your creation!

Thanks for visiting!

October 11, 2011

ColourQ #106


Good morning!  I hope my Canadian friends had a wonderful Thanksgiving weekend.  We had a gorgeous long weekend for the Columbus Day holiday here in the U.S., which fell on my son's birthday this year.  But it's back to work today, and I'll be confused about what day it is for the rest of the week!

I did manage to remember that today is Tuesday, which means a new ColourQ challenge!  I think I would carry a backpack every day if I could get one this cute:


This seemed like a perfect combo for a Halloween card, which gave me a chance to use more of the $1 stamps I found at Michaels a few weeks ago.  I don't do cute cards very often, but I just can't resist images like this at Halloween!

This card was fairly quick and easy to make.  I used my Stamp-a-ma-jig to line up the images on a white cardstock panel, colored them with Prisma pencils, and blended with OMS.  The open circle border is from PTI's Faux Ribbon, and I originally planned to fill the circles with bling, but decided against it in the end.  The sentiment is from Tiny Treats:  Halloween.

The panel is matted and stitched to a piece of Summer Sunrise cardstock, tied with Mandarin twine from The Twinery, and adhered to a Basic Gray card base.

Cardstock:  Papertrey Ink (Summer Sunrise, white), Stampin' Up! (Basic Gray)
Stamps:  Studio G (vampire, witch, mummy), Papertrey Ink (Faux Ribbon, Tiny Treats:  Halloween)
Ink:  Inkadinkadoo (Black)
Coloring medium:  Prismacolor Premier pencils, odorless mineral spirits
Accessories:  The Twinery (Mandarin twine), thread

I hope you'll find time to play along with the challenge this week and check out the rest of the inspiration from the always-amazing Royal Court DT.

I have a special post lined up for tomorrow, so be sure to stop by!  Thanks for your visit today!

October 5, 2011

WPlus9 WCMD Halloween Challenge


Hello!  I'm popping in with an entry for a challenge over on the talented Lea Lawson's blog.  She has a WPlus9 stamp set up for grabs, so you know I have to play for a chance to win!  The challenge is to make a stamped Halloween project.  Easy peasy!

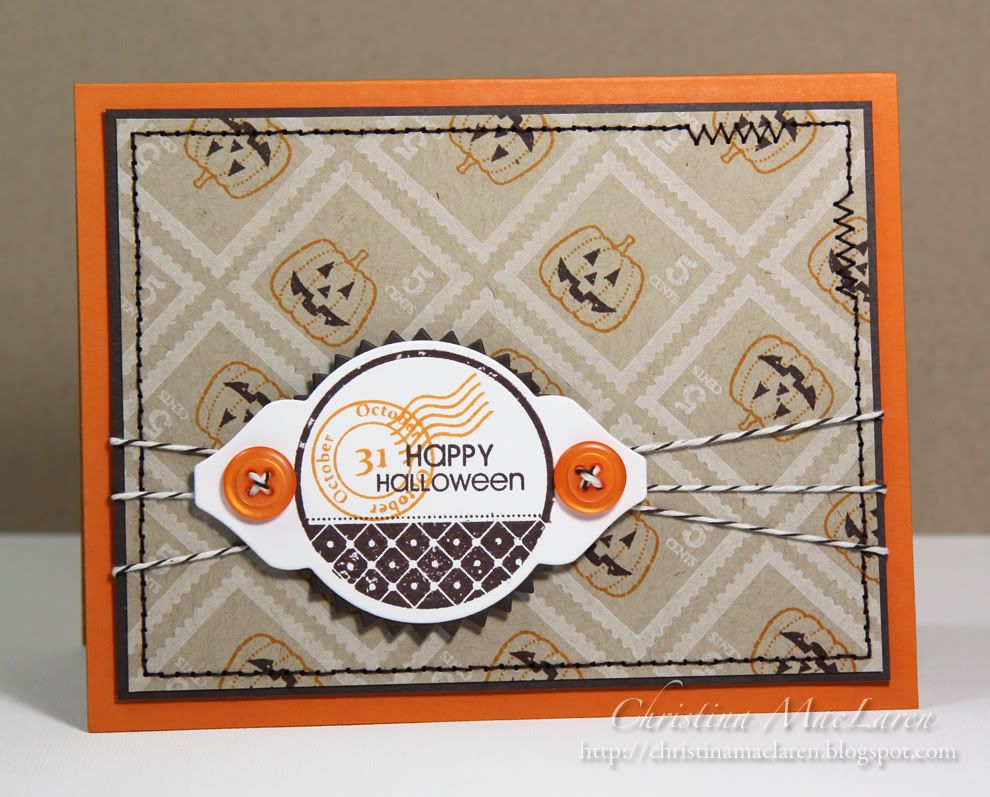
I don't have any fall or Halloween stamps from WPlus9, but I wanted to use some of Dawn's stamps that I do have, so I pulled out two favorites:  Spring Post and Postmarks.  On a kraft panel, I repeatedly stamped the postage in white ink.  I love this image because you can customize it with any small stamps in your collection.  I chose the pumpkin from PTI's Tag-its #7.

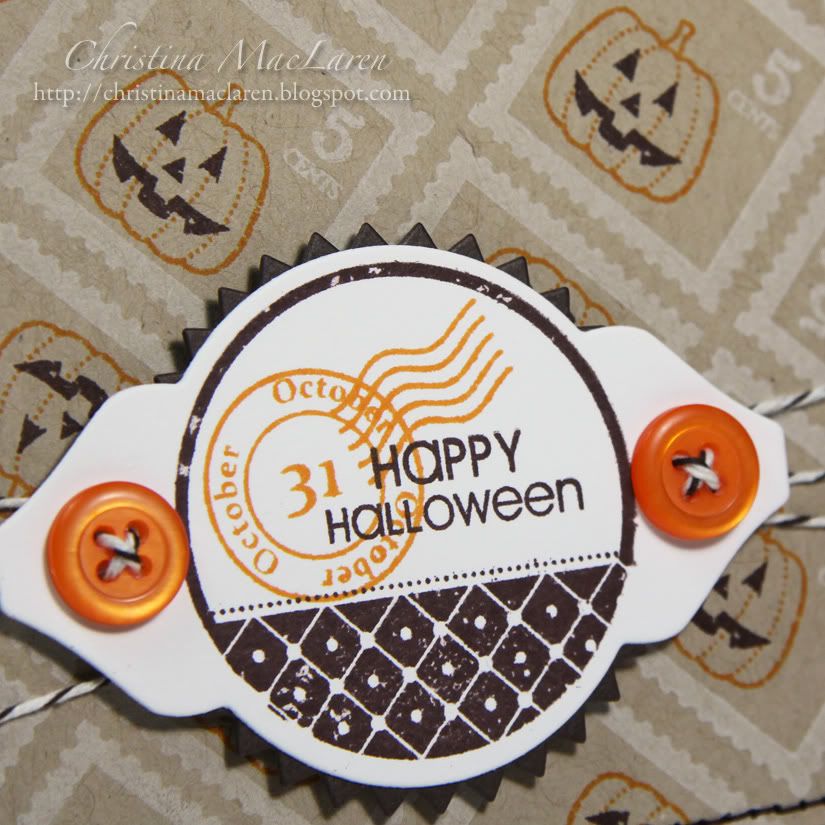
I stamped the tag and sentiment from Tag-its #7 onto a Mat Stack 2 label, then added an orange postmark with "October" and "31", from WPlus9's Postmarks.  Orange buttons and some brown and white twine finish the card front.

Cardstock:  Papertrey Ink (Orange Zest, Kraft, white), Stampin' Up! (Early Espresso)
Stamps:  WPlus9 Design Studio (Spring Post, Postmarks), Papertrey Ink (Tag-its #7)
Ink:  Stampin' Up! (Early Espresso), Clearsnap (Frost White), Ranger (Spiced Marmalade)
Tools:  Papertrey Ink (Mat Stack 2, Limitless Layers dies)
Accessories:  Papertrey Ink (buttons), baker's twine, thread

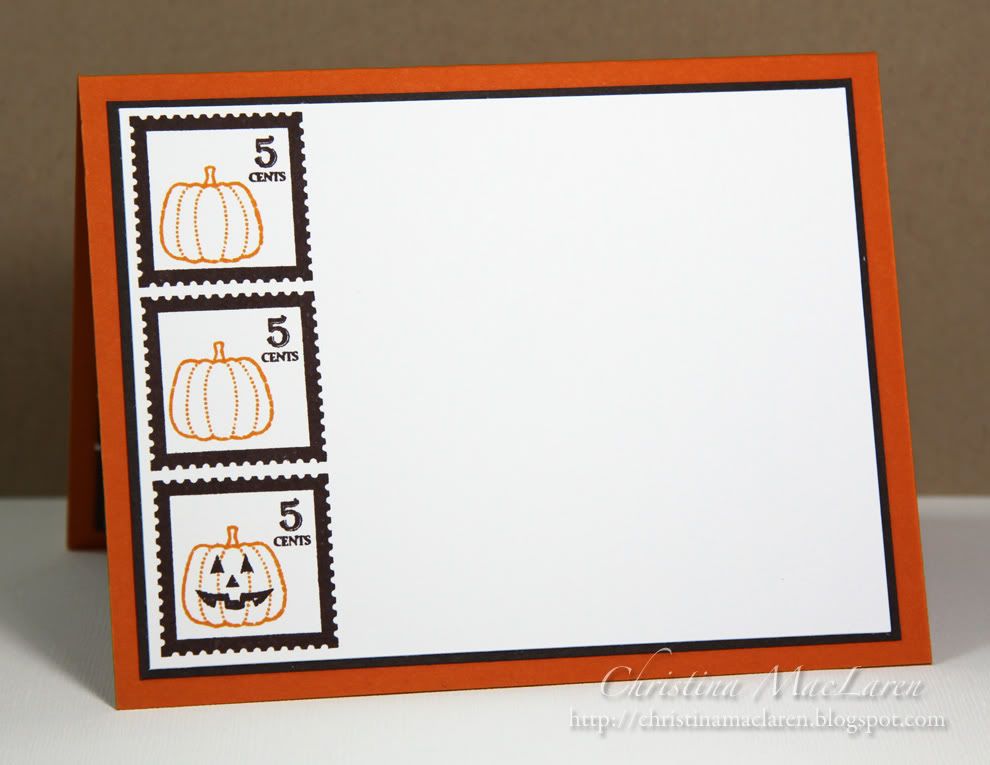
I haven't given you a peek at the inside of a card for a while, so here you go:


Thanks to Lea for hosting this challenge!  And thanks to you for stopping by, friend!

September 15, 2011

CardPatterns #132 & CAS-ual Fridays #19


Hello, friends!  I want to say a huge thank you to everyone who has commented or emailed to congratulate me on my big win during PTI's release festivities.  I am still somewhat in shock and utterly thrilled to have so many fabulous new stamp sets coming my way.  Thanks for sharing in my excitement!

I've managed to be a little more productive in my craft room this week, so I have a card to share that was inspired by two challenges.  First is a square sketch at Card Patterns, and second is the CAS-ual Fridays challenge to use paper piecing on a fall-themed project.

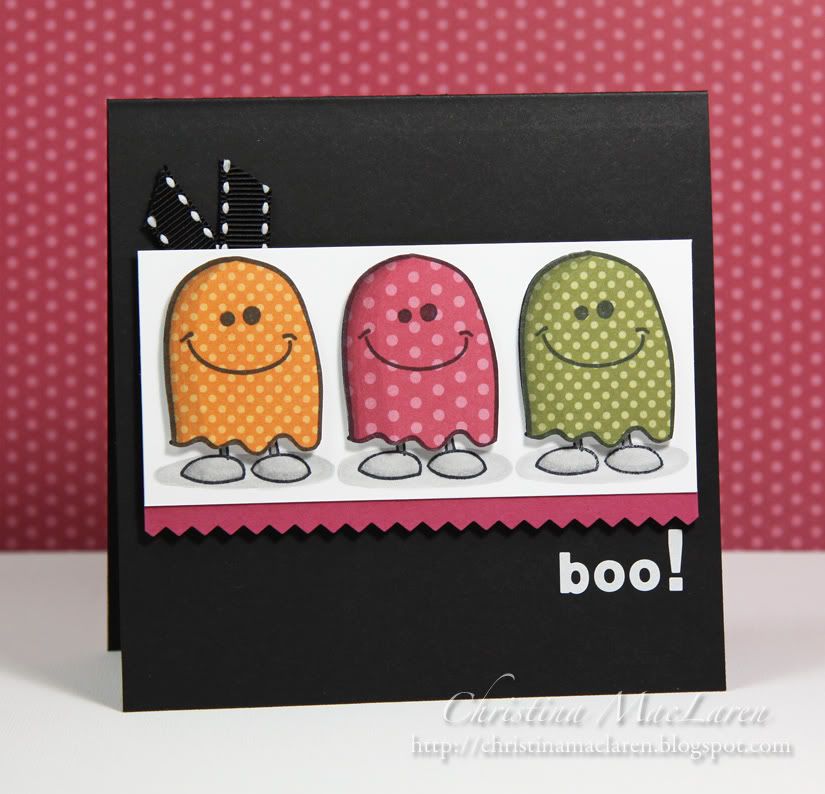
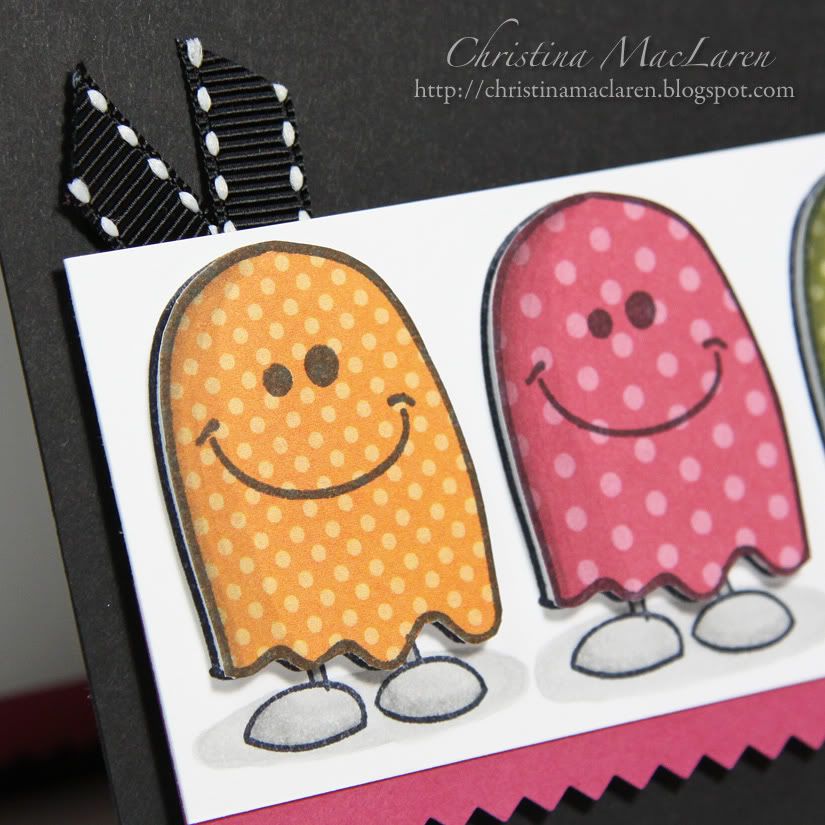
I picked up several adorable Halloween stamps in the dollar bin at Michaels a couple of weeks ago, including this cute smiling ghost.  I knew he would look great dressed up in different patterns!

I chose three dotted papers from DCWV's Amber Autumn Stack to piece the ghosts.  I stamped them again onto white cardstock and added some shading with Copic markers.  The panel is adhered with foam dots, with a pinked rose border along the bottom.

I added a simple "boo!" sentiment with stickers and tucked a scrap of black ribbon in the top corner.

Cardstock:  Papertrey Ink (True Black, white), Stampin' Up! (Regal Rose)
Patterned paper:  DCWV (Amber Autumn Stack)
Stamps:  Michaels (ghost)
Ink:  Inkadinkadoo (Black), Copic markers
Tools:  pinking shears
Accessories:  Michaels (letter stickers, ribbon)

This card just makes me smile!  How about you?

Thanks for stopping by tonight!  Have a great one!
Related Posts Plugin for WordPress, Blogger...